Hello! Week 3 takes us through a progress of our library unit construction for the office/gym makeover. Hoo-ray! (Too excited?)
Progression: Week 1 | Week 2 | Week 3 | Week 4 | Week 5 | Week 6

If you came here from the ORC site, hello! I’m Sanju Patel. By day, I work behind a desk, typically crunching numbers. By night, you can find me in a garage. My wife and I purchased a home in Texas 3 years ago – a quick close without costly bells and whistles. As lifelong fans of DIY, we’ve decided to invest into our home as our family grows with an open invitation to see our process from start to finish.
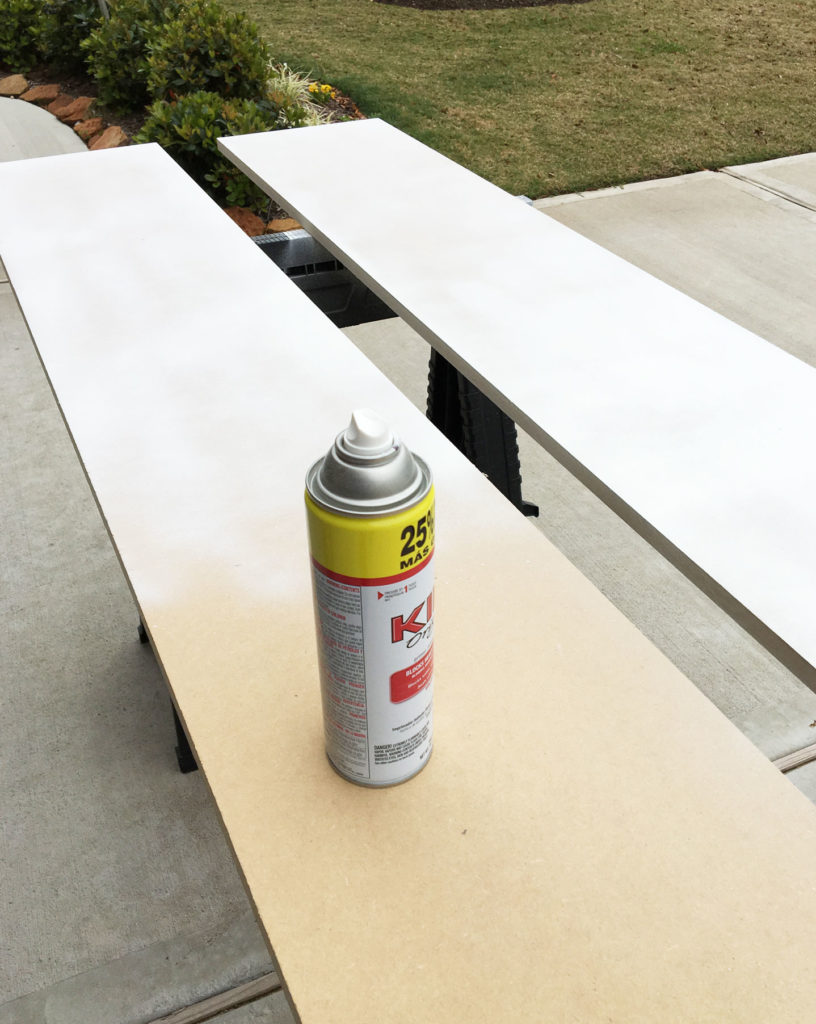
MDF cabinet toppers and wall hard back
Using a combination of leftover and acquired MDF (basically leftover MDF from a closet demo), 14″ strips were cut and placed on top of the wall cabinets, secured by 1 1/2″ and 2 1/2″ nails. It doesn’t quite matter if there are gaps until the upper most strip which was continuously cut as much as possible and quickly primed with Kilz spray paint (btw – the gap can later be rectified with wood filler). This is kind of a pre-primer to the actual primer we’ll be using from Sherwin Williams – MDF absorbs a lot paint. The thinking here was to save on the expensive primer for the first top coat. The wife thought it was a good touch to throw in a construction cone because well…they are awesome?
Tip: be sure to mark the studs with masking tape. This will be helpful down the road.
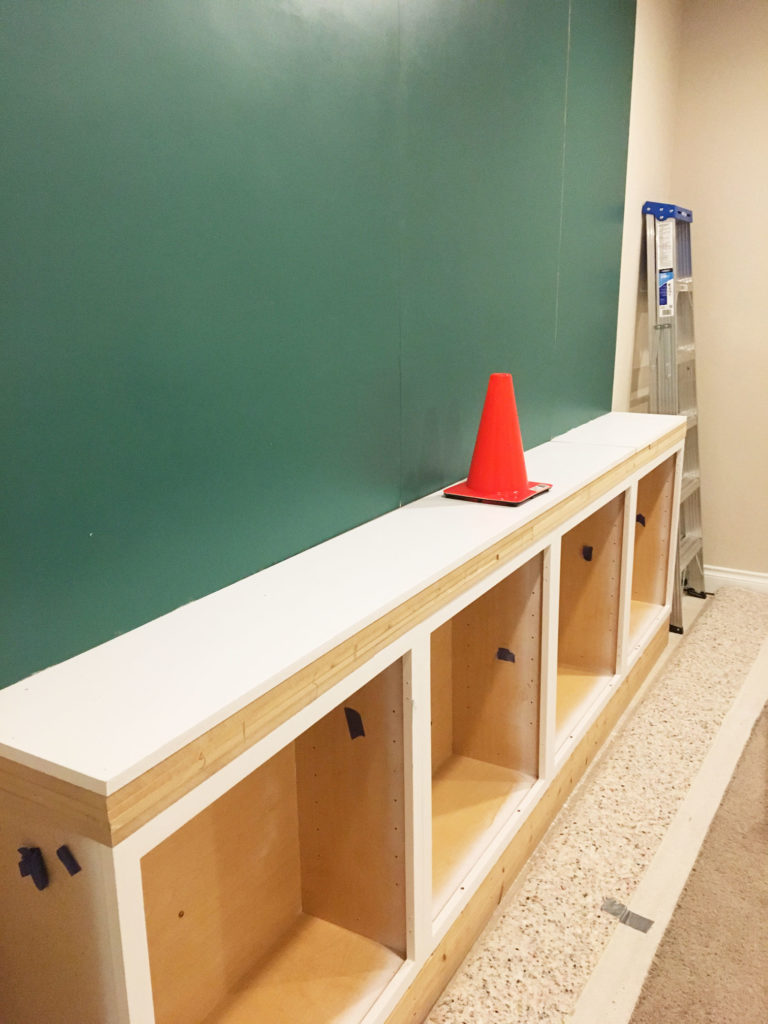
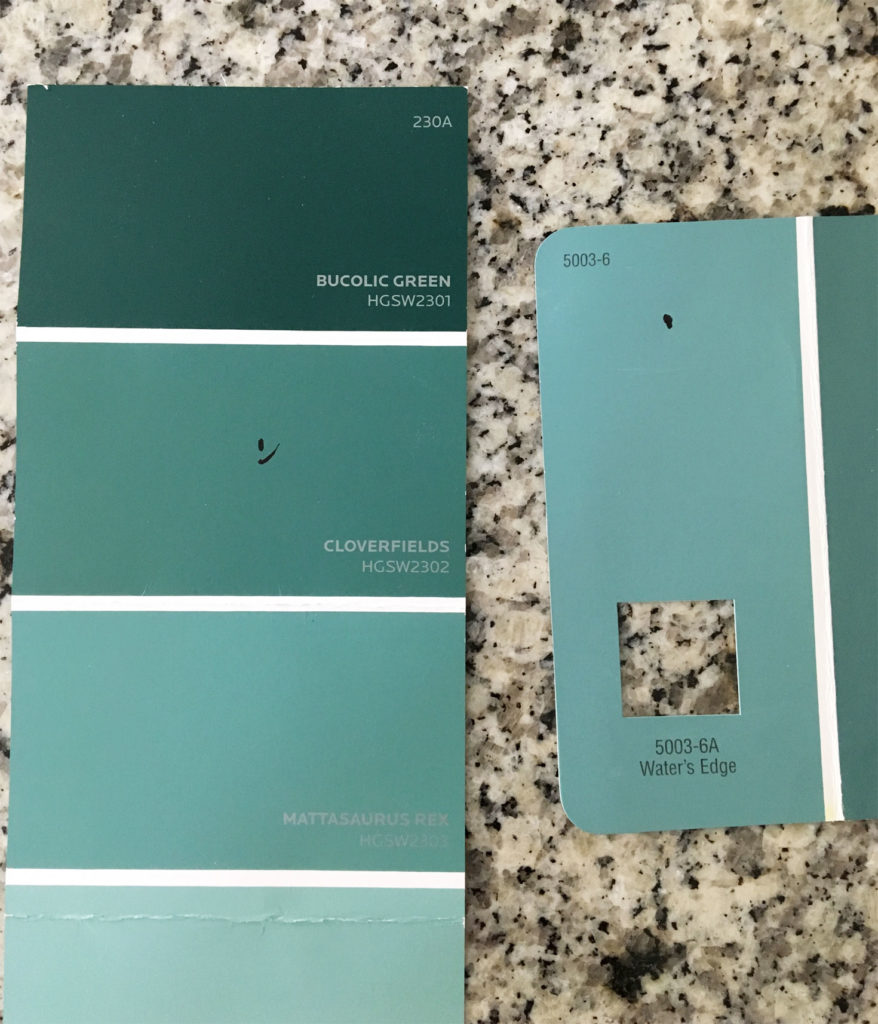
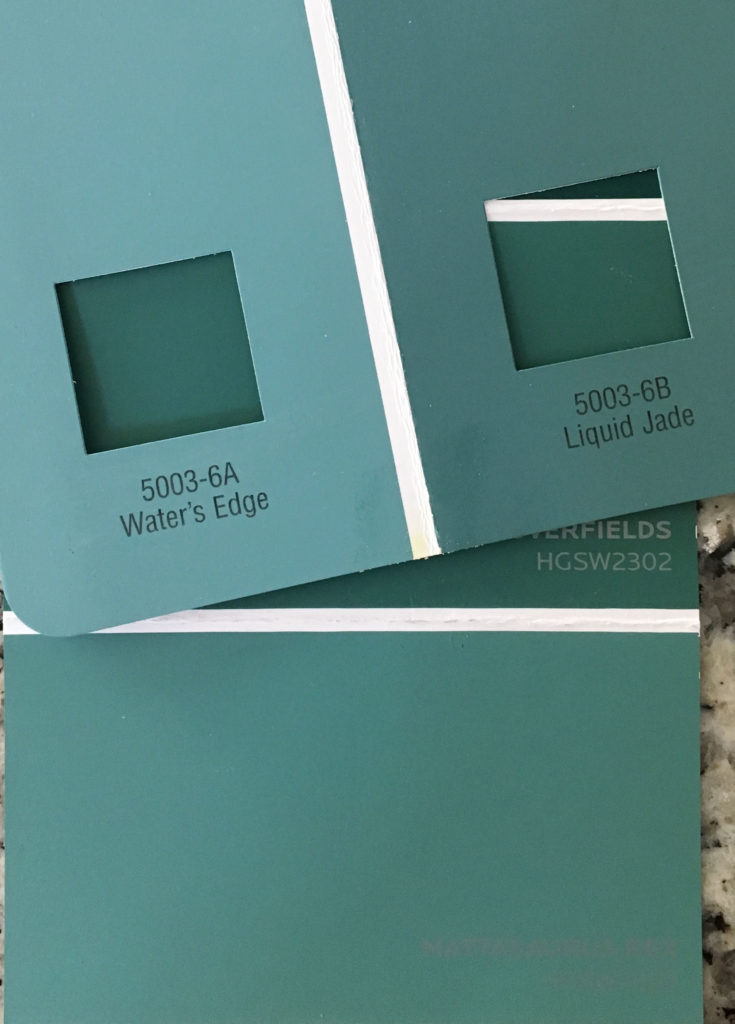
In addition to the toppers, 4′ x 8′ hardback was added to the wall with 2″ nails in an effort to create a smooth backing for the library unit (our walls are textured). We pre-painted these in an effort to get a feel of what the unit would like if we moved forward with the color for the whole unit. What do you think (the color shown is SW Cloverfields)? It was difficult to decide between many variations, especially when exposed to natural light.
Tip: though not ideal, gaps between the backing can be filled in with drywall tape, mud, and later sanded to a smooth finish via feathering.
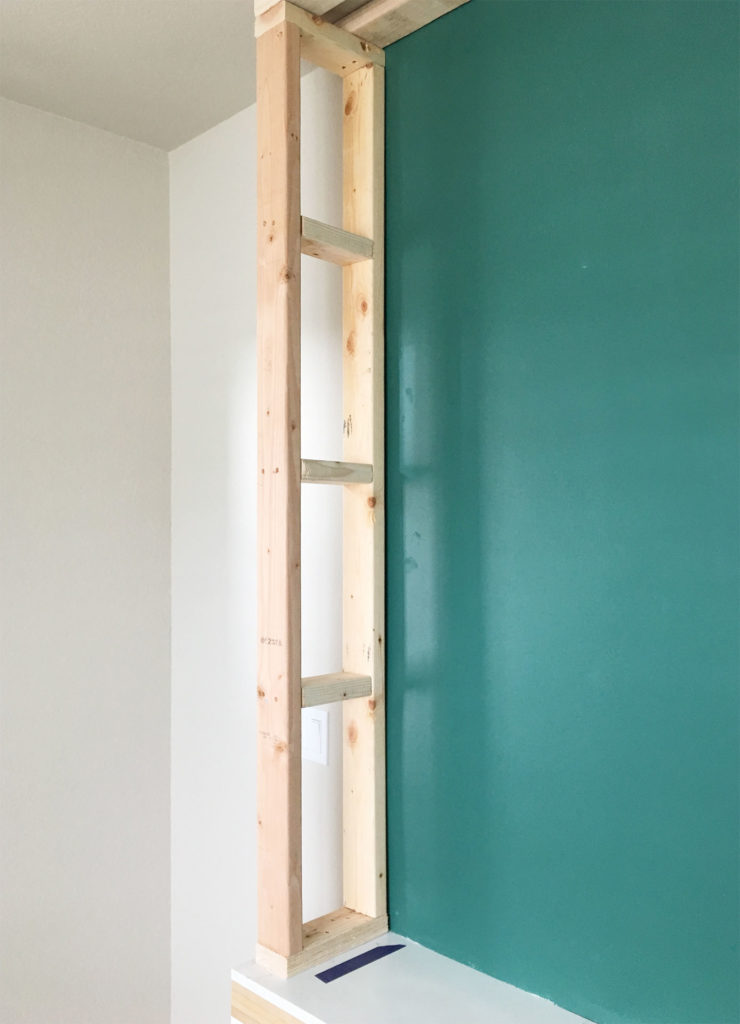
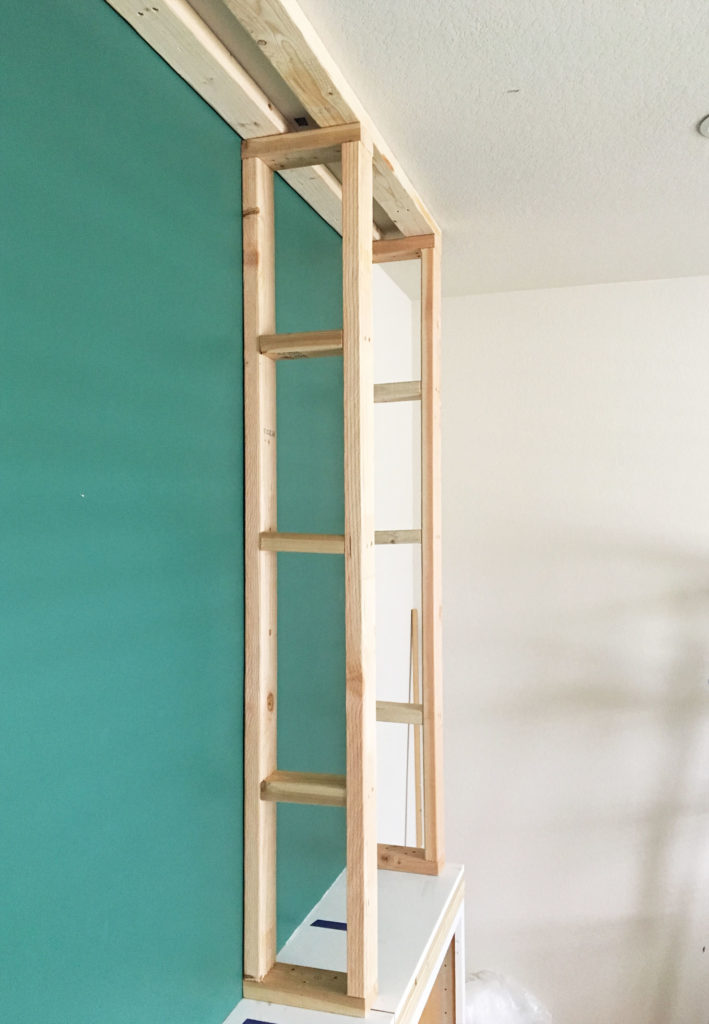
Framing
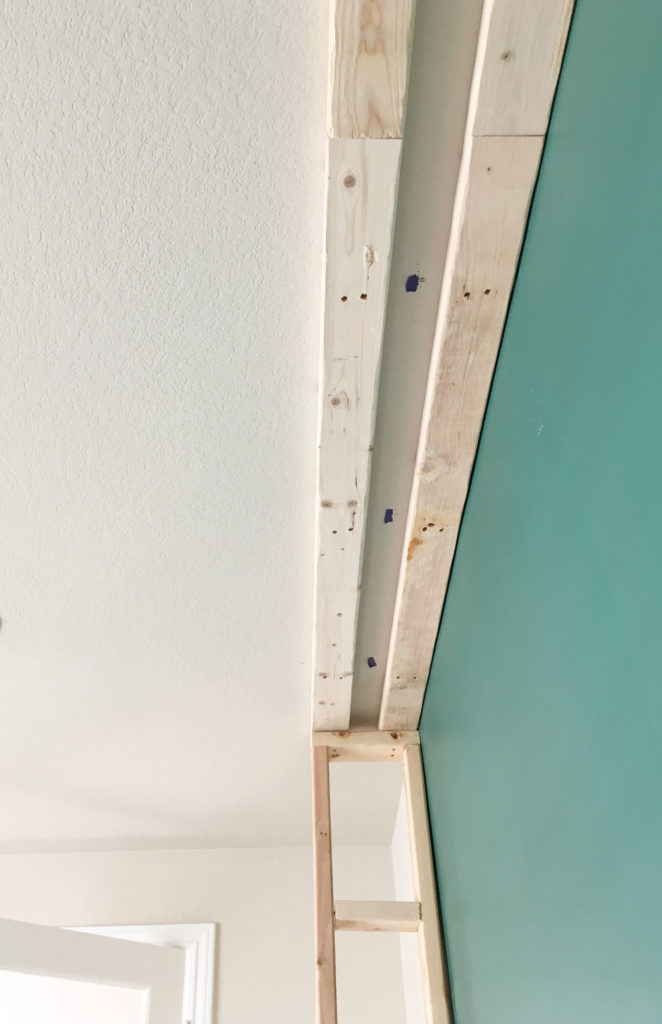
Now comes the fun part. Each upper section of the unit was framed out like a wall using 2″ x 4″s. Ultimately four framing units were constructed – one for each end and two down the middle. The width of the unit was slightly smaller than the MDF, set to 12″. These units were then secured to 2″ x 4″s running down the ceiling screwed into the rafters and below to the MDF – extremely sturdy for a unit to be filled with books.
Blondewood plywood
The units will not be left exposed. Eight 3/4″ ‘blondewood’ plywood strips were cut to an exact length and width of the framing units (basically two 4′ x 8’s). We choose this material for durability and smoothness – plus they were primed at the source. Blondewood is simply a plywood product marketed at Lowes.

Budget
A major consideration in building the library unit was budget. Obviously we can’t account for the hours we spend on DIY-ing, hence the labor. (Well…maybe we can put a price on opportunity cost, but we love DIY!) Local builders quoted us in the $7-$12k range. You’ll discover significant ranges depending on demand and reputation. In the end, we can do this for $2k (just raw materials). So far, here’s what we have (priced on average):
- Wall Cabinets: $340
- 2 x 6’s: $50
- 2 x 4’s: $45
- 4 x 8 MDF: $85
- 4 x 8 Hardback: $30
- 4 x 8 Blondewood Plywood: $200
- Paint: $150
- Screws: $50
Not bad so far, right? Next week, we’ll discuss trim and paint.
As always, send us any questions and don’t forget to follow our Instagram stories. By the way, there are SUPERB featured designers participating in the One Room Challenge with Better Homes and Gardens as a media partner. These artists totally rock and will not disappoint. Check it out!
I love the introduction! Hello Sanju! I am Gretchen, and I reside in Kentucky 🙂 Keep up the great ORC work!!! It is starting to come together!