My mom, a garden lover and decorist, started to approach me for custom projects a few years ago. Often, I doubted myself, but her smile, as always, pushed me into accepting the challenge. Before you knew it, I built her a pair of outdoor benches as large as the Texas sky, still sturdy after sitting in the patio for many years. It was my first time using a table saw and a chisel to carve out a solid joint.
Initially, I experimented with using a Kreg pocket hole jig. However, being my first time and pressed for time, I settled for a more direct approach, driving 2″ #10 screws straight into the 2″ x 4″ (of course, if I could go back, I would have went with the pocket holes).
One of the greatest joys in woodworking – learning and solving for problems. One problem I tried to solve for was weight bearing so that the studs wouldn’t collapse. I later modified the bench by adding a 5th rear leg at the bench’s midpoint. I probably should have went with braces for better support and a much cleaner look.
The plans below are original (i.e. beta version), but completely modifiable. I look forward to seeing your creation.
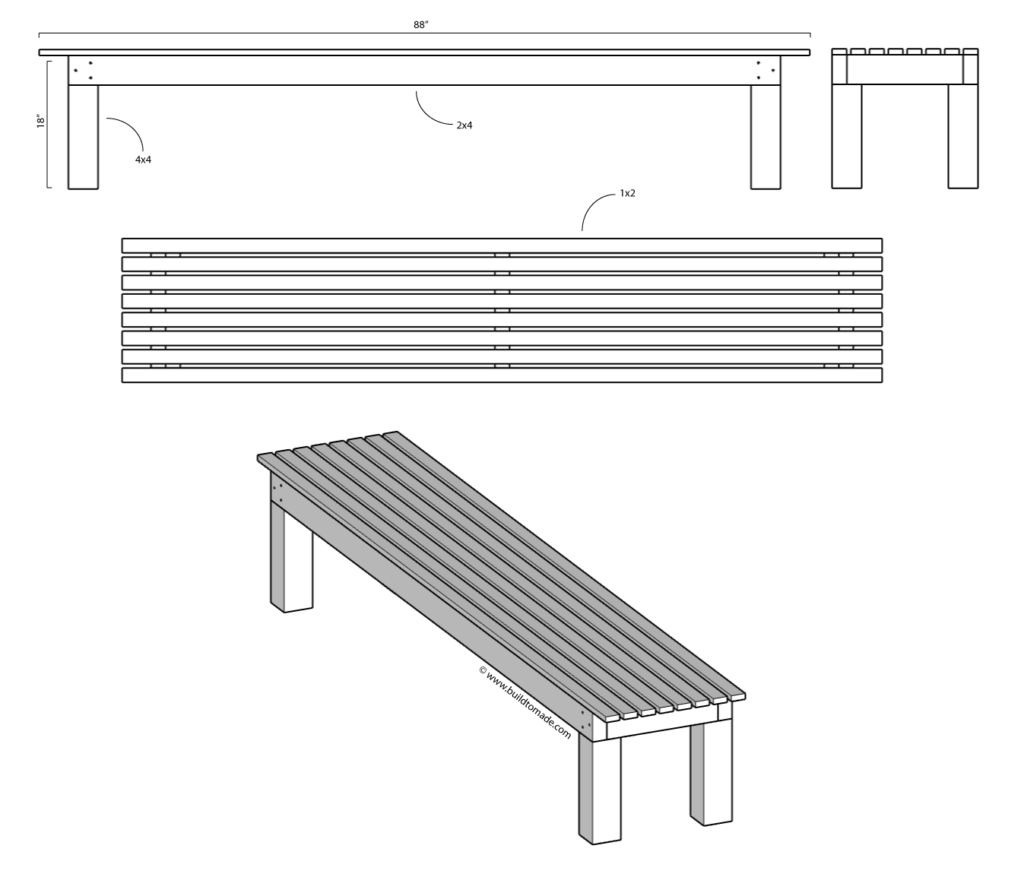
Materials
- (3) 2″ x 4″ x 8′ studs
- (1) 4″ x 4″ x 8′ Douglas Fir is common for hobby furniture making
- (8) 1″ x 2″ x 8′ smoothed pine strips (different from lighter furring strips)
- (8) #10 2″ Stainless Phillips Screws (or equivalent Kreg Screws)
- Box of 18 gauge 1-1/2″ brad nails (or equivalent 1-1/2 in. Stainless Wire Nails)
Tools
- Claw hammer
- Drill and drill bit (Phillips head + 13/64″ drill bit)
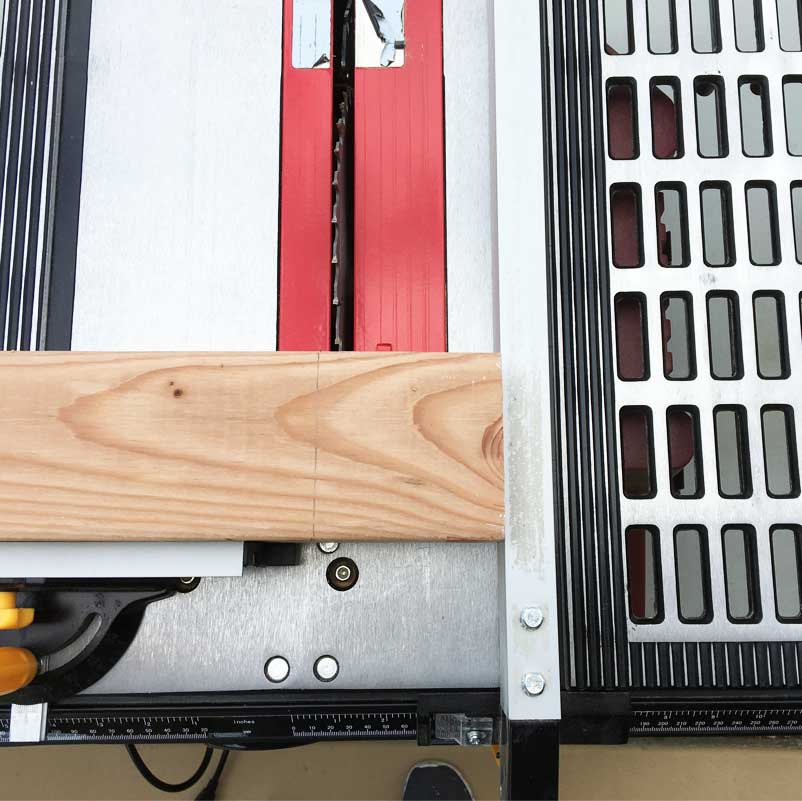
- Table saw
- Miter saw
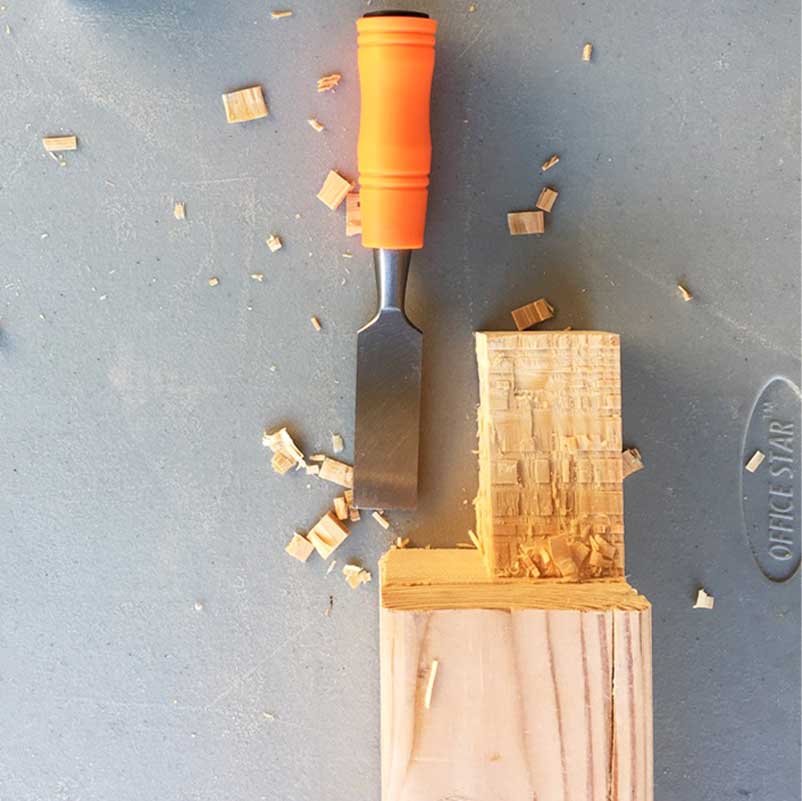
- 1″ chisel
- Optional: Kreg Jig R3
- Optional: Brad nailer
- Optional: Wood glue
Overview of Steps
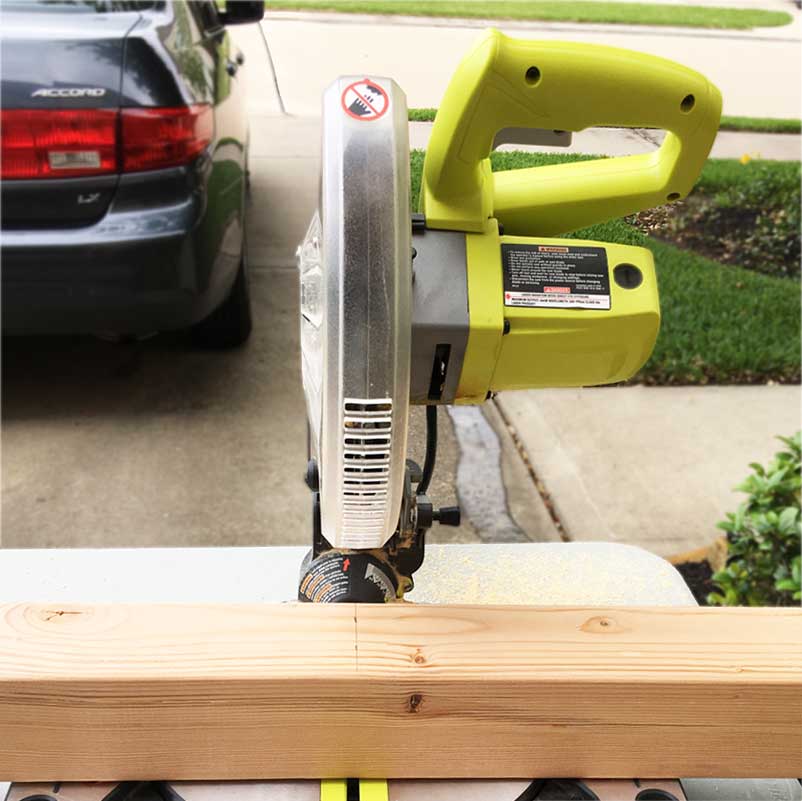
- Cut 2-2×4 down to 88″ with a miter saw or hand saw.
- Cut the 3rd 2×4 into 11″ pieces (you will need 3) with a miter saw or hand saw.
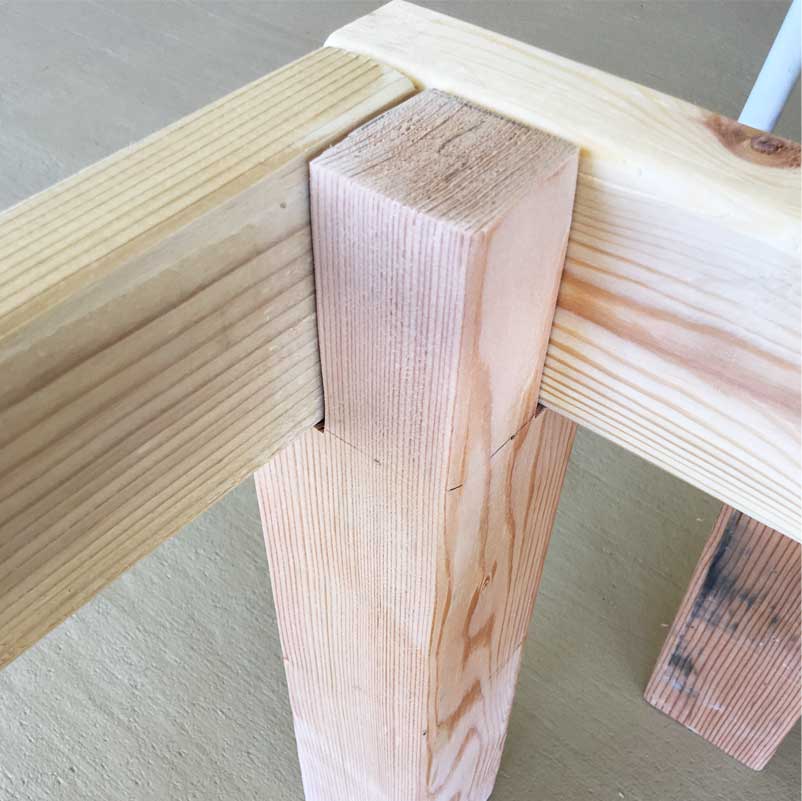
- Cut the 4×4 into 18″ pieces (you will need 4) with a miter saw or hand saw. Precise cuts are optimal as 4×4’s will be used for the legs.
- Trace a 2×4 on top of the 4×4. This line will serve as a guide for your next cuts.
- Set your table saw blade to the height of a 2×4. This should be approx. 1.5.”
- Using the table saw, make several straight cuts up to the guide on step 4.
- Rotate the 4×4 90 degrees. Make several straight cuts again up to the guide.
- Chisel out the cuts until you are left with a quarter of the 4×4 up to the reference line. Sand the ridges until flat.
- Follow steps 4-8 for the remaining 4×4 legs.
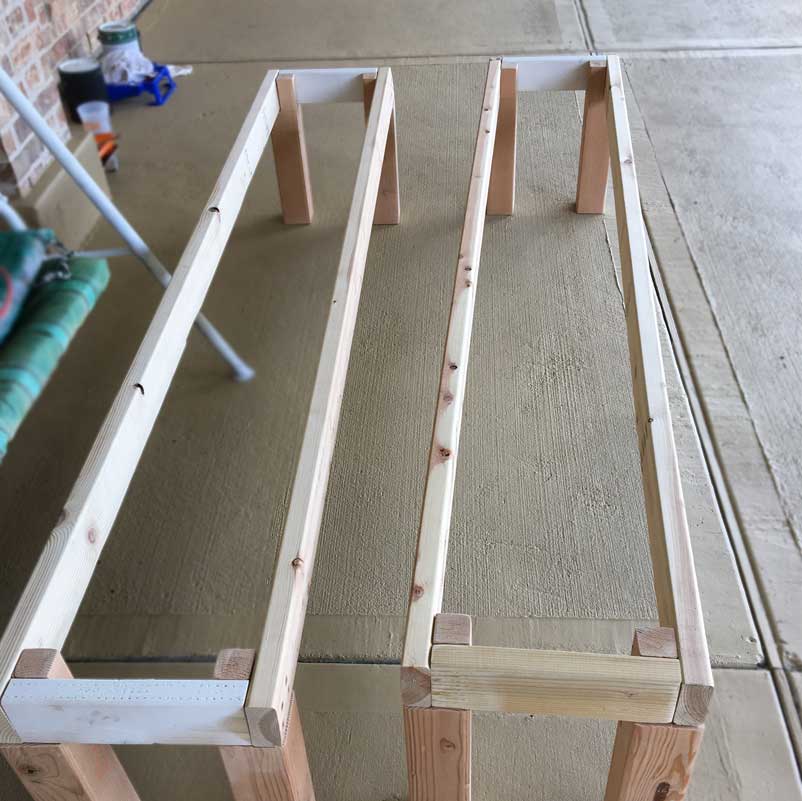
- Place the 88″ 2-4’s on a flat surface.
- Affix legs on each side with a 2″ screw ( you may also choose Kreg and/or glue for added stability). Pre-drill 13/64″ drill holes prior to screwing to prevent split.
- Join the two pieces with the 3-11″ pieces. With this step, the base of the bench will be complete. You may have to adjust screw placement to level the bench. Feel free to paint or stain the bench at this step.
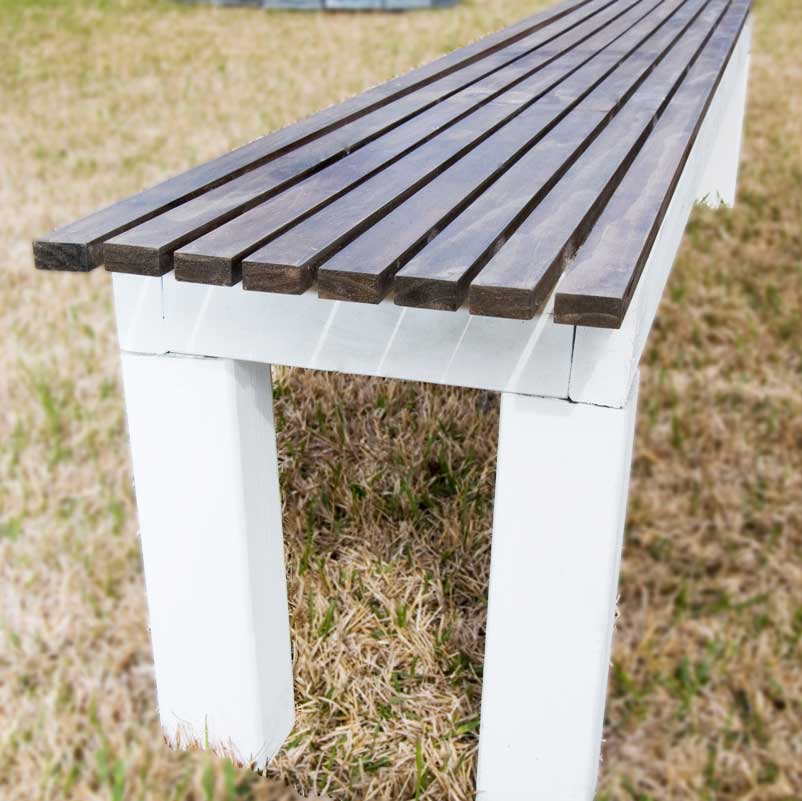
- Paint or stain the 1x2x8 pine strips. Apply conditioner, stain, poly. I prefer Minwax.
- Attach the strips on top the bench. Start with the ends, leaving a gap in between each strip. Using a brad nailer, affix to the bench on each end and down the middle.
- Finish each hole with wood putty and lightly sand down. Congrats on your bench!
Tips
Most of the materials will listed in nominal size – meaning the size of wood before it has been planed smooth on all 4 sides. Typically, big box stores will have nominal sizes listed, but actual sizes are smaller. For example, a 2″ x 4″ x 8′ stud is actually 1.5″ x 3.5″ x 8′. It’s helpful to re-measure/jot down the actual size before making any cuts.
You might find Whitewood or Southern Yellow kiln-dried studs. Whitewood will be slightly lighter and less expensive than a denser Southern Yellow. I generally prefer the latter. Kiln-dried refers to the method of drying – a large oven to minimize shrinkage. In addition, you might find #1 or #2 grade types of wood. #1 grade looks better (less knotty). If you’re going to paint it, #2 will be the better option. When choosing wood, hand select pieces with minimal splinters. Check for any damages that may occur in transport.
#10 screws are wider than #8 screws. The higher the #, the thicker the screw.