TOUCHDOWN! Prior to the Super Bowl, we challenged ourselves to build a lightweight, portable baggo board set made from lumber scraps and extra hardware found in the garage. And guess what? We made it happen: bold and bright, full of life ready to begin a new Sunday ritual in our pergola.
(Is it baggo board? Cornhole? Bean bag toss? What do you call it?)
My first set was built 5 years ago with 2×4’s by following instructions on a blog. It was a wonderful beginner project to learn from and use some hand tools. Like most projects, useful improvements start to surface. The original board felt bulky; really a drag to carry around. Split joints and weakened midsections. Boy, is this what middle-age feels like?
AD: a crappy, uncomfortable chair is no way to work from home. Seriously. We put a few chairs to the test and give you 3 reasons why Branch Furniture’s Office Daily Chair exceeds all of our expectations. Try it out for yourself and get $20 off $150 by clicking this link. Special terms and conditions apply*.
Given a second chance, careful consideration was given: swapping 2×4’s with 1×2’s to reduce weight. Reinforcing the midsection with a crossbar. Pocket holes and glue to create, tight clean joints. And of course, a brand new field to play on.
Frame construction
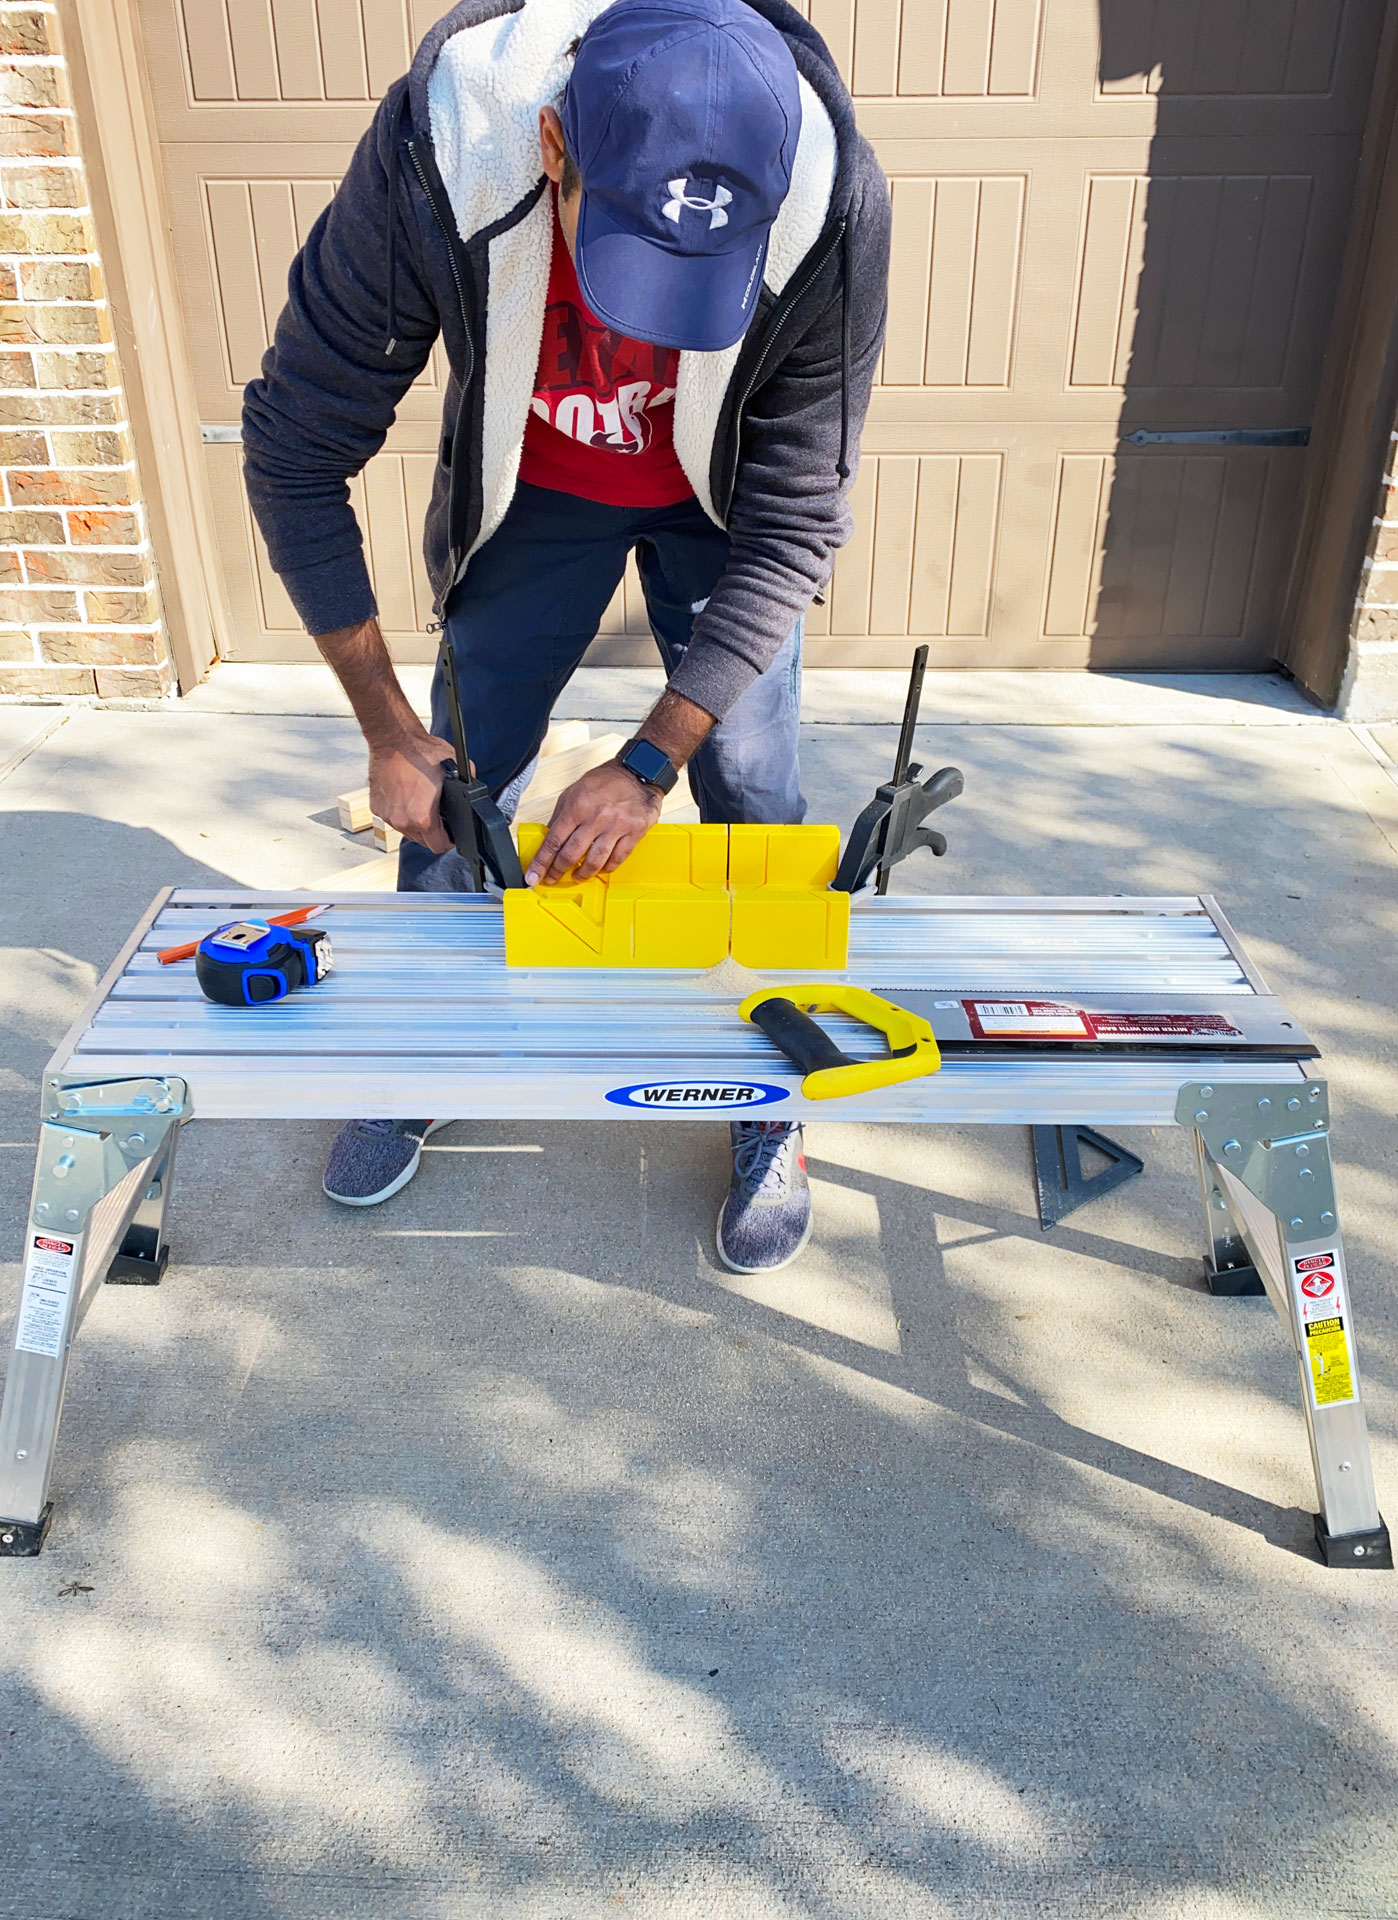
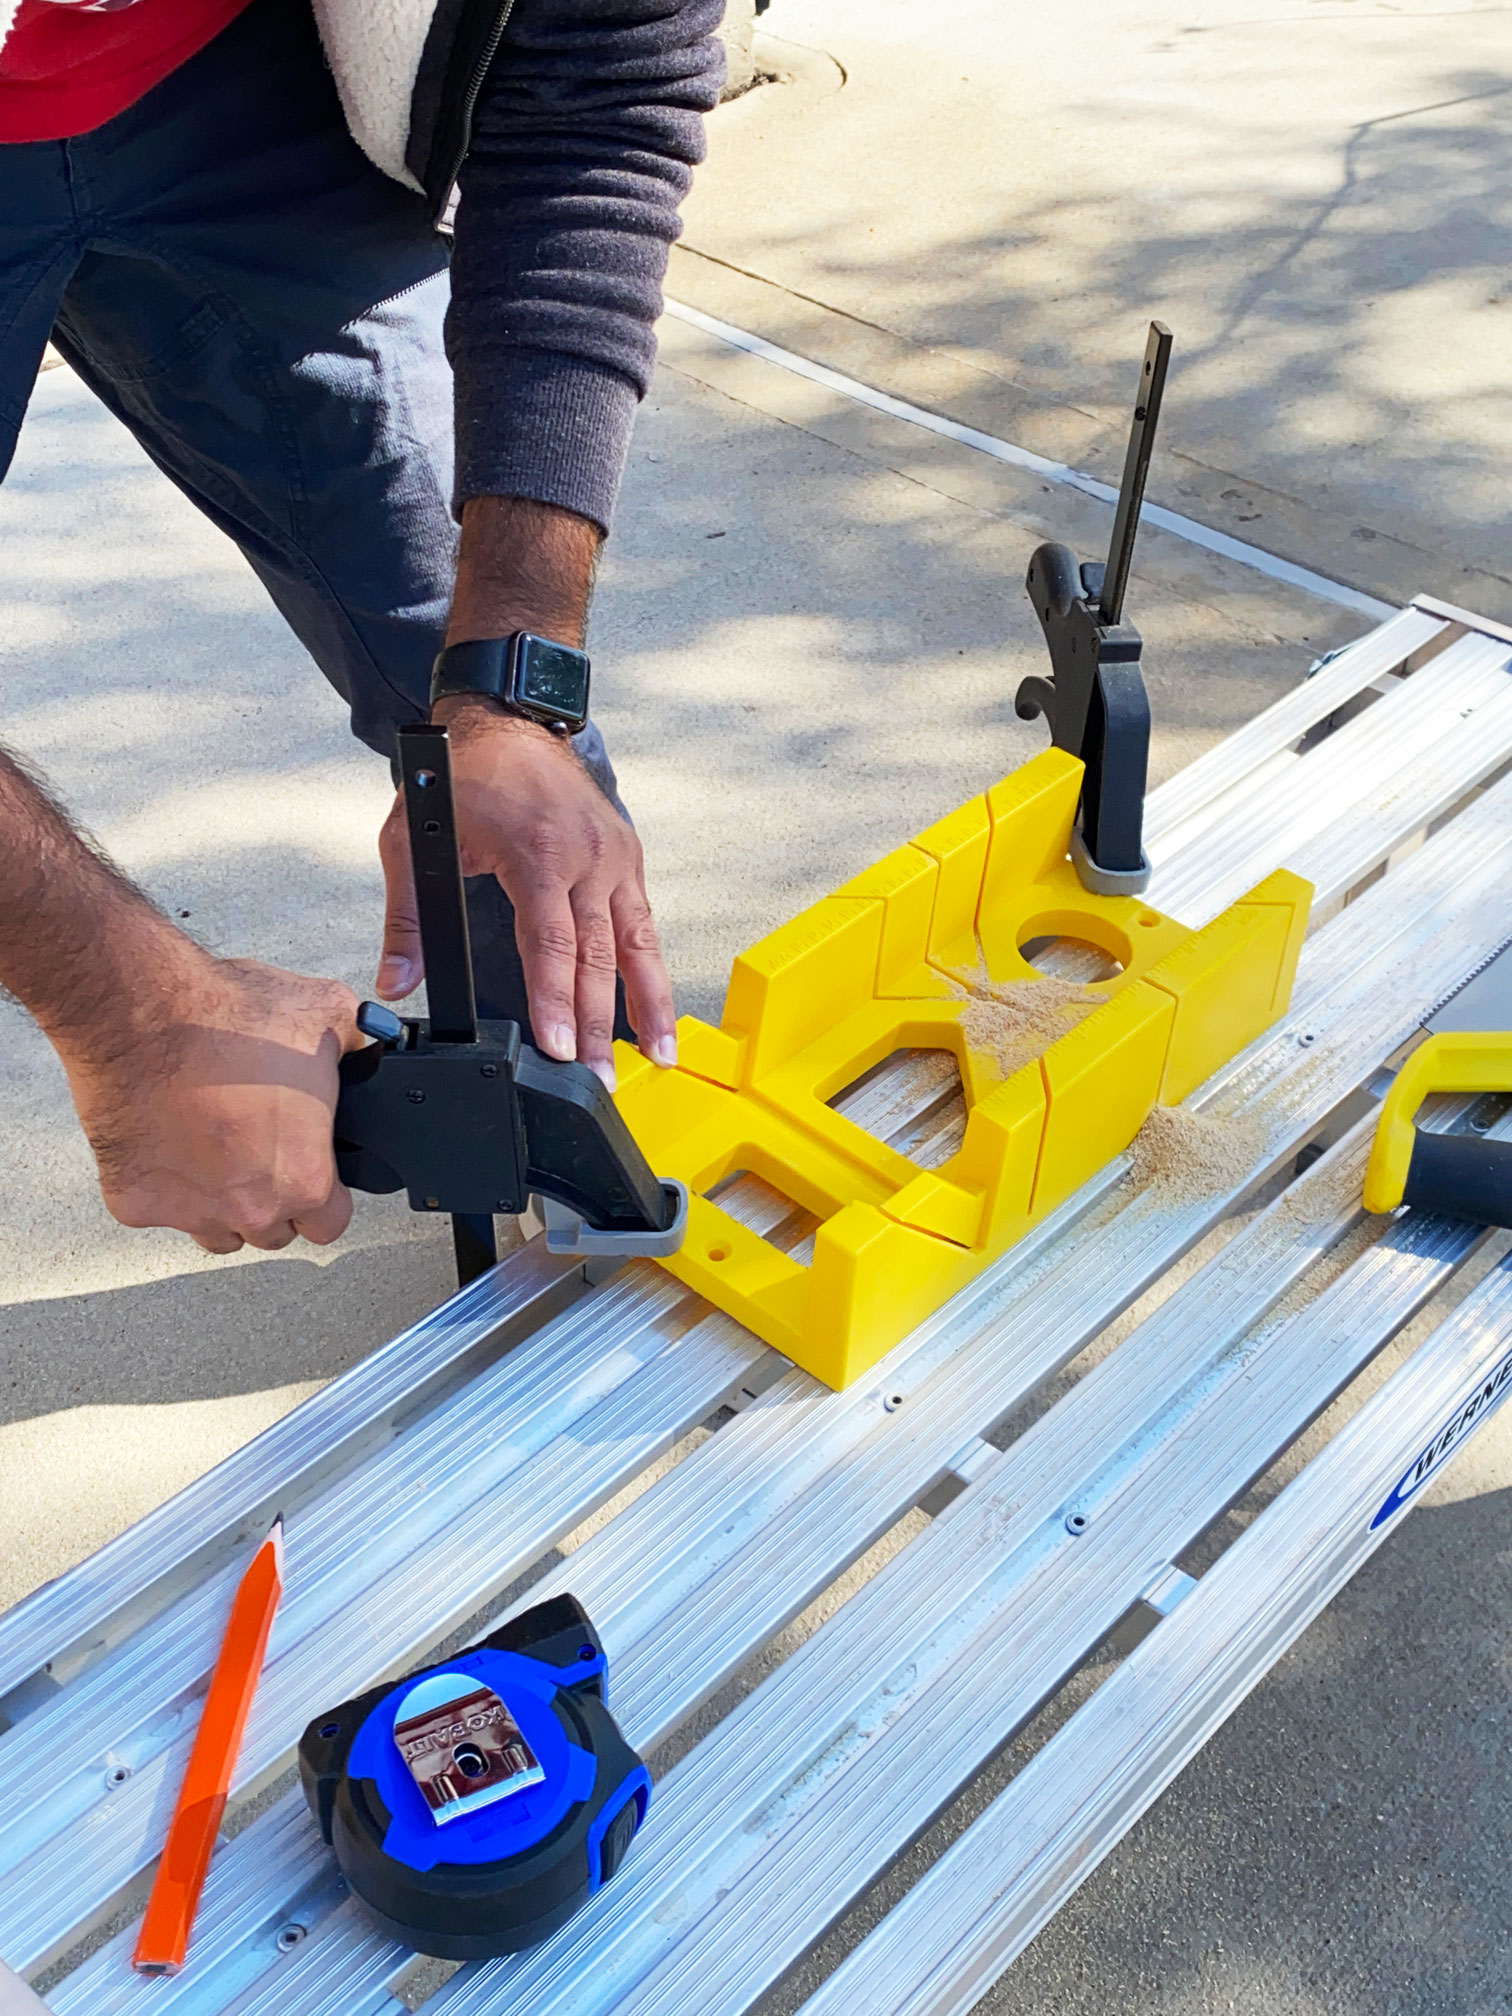
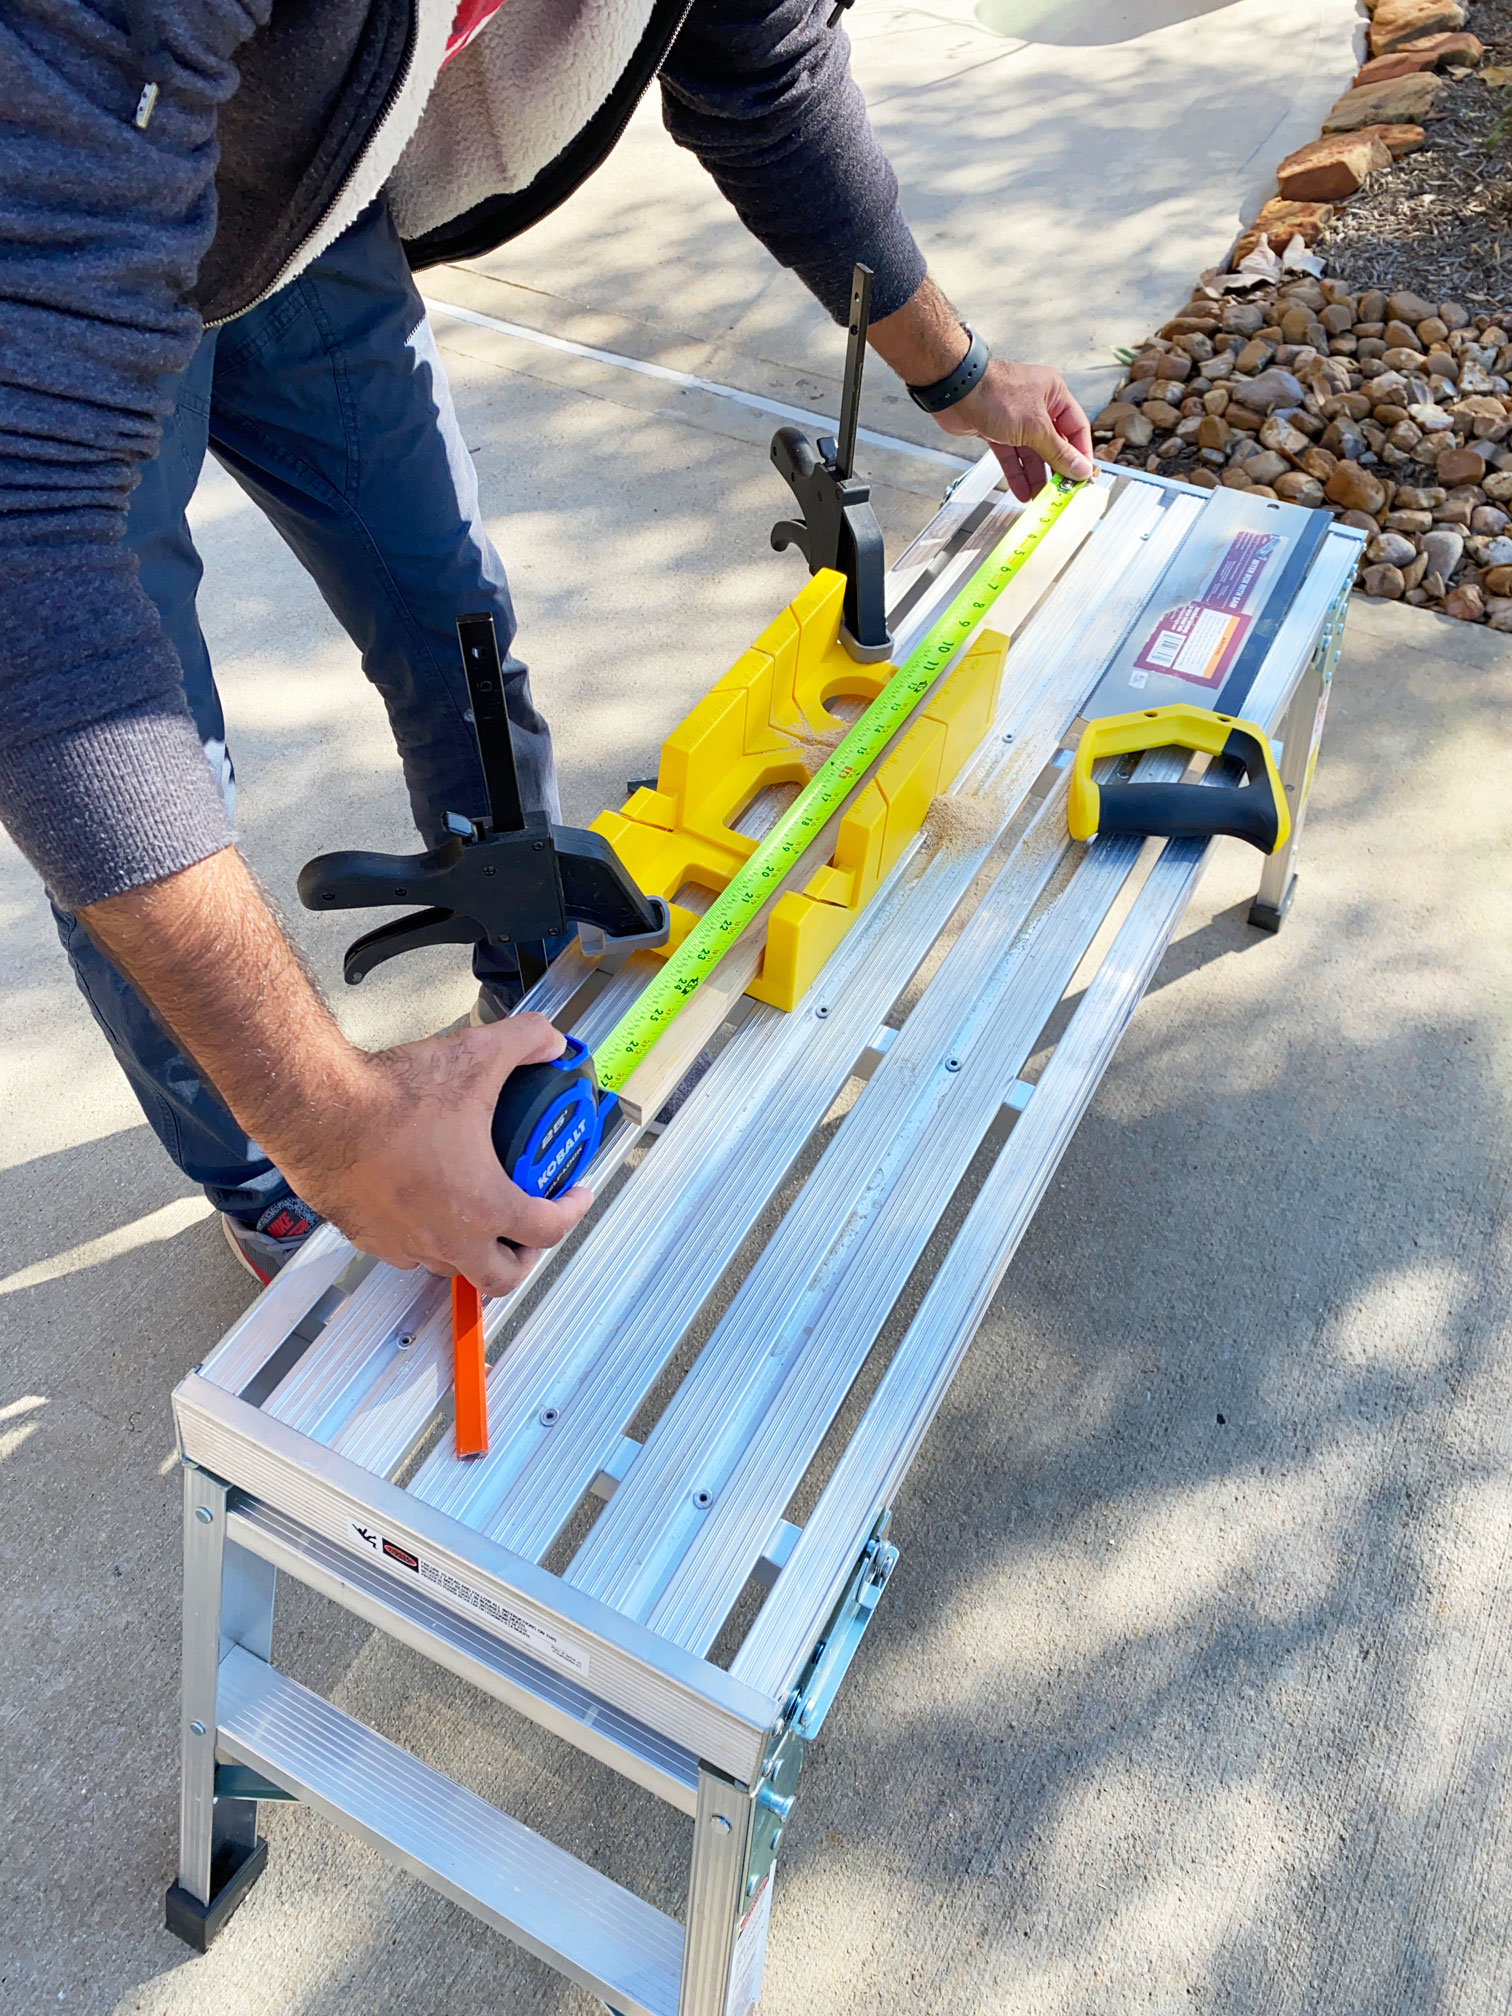
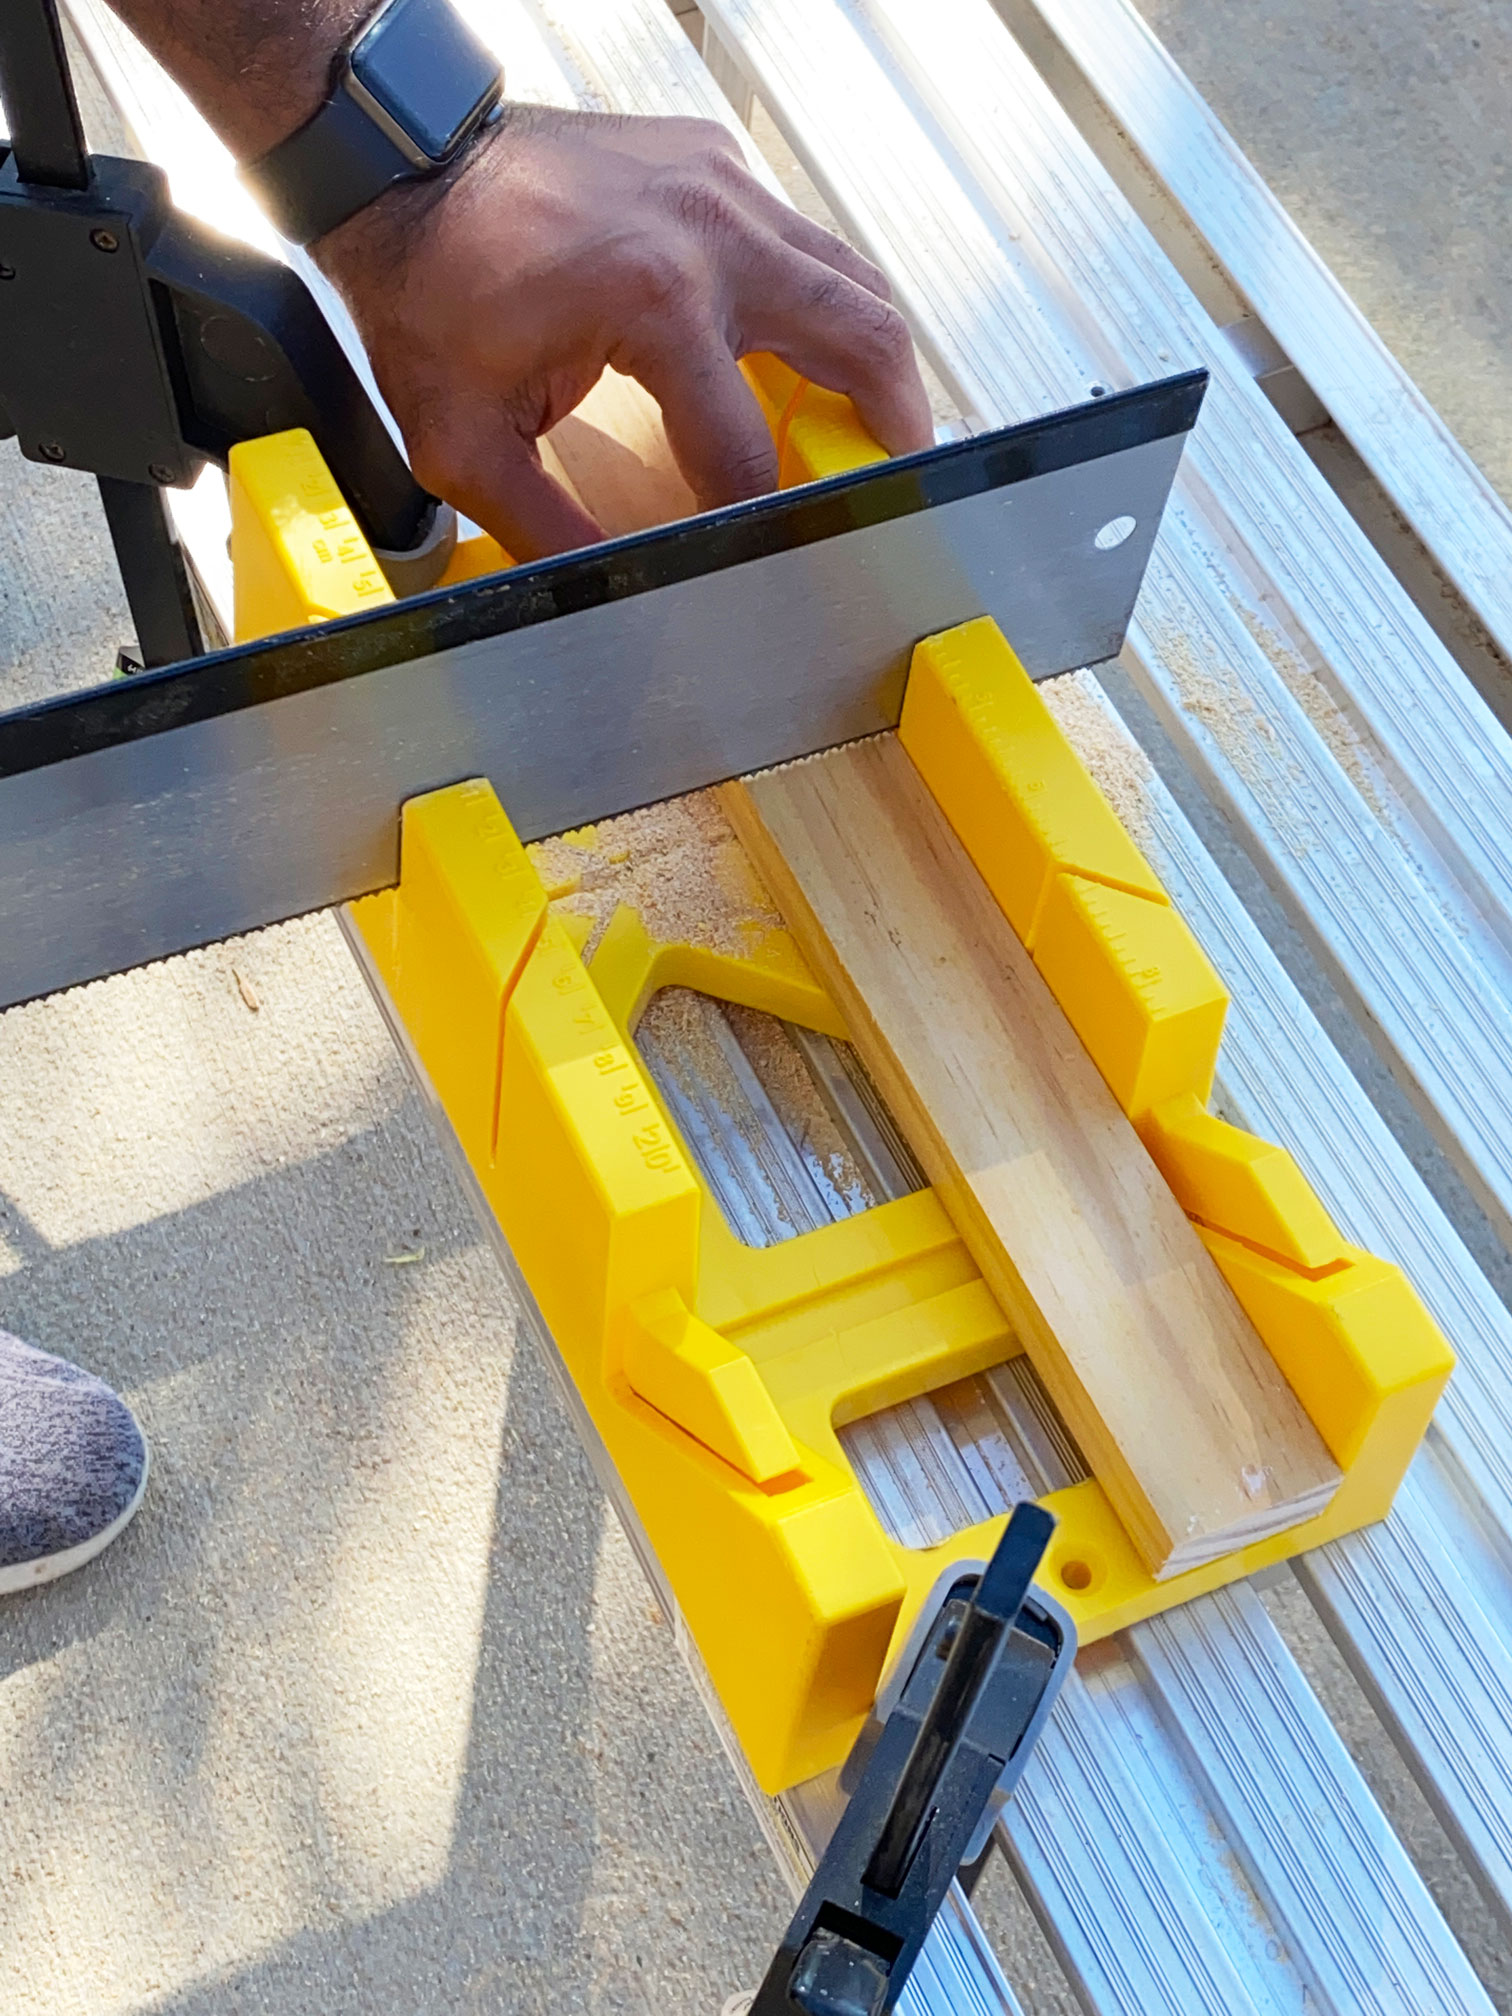
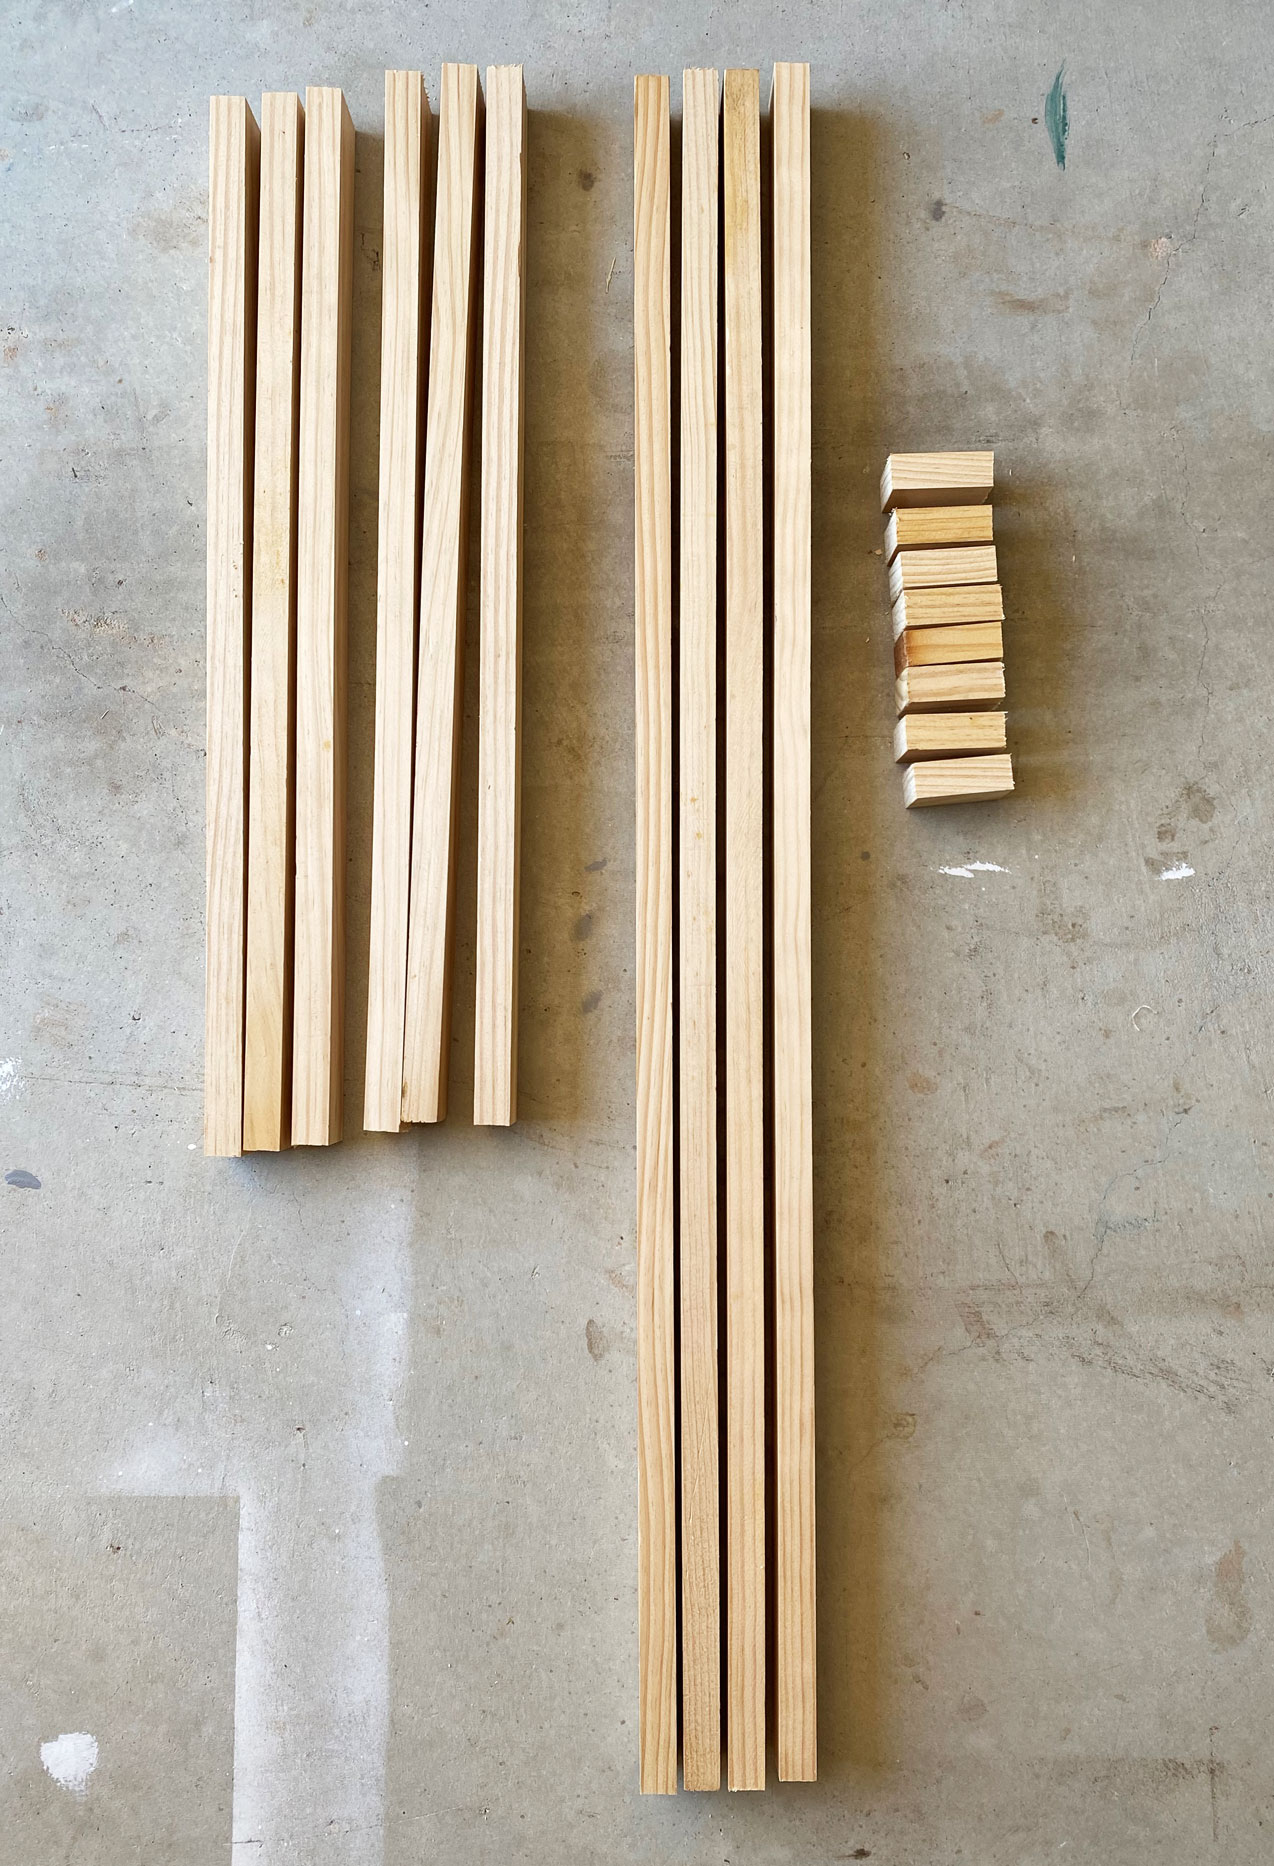
Using a manual miter saw and box, 4 pieces of 1″ x 2″ x 8′ pine sticks were cut down to size:
- Part A: Qty 4 of 35 1/2″ sticks
- Part B: Qty 6 of 22 3/8″ sticks
- Part C: Qty 8 of 9 1/8″ sticks
- Part D: Qty 8 of 2 1/2″ sticks
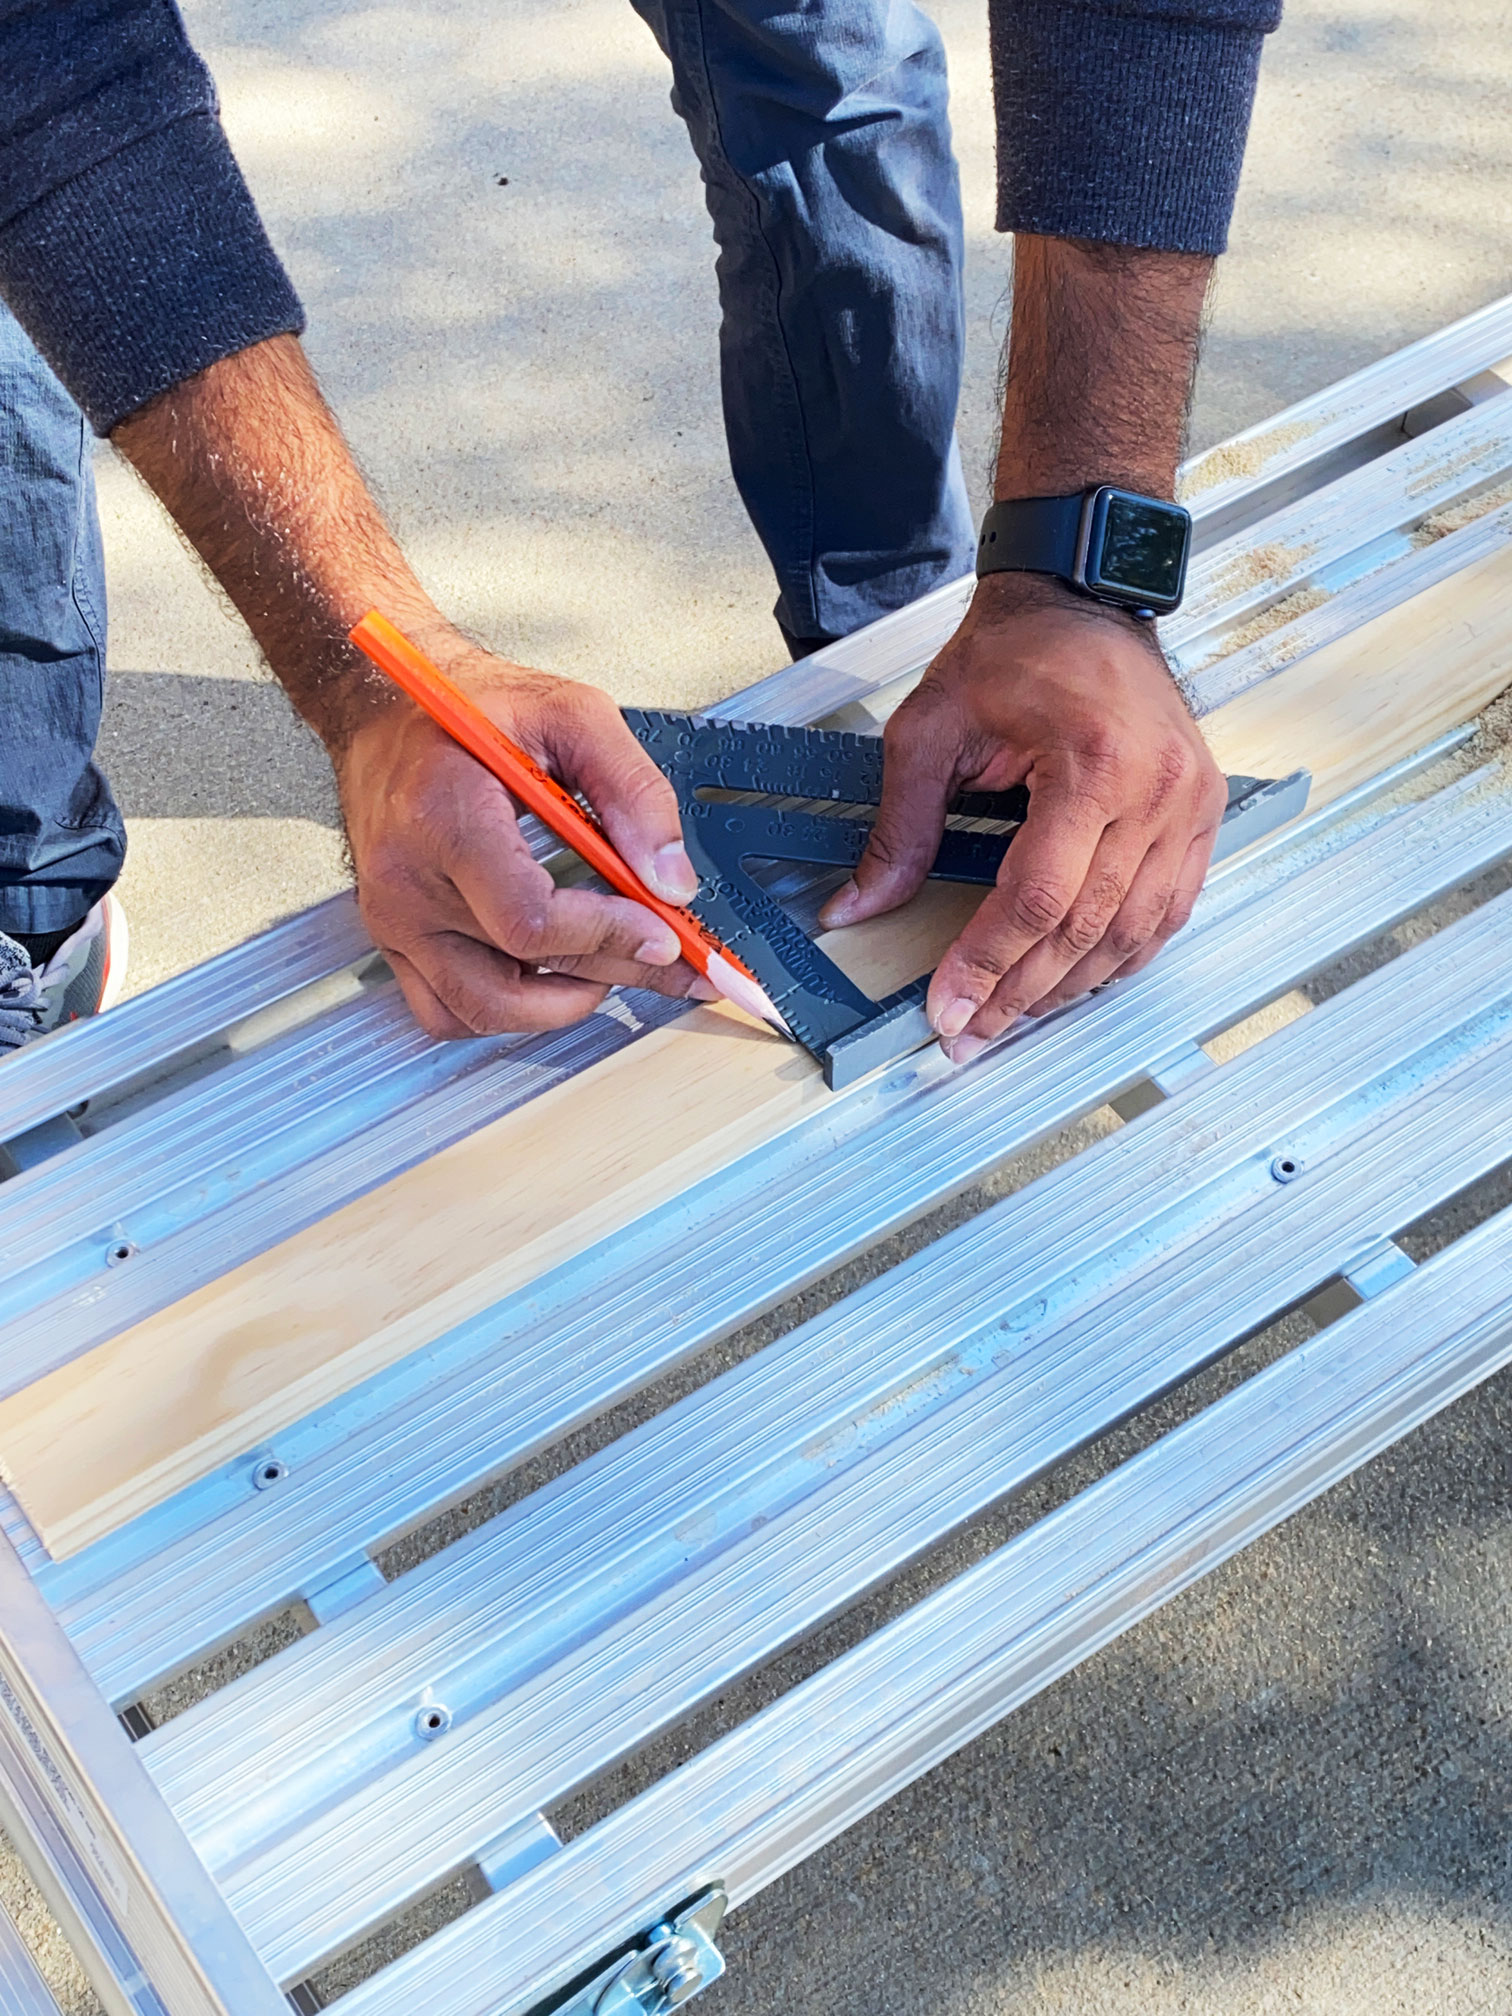
The miter saw box can be clamped down to a table using a f-style clamp or ratchet clamp. Remember to let the saw do the work instead of exerting a ton of pressure to cut the wood. Use a builders square to line up along the top edge and mark a straight cut line.
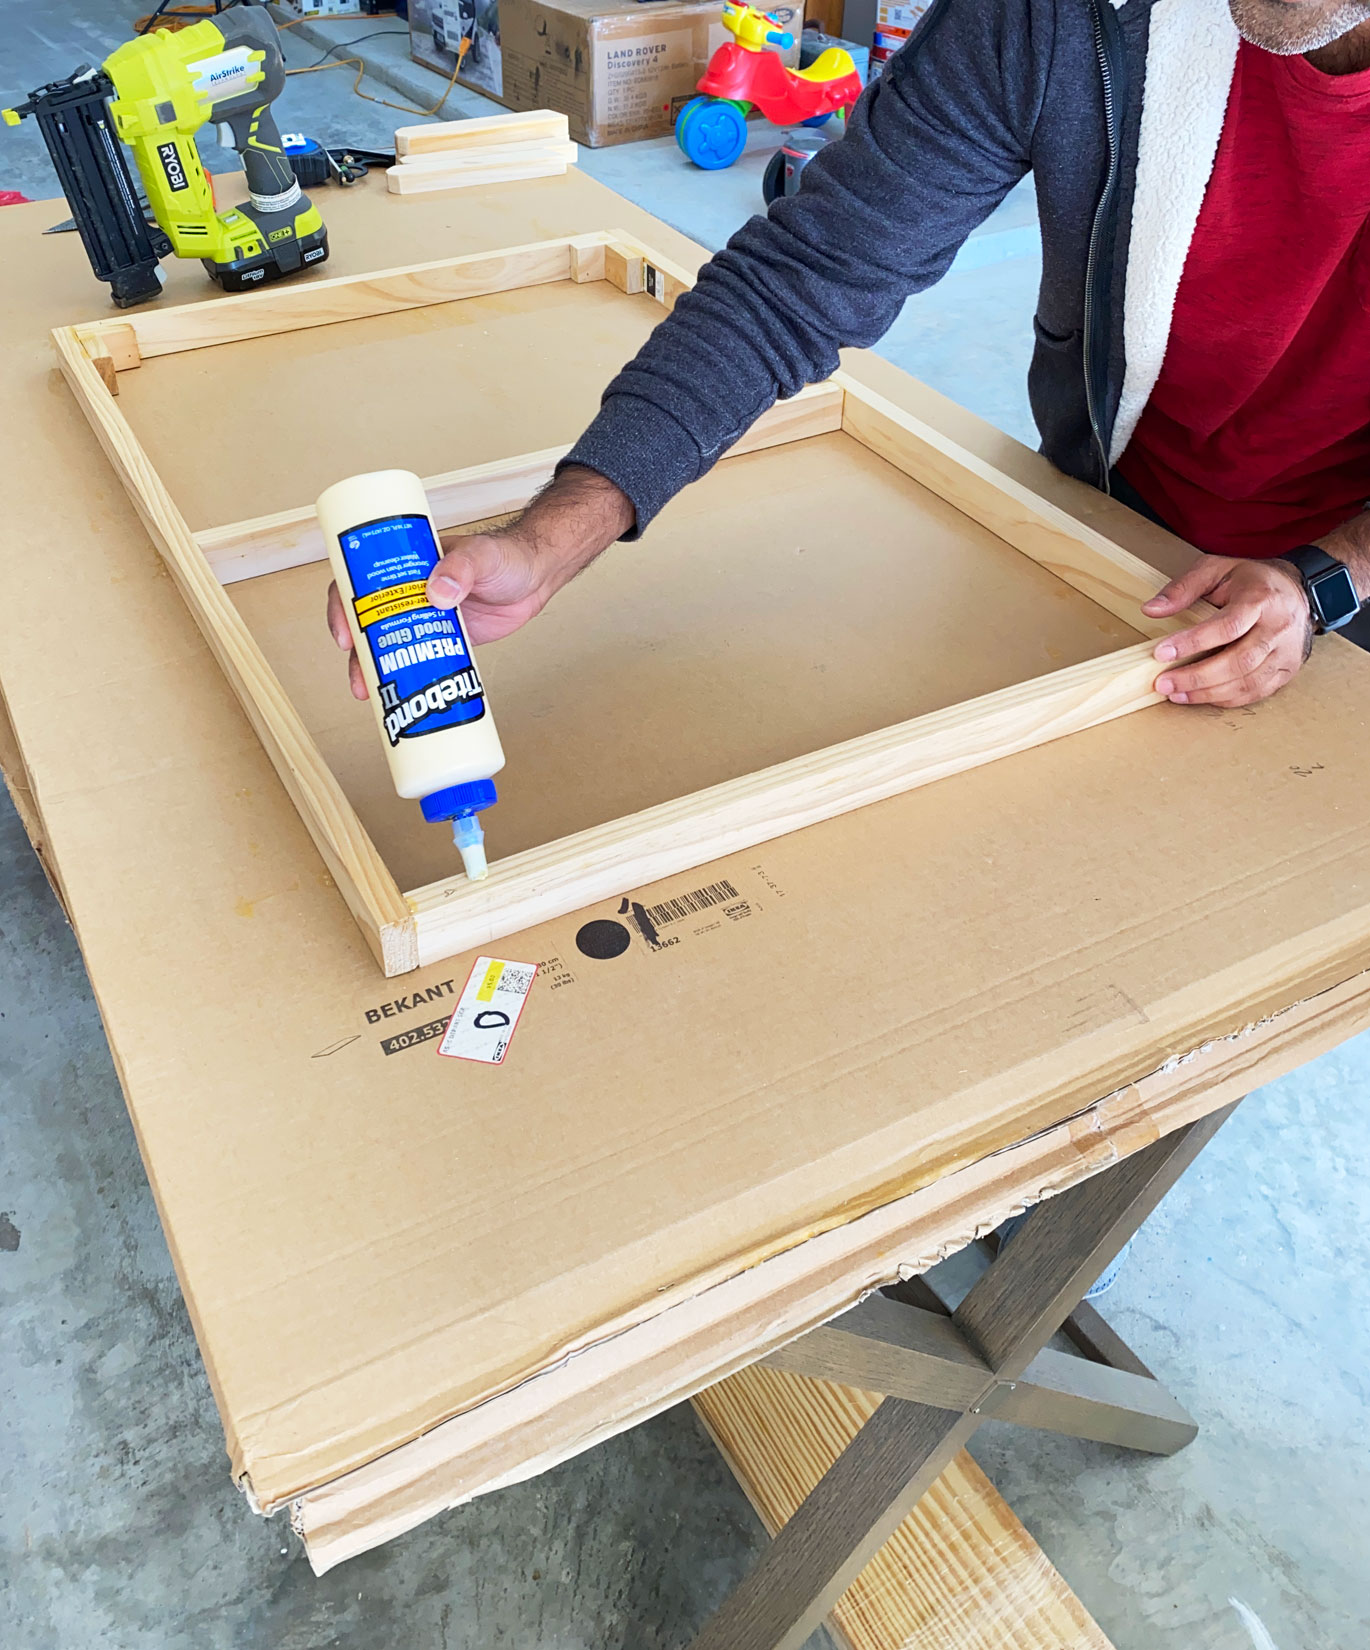
Pocket holes
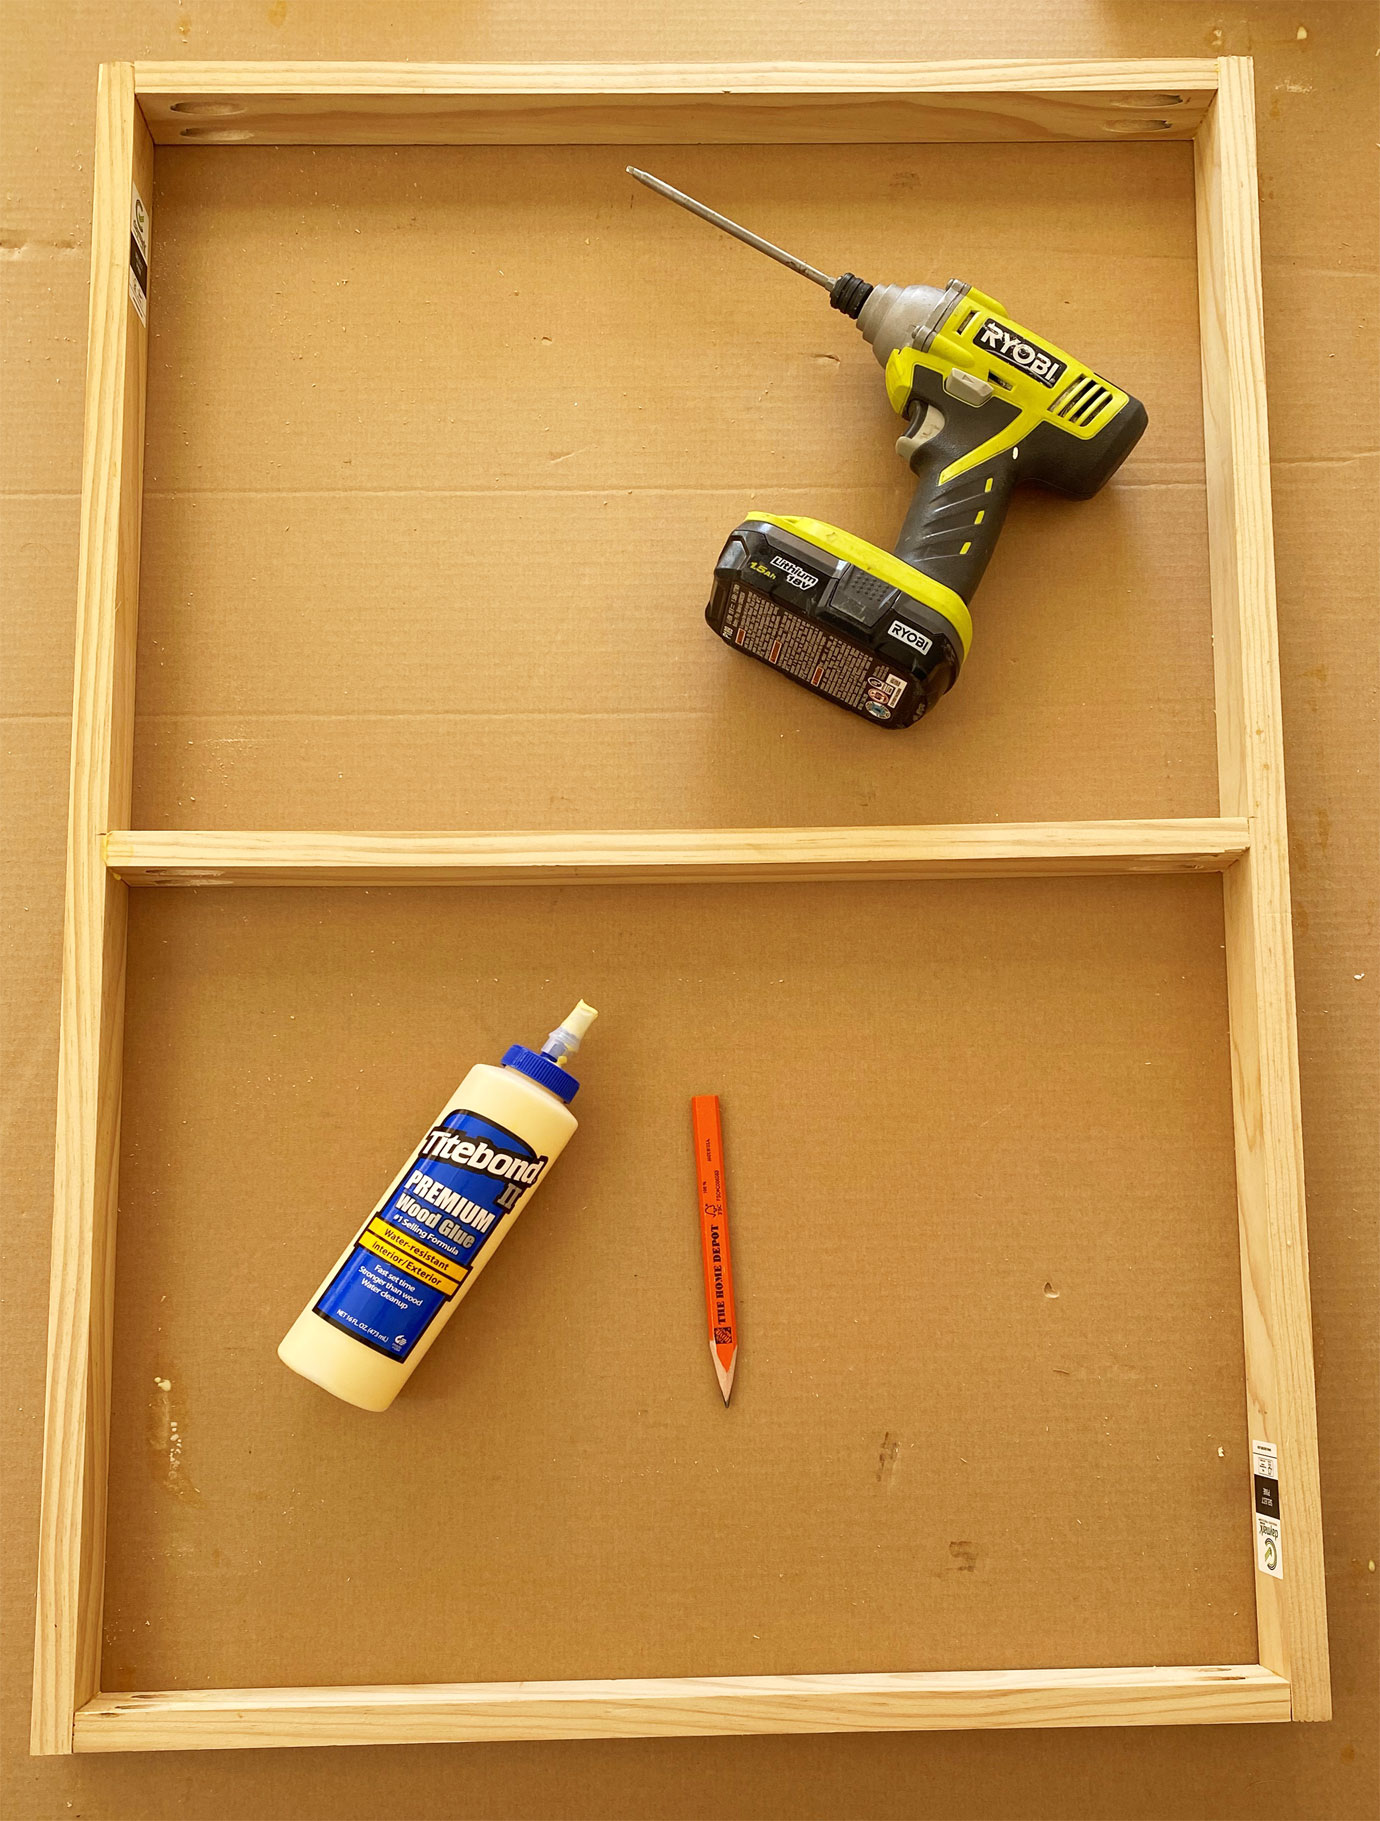
The frame will be joined using Titebond wood glue, pocket holes and 1 1/4″ coarse Kreg screws. There are a wide variety of pocket hole jigs to choose from. The Kreg Jig R3 is one economical option that can be clamped down to a surface. Other joining techniques are possible such as dowels, tenons, or box joints. IMO, pockets holes are efficient and work better than driving a screw straight down a butt joint.
Drill 2 sets of pocket holes on opposite ends of part B.
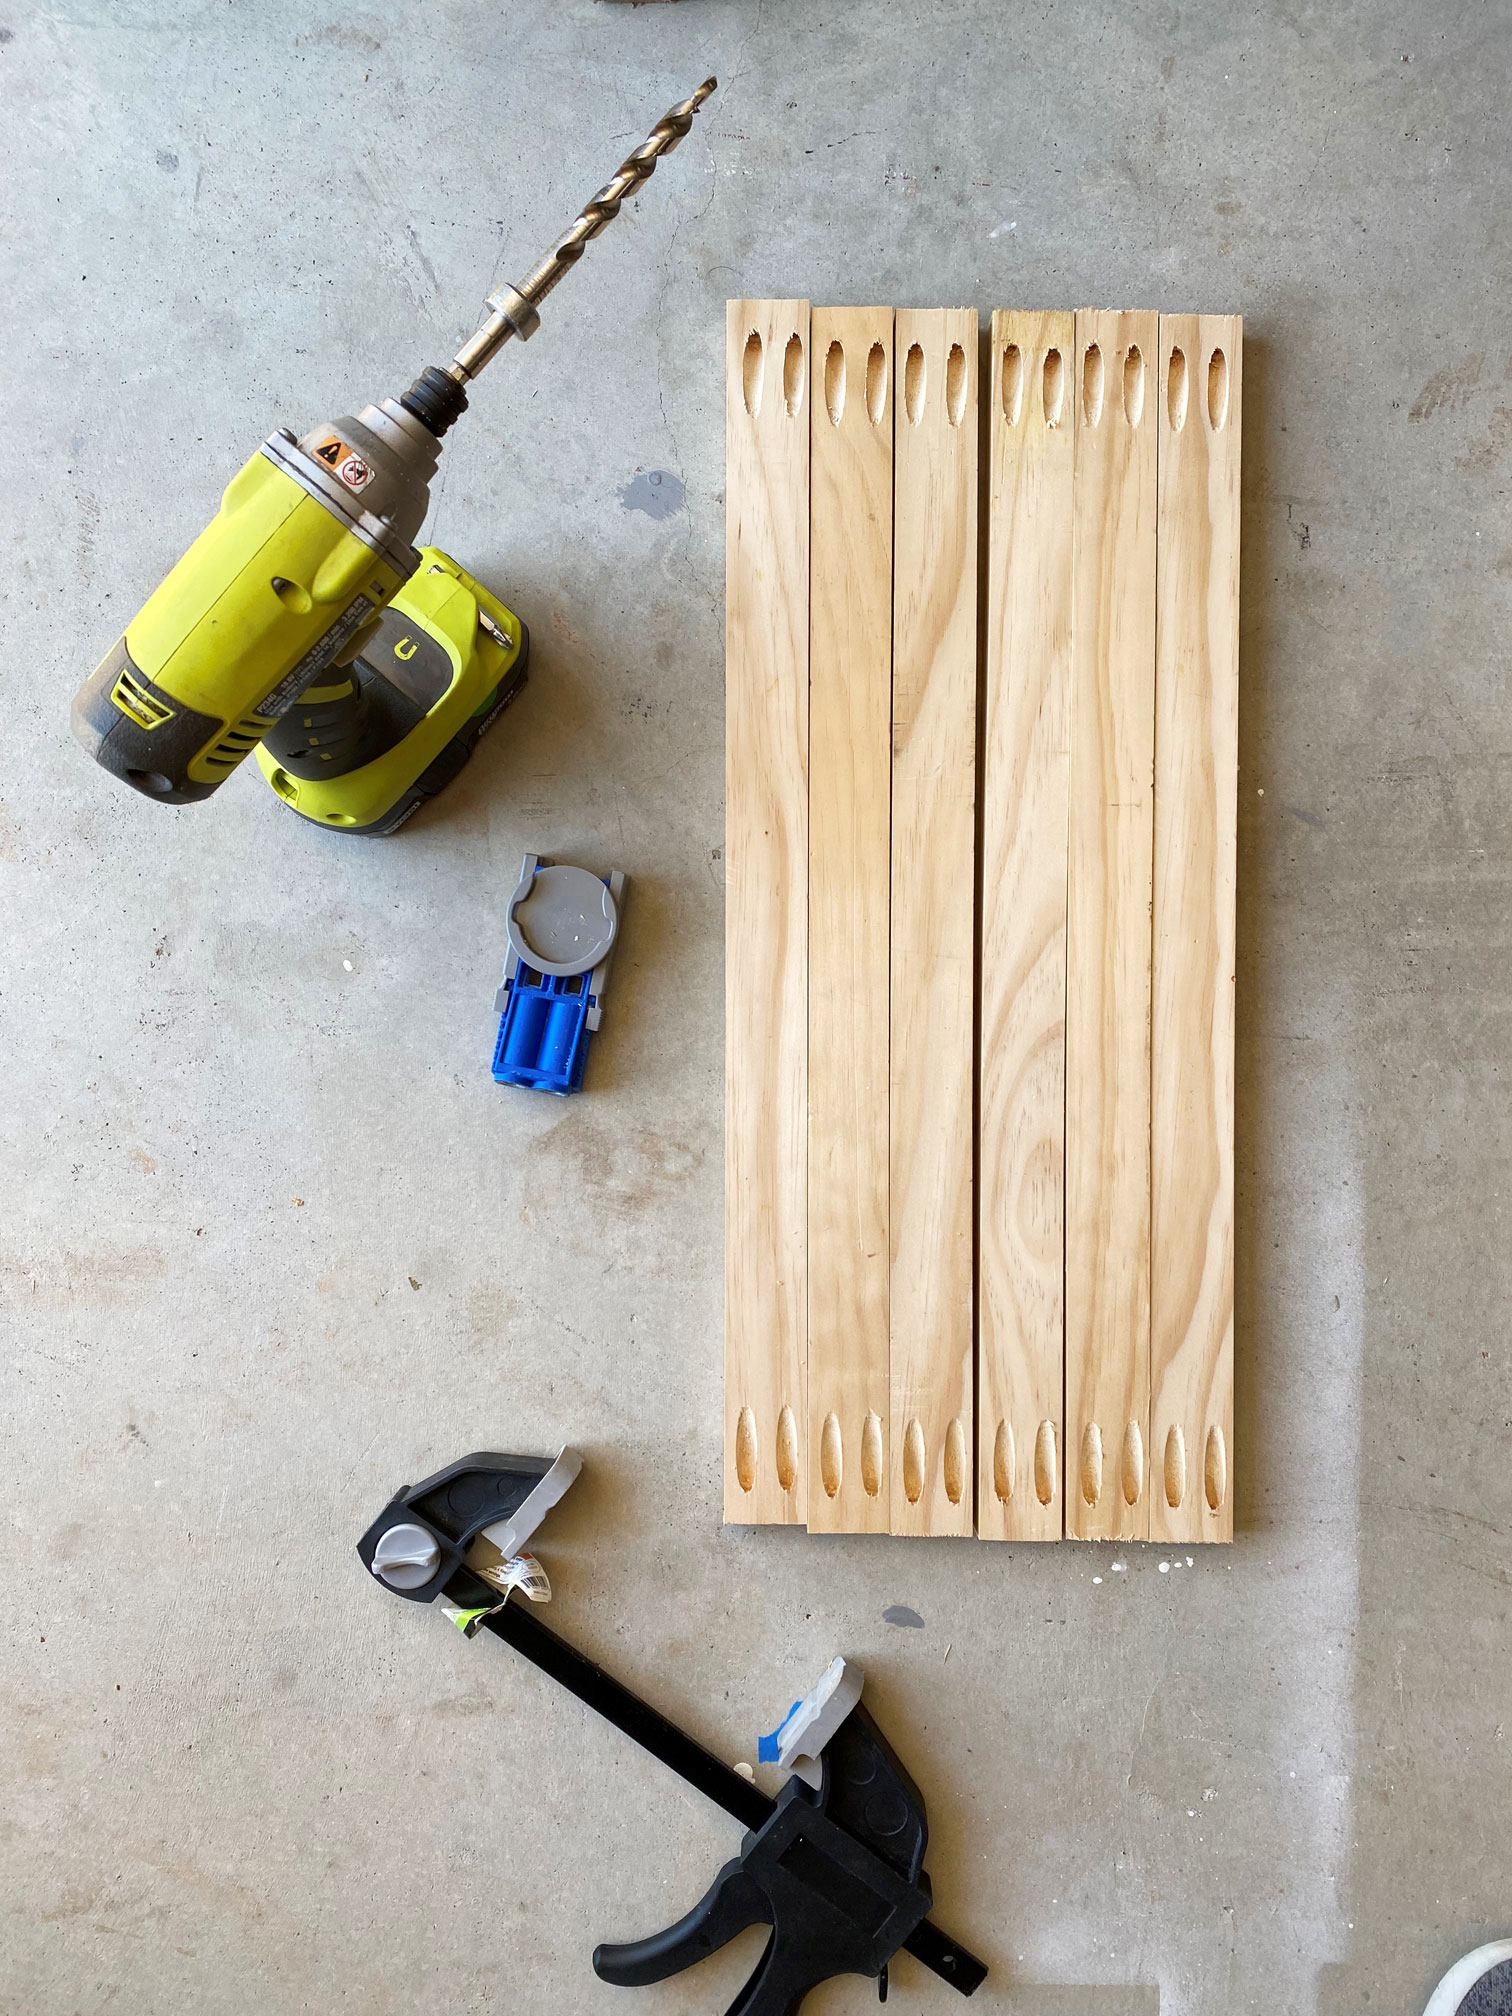
Part B will be used to form the top, mid, and bottom sections screwed into 2 pieces of part A. The butt joints can be glued and temporarily clamped for additional strength.
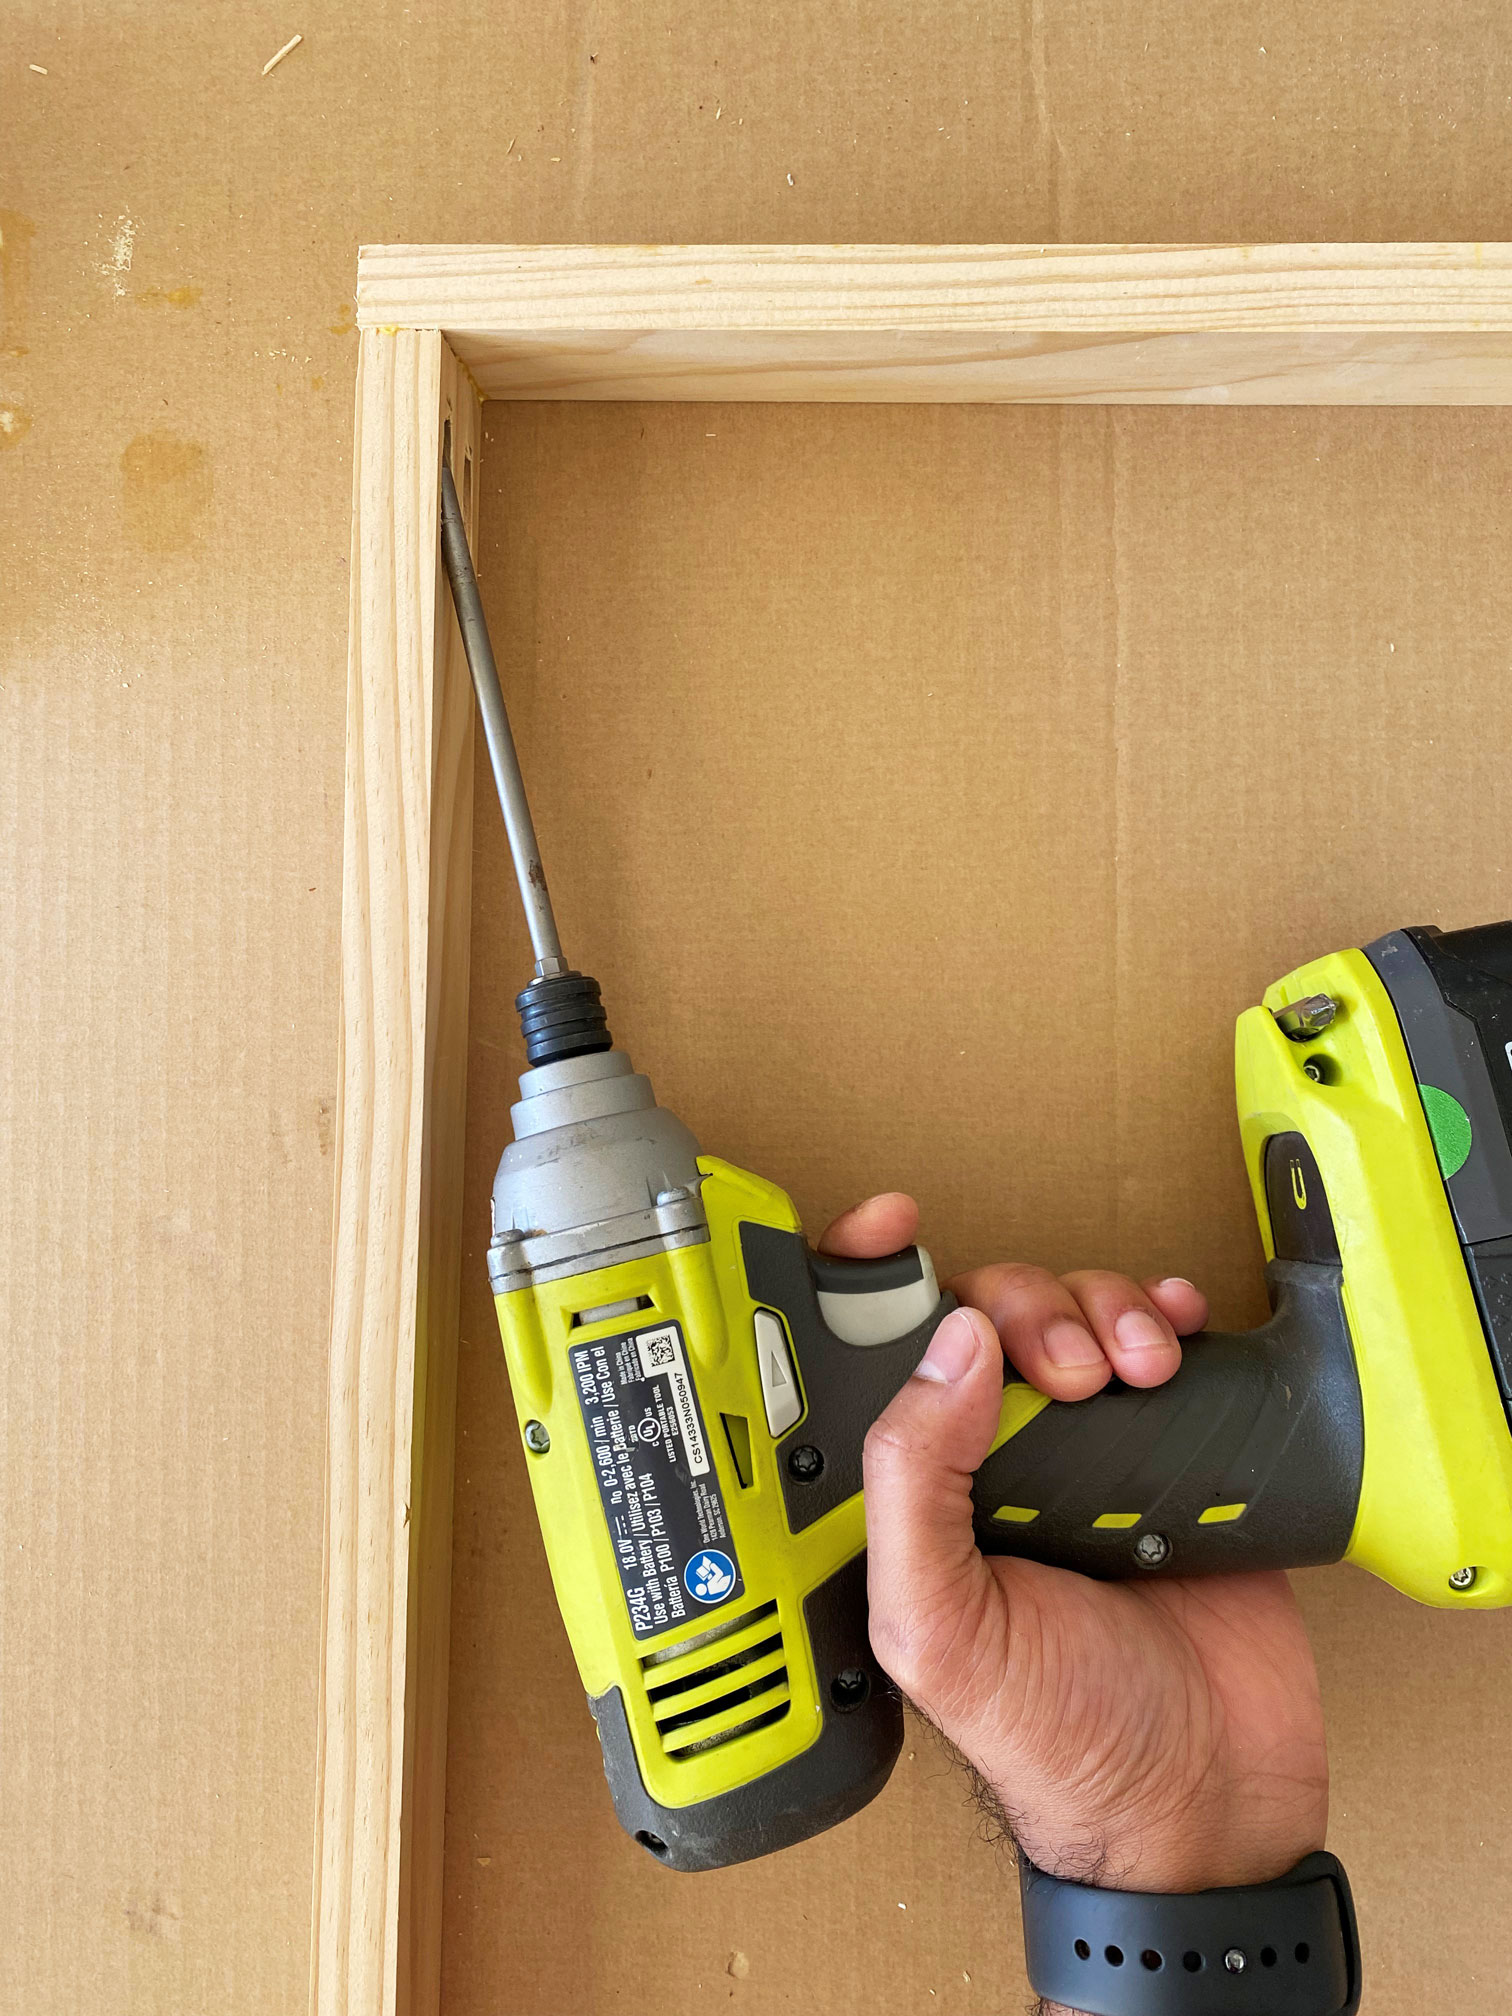
Part D can be attached to the top corners of the frame with glue and 1 1/4″ brad nails. Leave a space between the middle – a hole will be drilled later to attach legs.
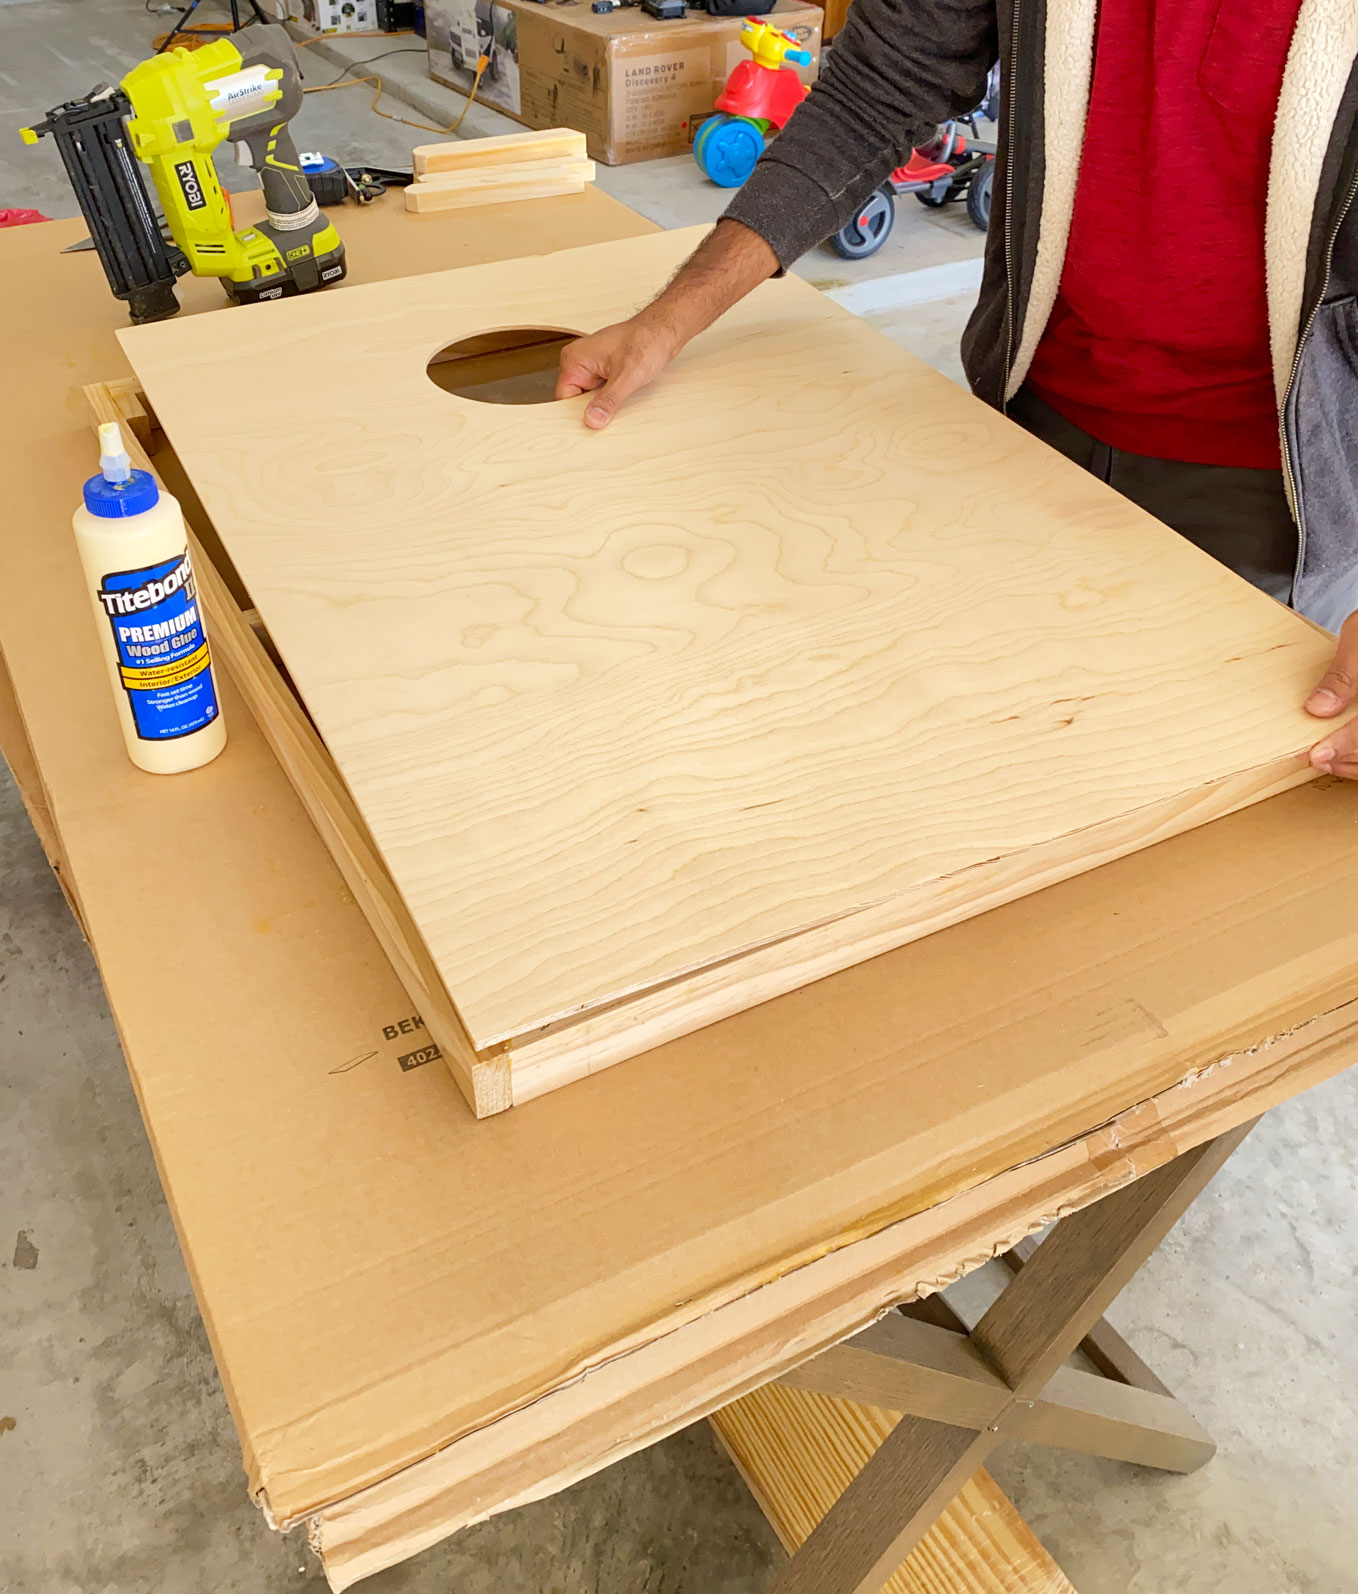
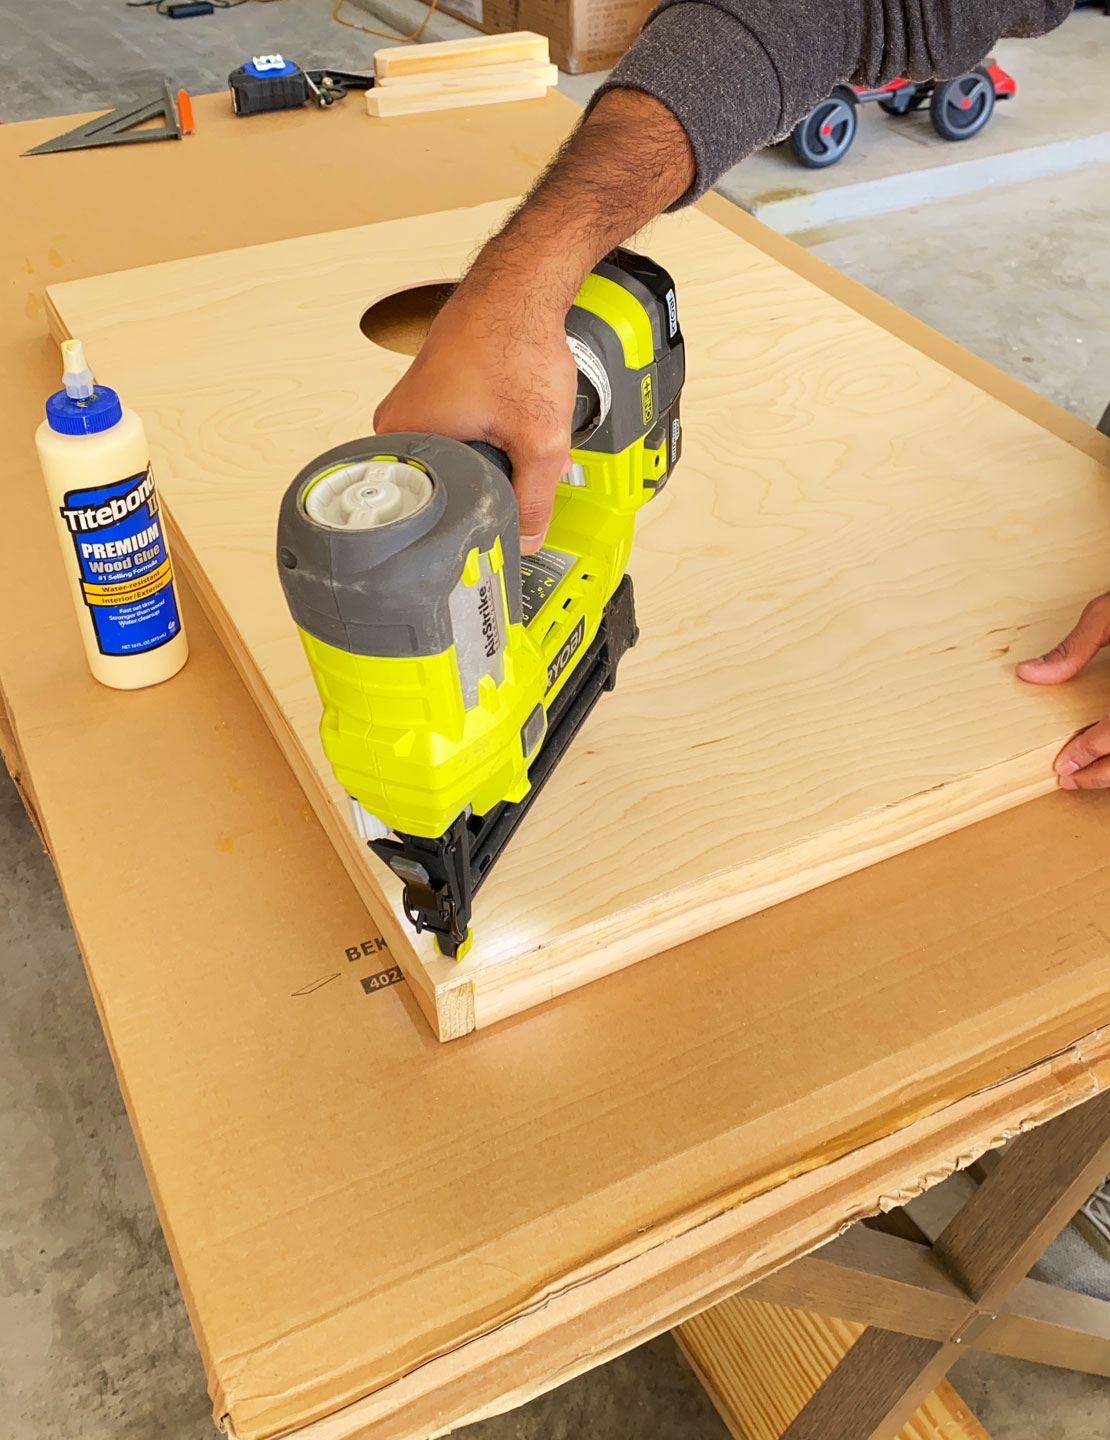
Board landing zone
2′ x 4′ underlayment can be glued and brad nailed on top of the frame. Try a dry fit first; any overhang can be cut off with a circular saw or a flush bit if you own a trim router. A 6″ hole can be created in the center (8″ from the top) using a jig saw or hole saw (we used a hole saw meant for recessed lighting).
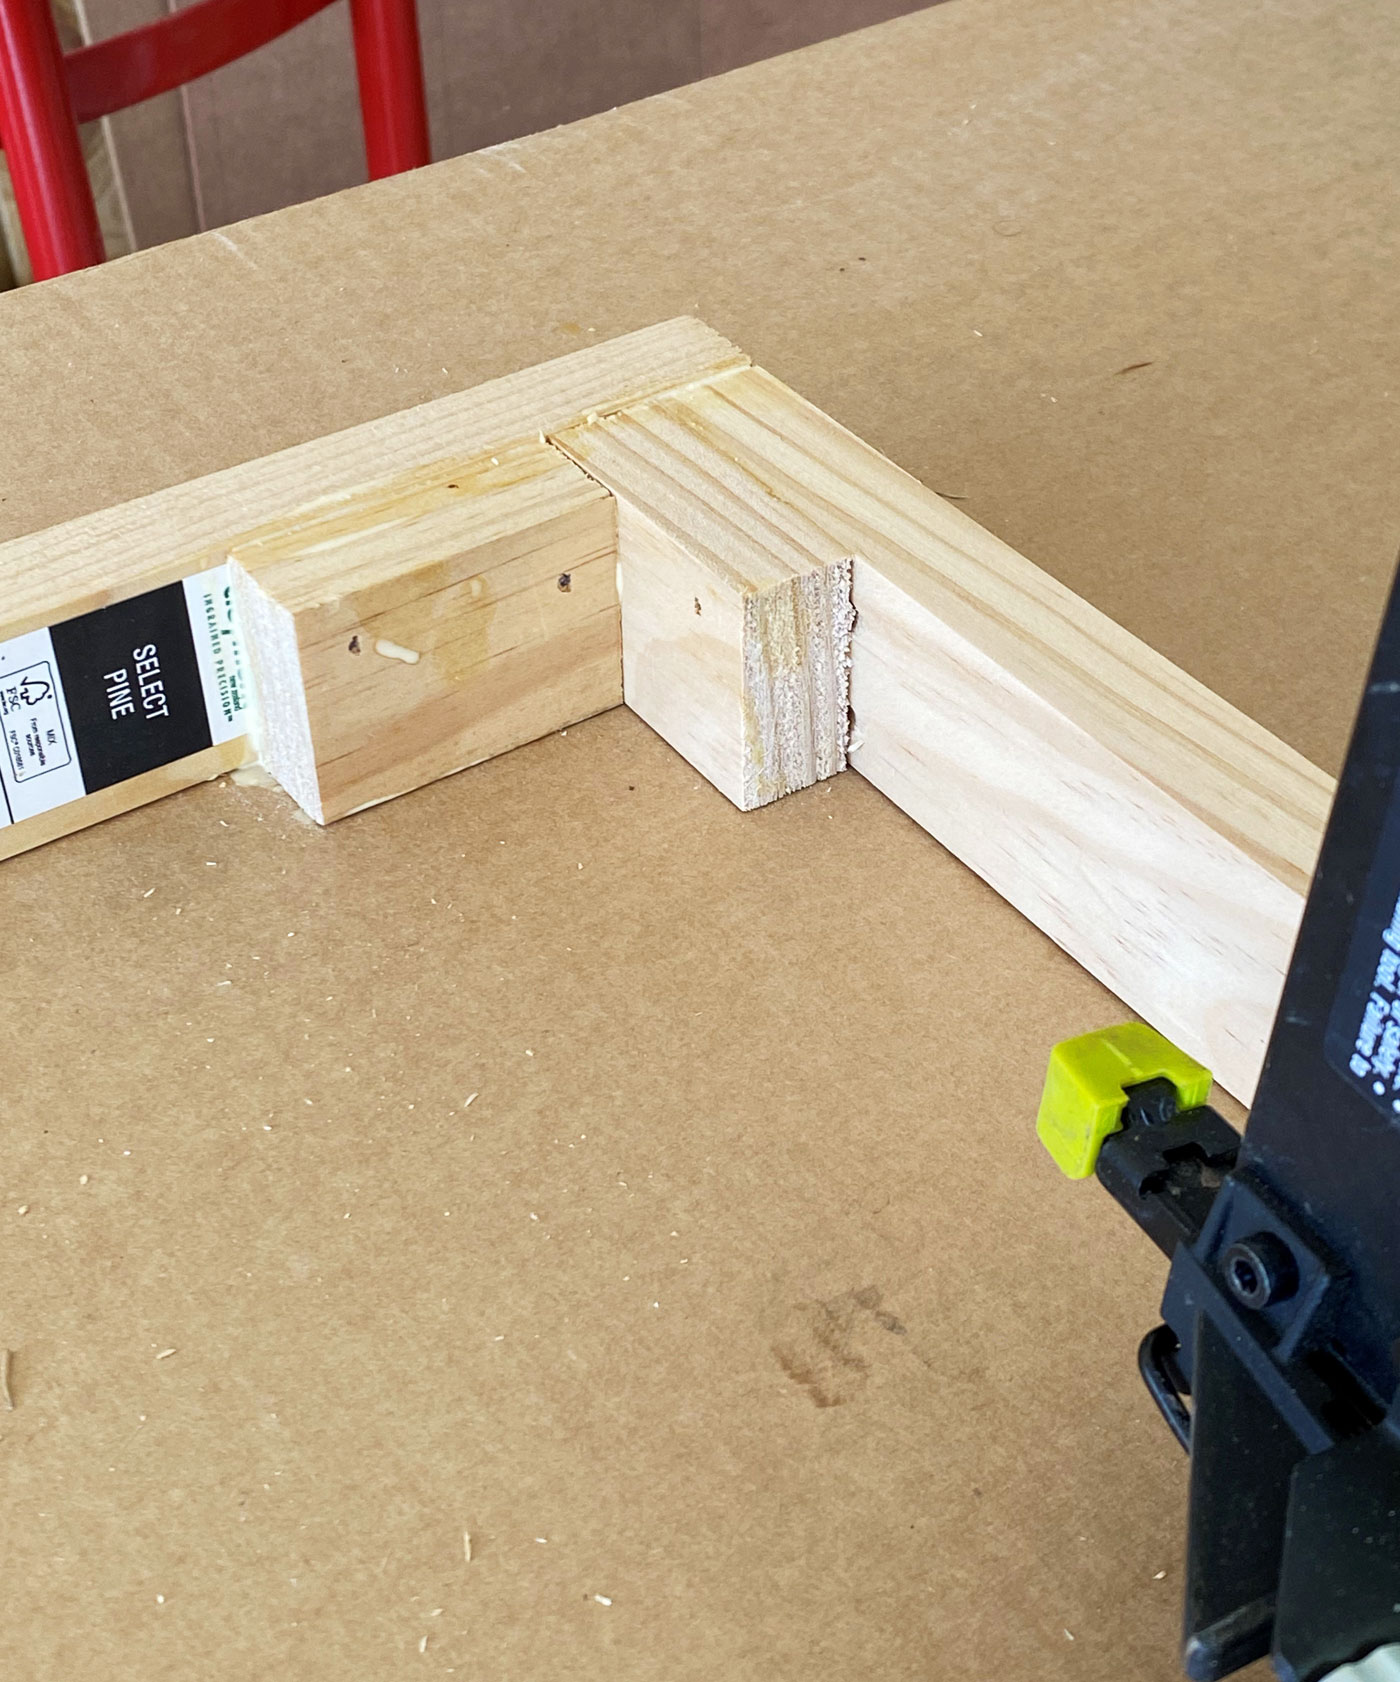
Leg construction and install
Using part C, glue 2 pieces together. On one end, cut dog ears (like the ears on top of a fence). On the other, cut off the end at a 20-ish degree angle. Some other instructions call for a 45-ish degree angle, but that might force your board to sit much flatter and closer to the ground.
AD: does your garage feel like a perpetual mess? Fleximount offers a range of smart garage storage solutions, such as an overhead garage rack. Check out the latest specials. RECLAIM THE SPACE BACK IN YOUR GARAGE!
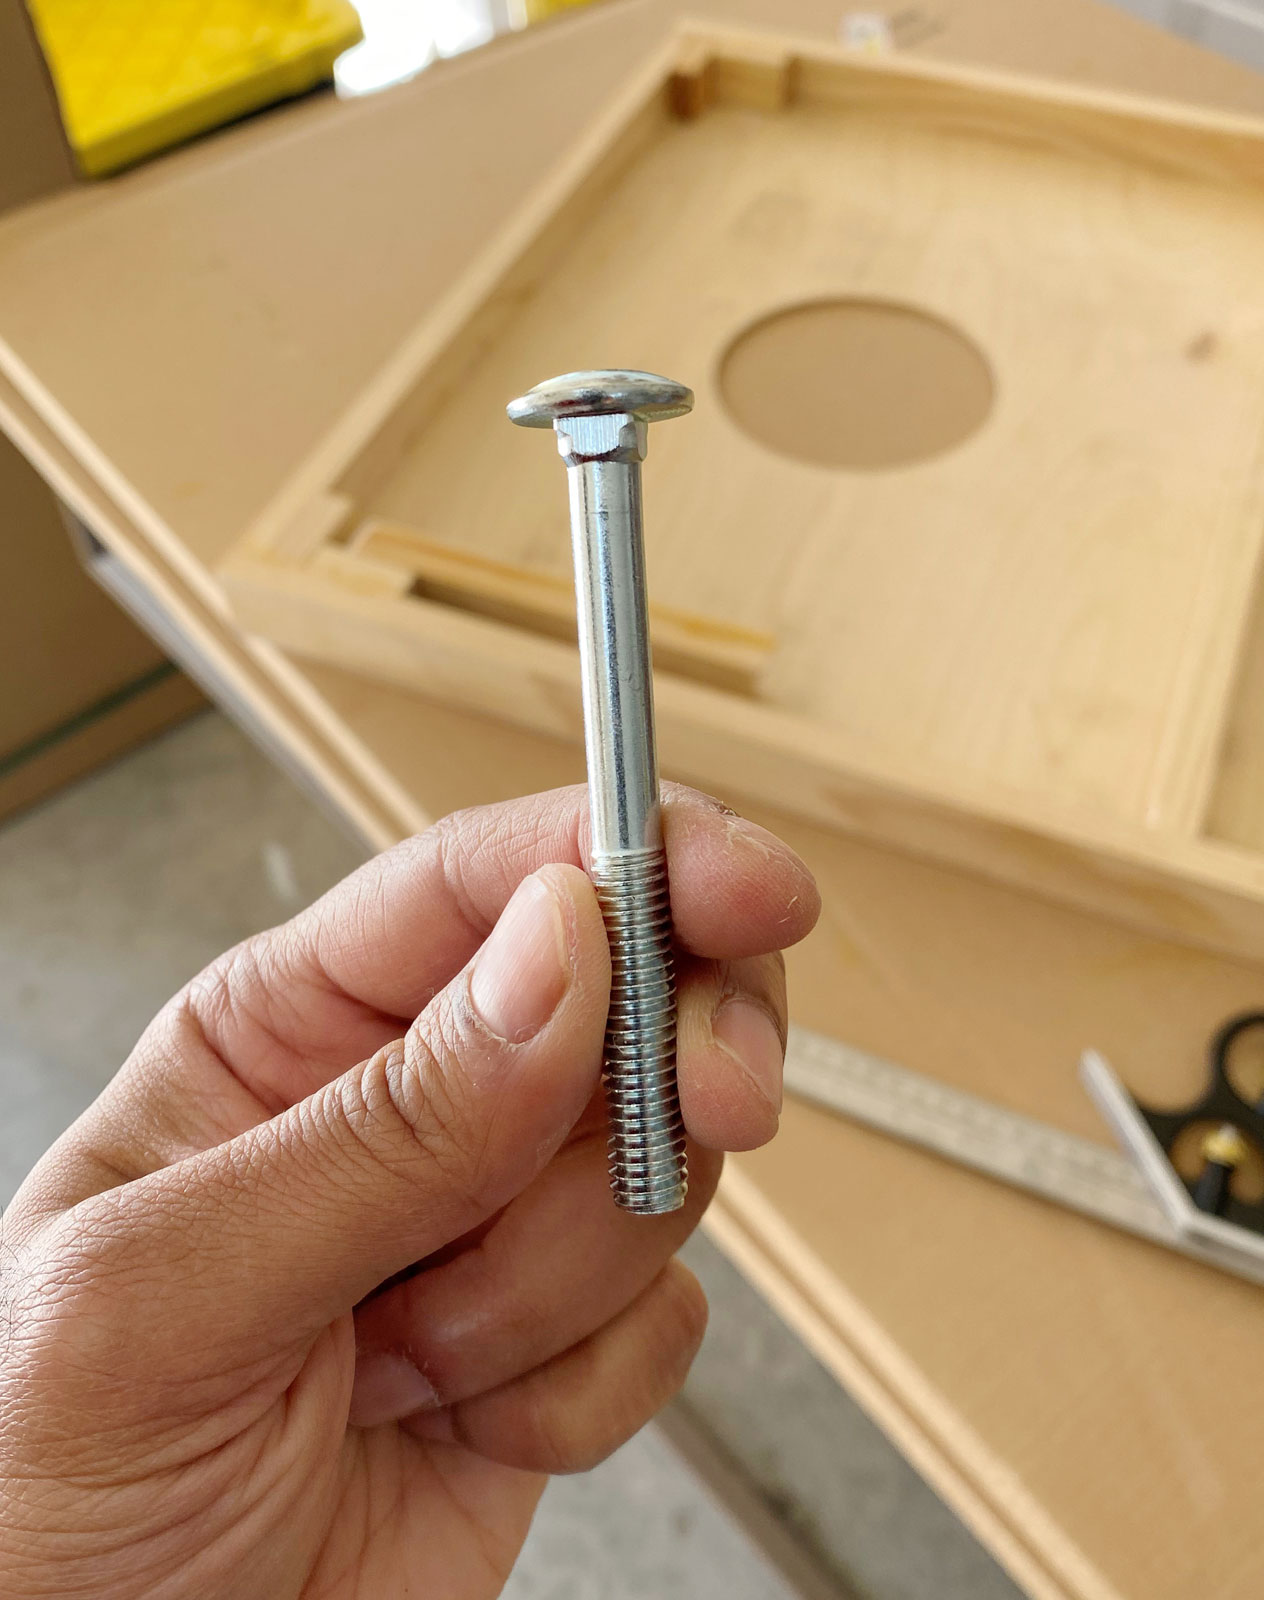
Drill a hole in the frame where Part D is located. The hole will be the size of your carriage bolt (4 will be required – 5/16″ x 3″ in length). A carriage bolt has a round head with a square neck that will secure into a hole – as long as the hole is not wider than the neck. Take the carriage bolt and hammer through the frame into the leg. Lock into place with a washer and nut.
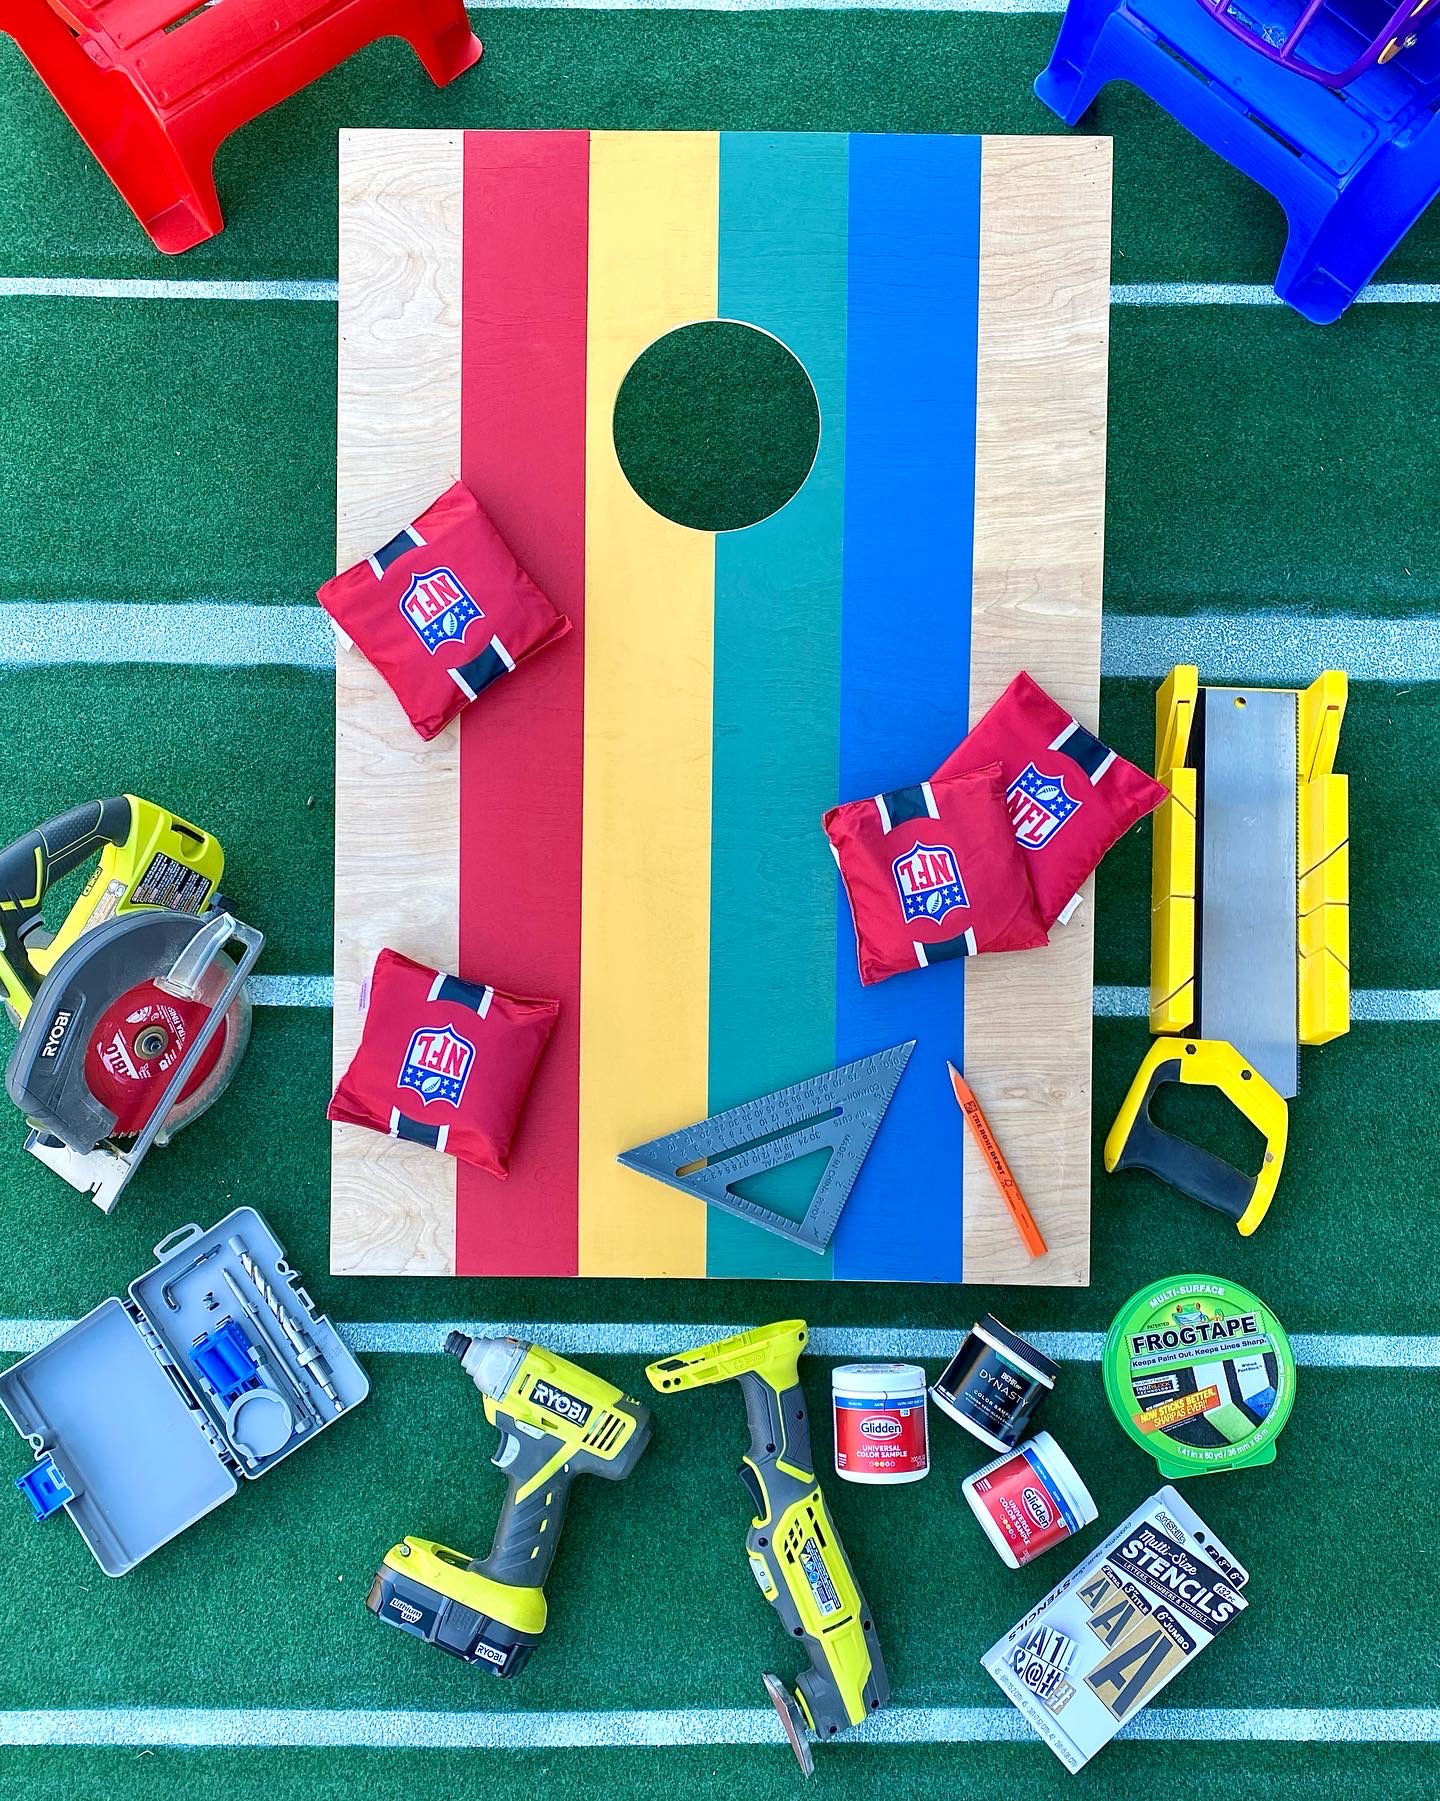
Accessorize with paint
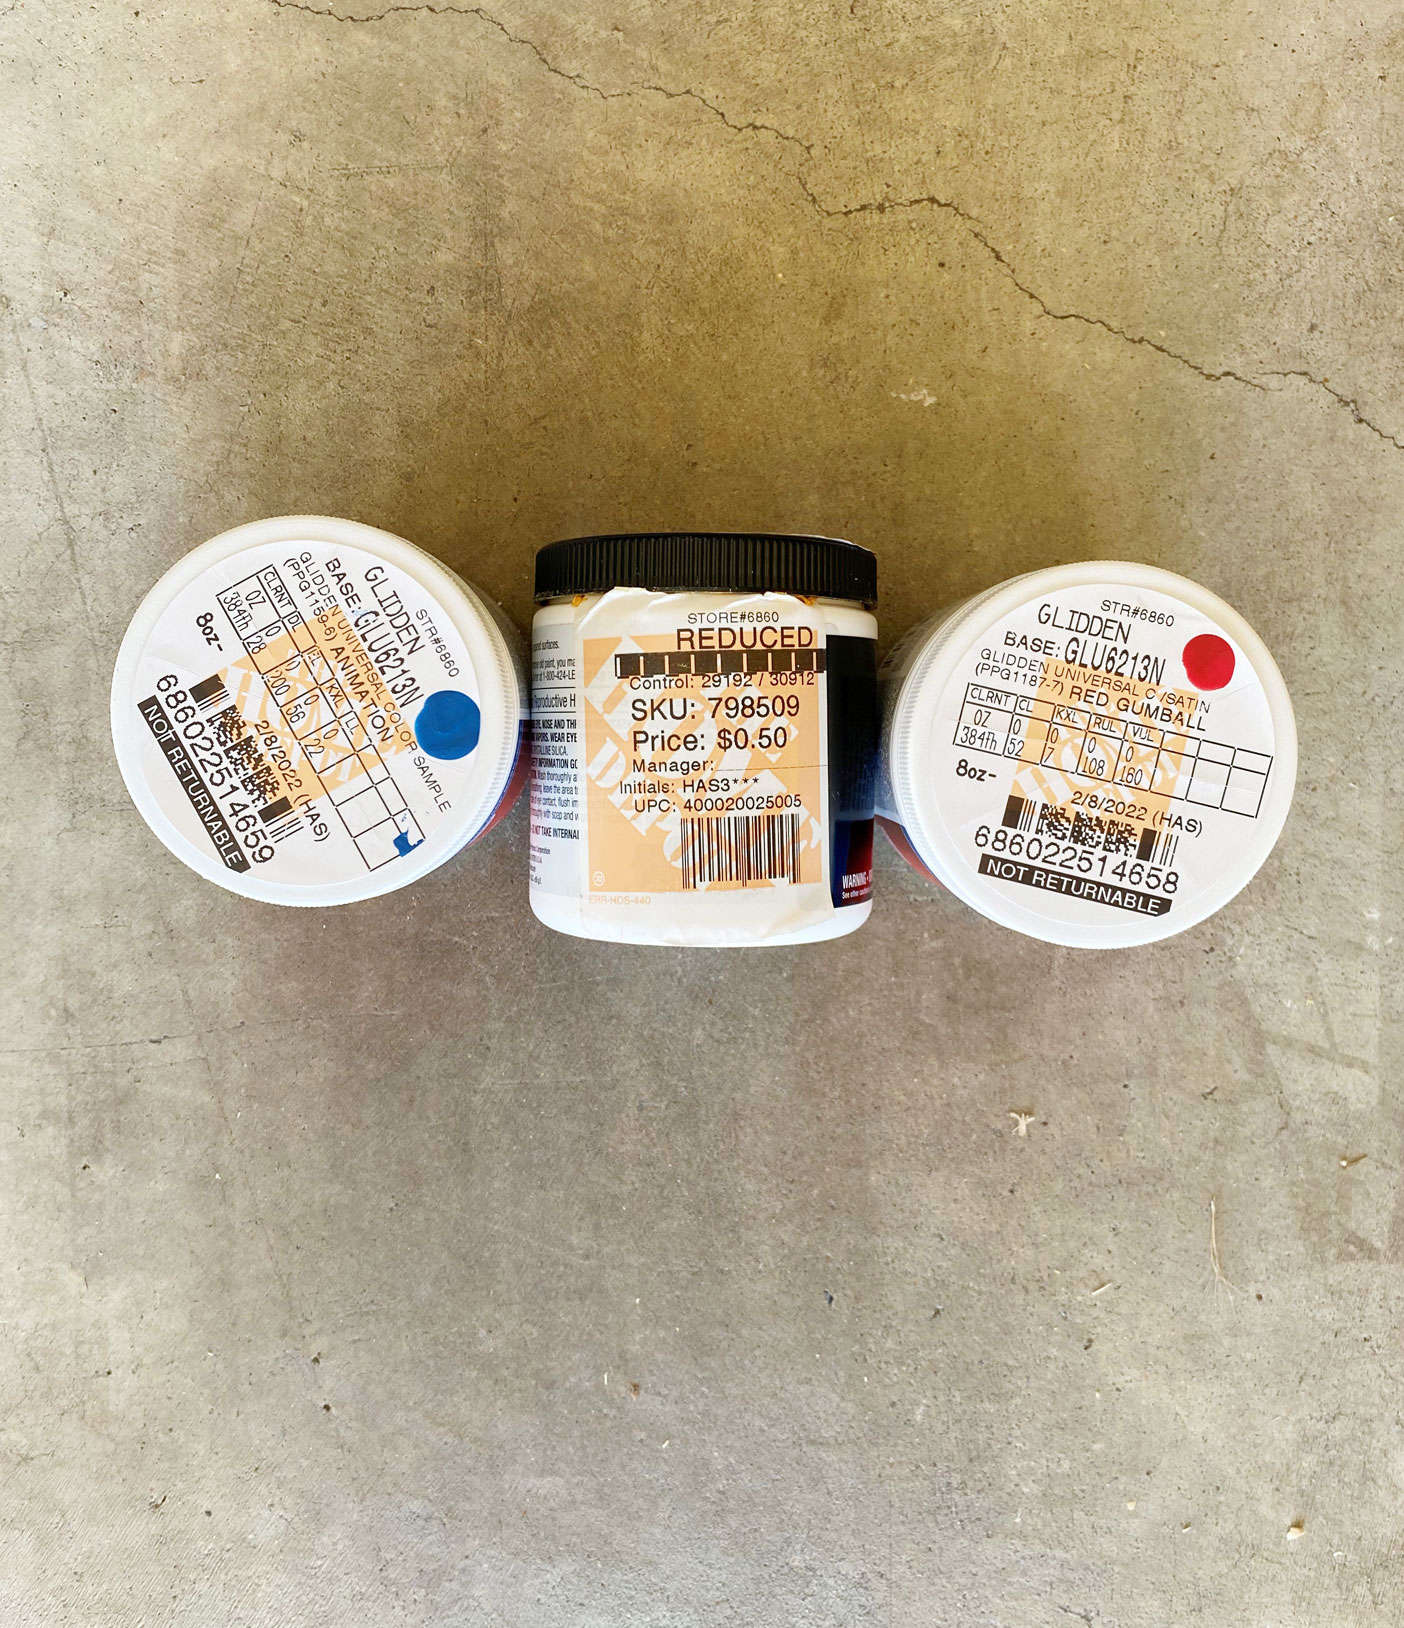
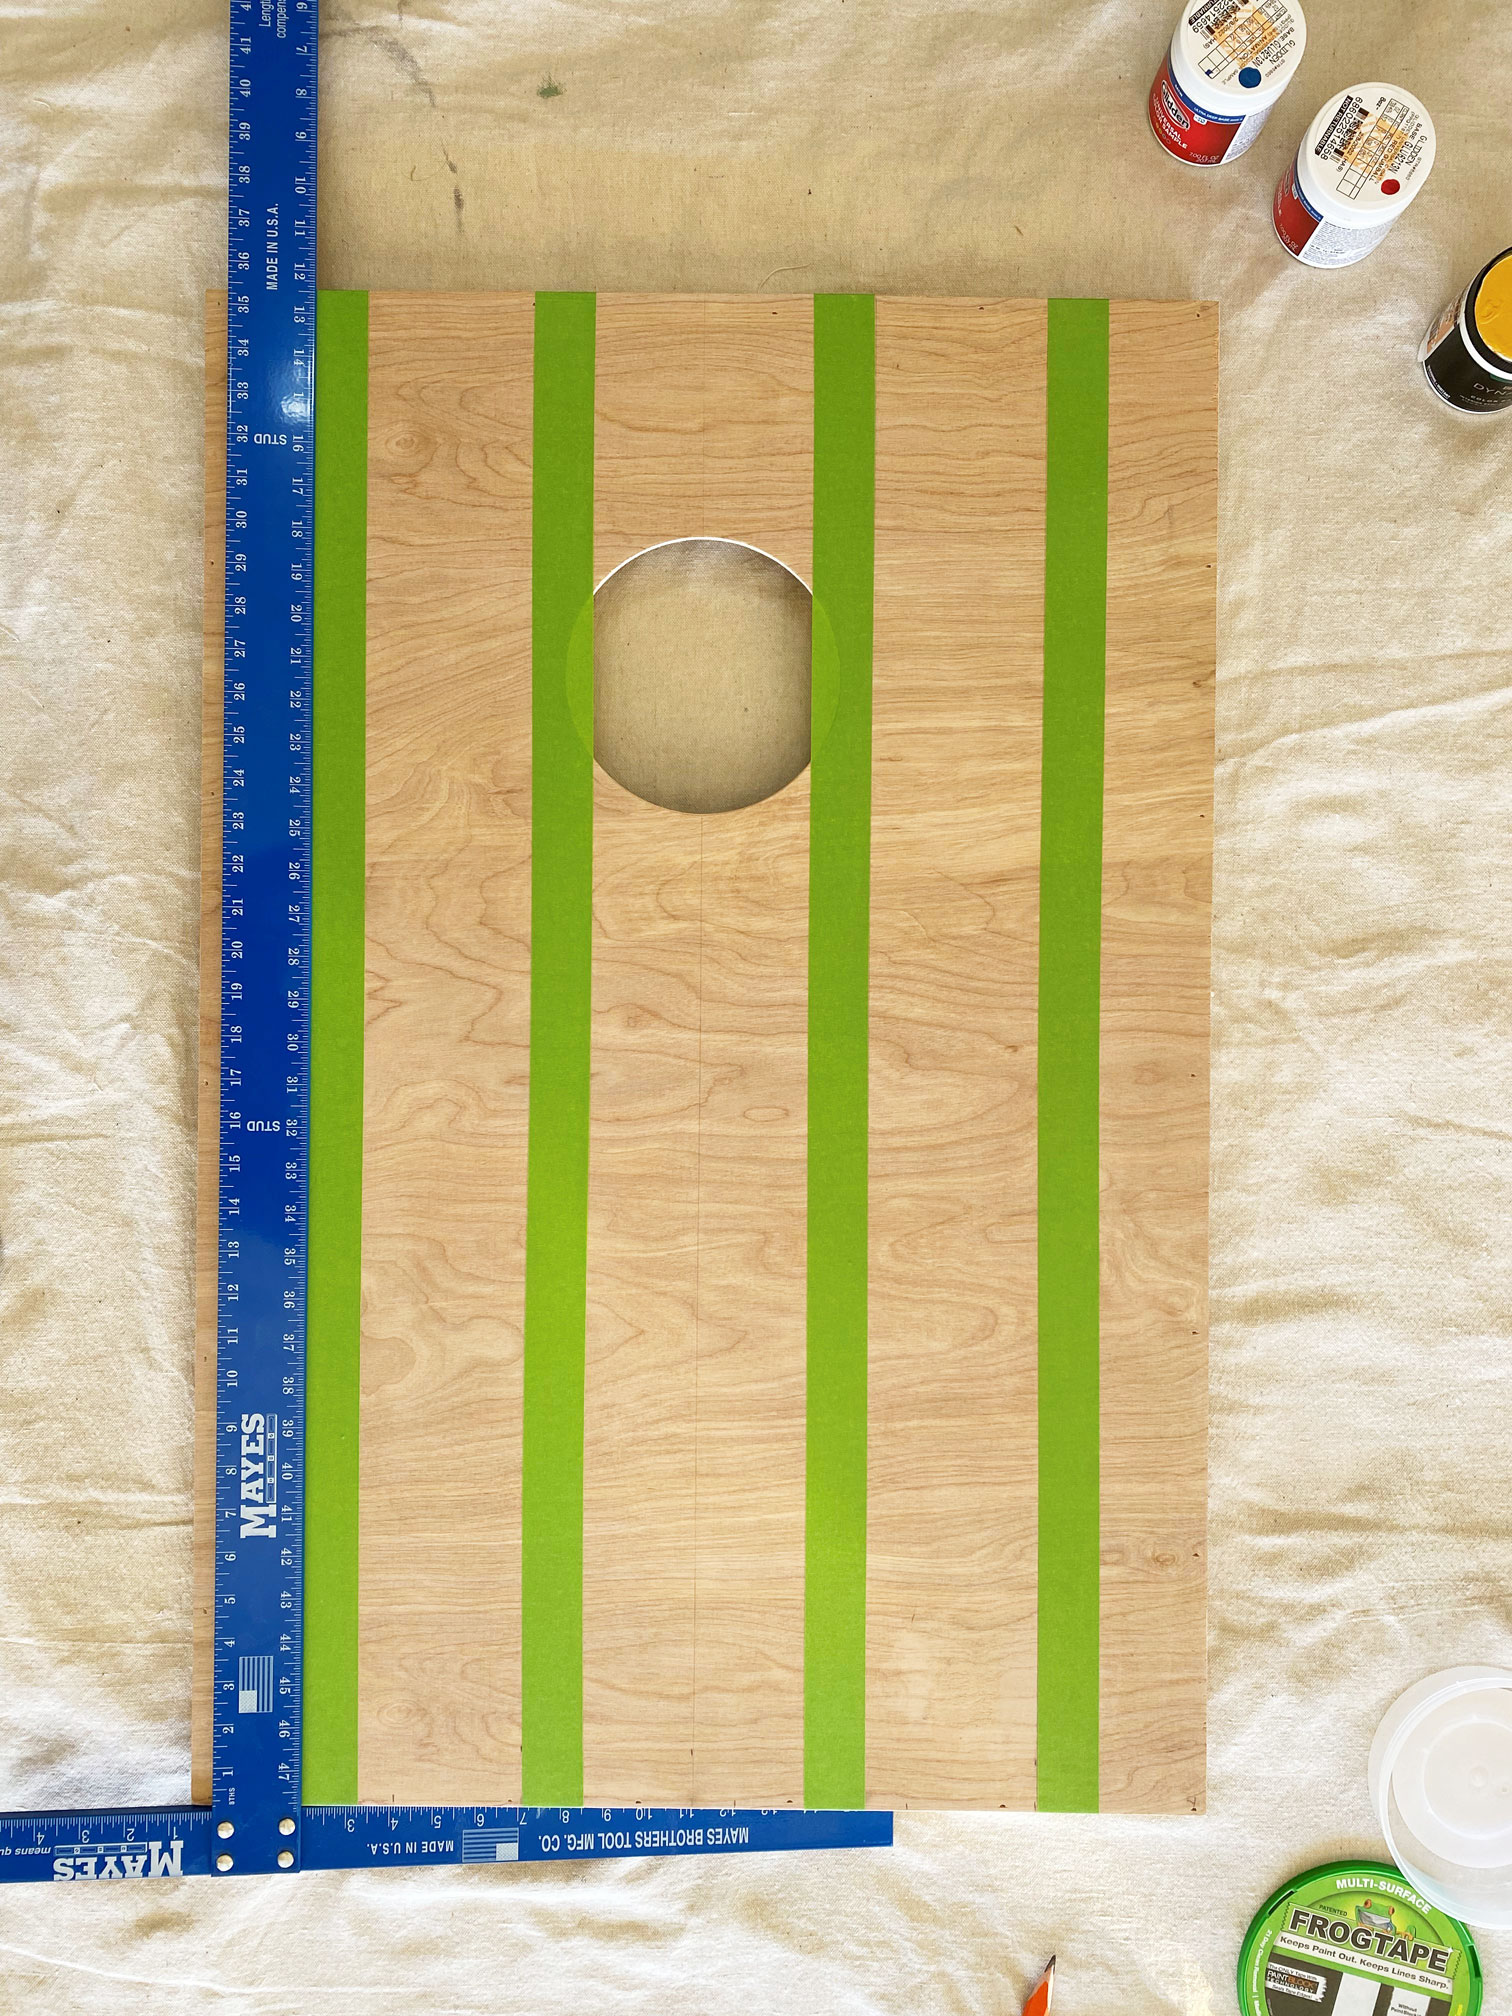
Now comes the fun part, the board can be painted per individual preference. If you don’t need much paint, samples can be requested from Home Depot for a nominal fee (paint in the clearance section can be madly discounted – and if you’re nice, it could be free). Our board was painted with bold colors using Frog Tape to create clean lines (i.e. no bleed). A 48″ drywall T-square can be an incredibly helpful guide.
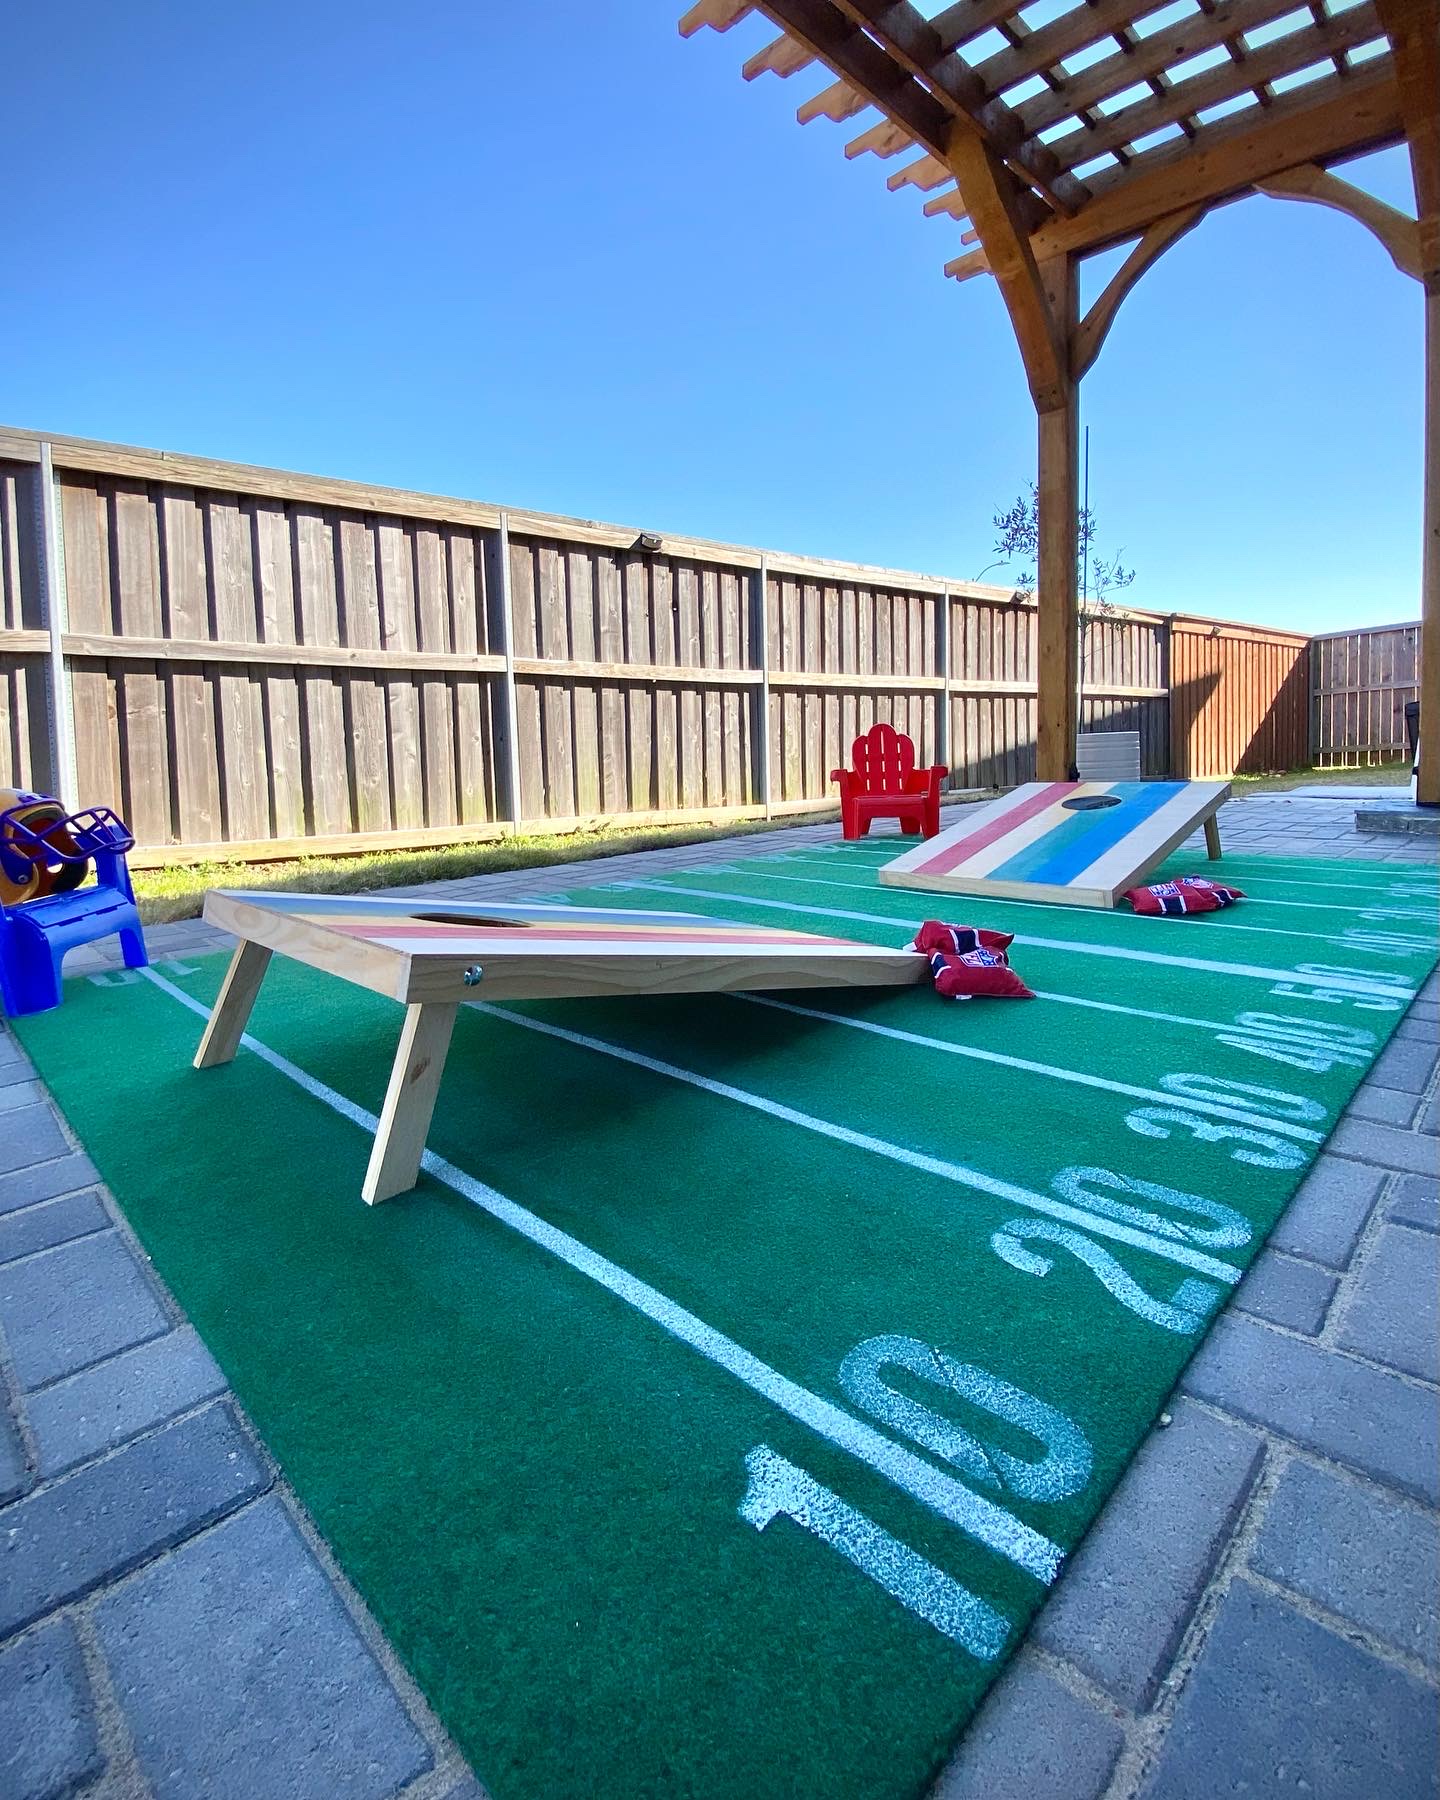
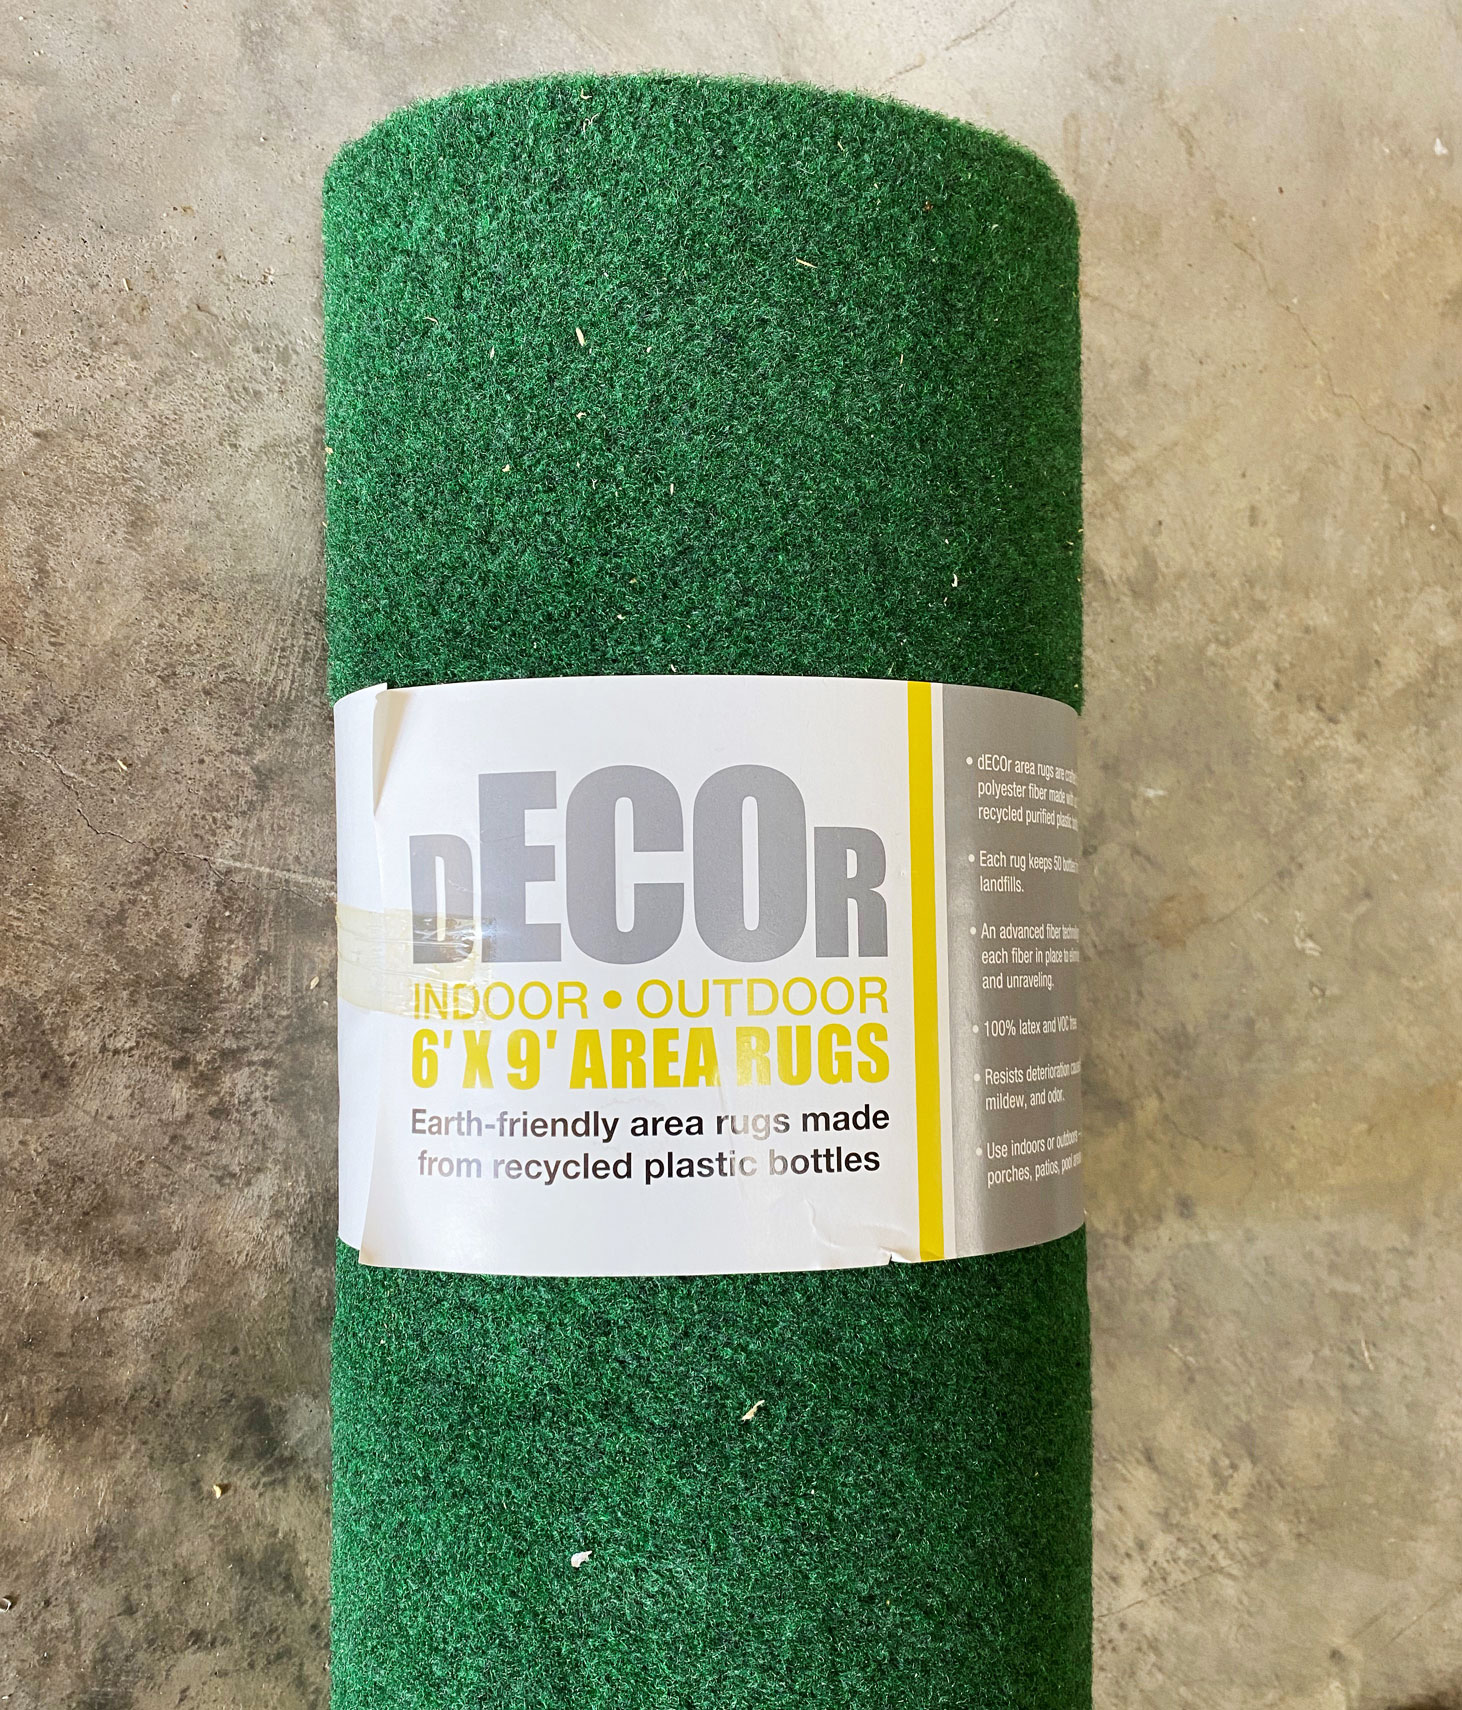
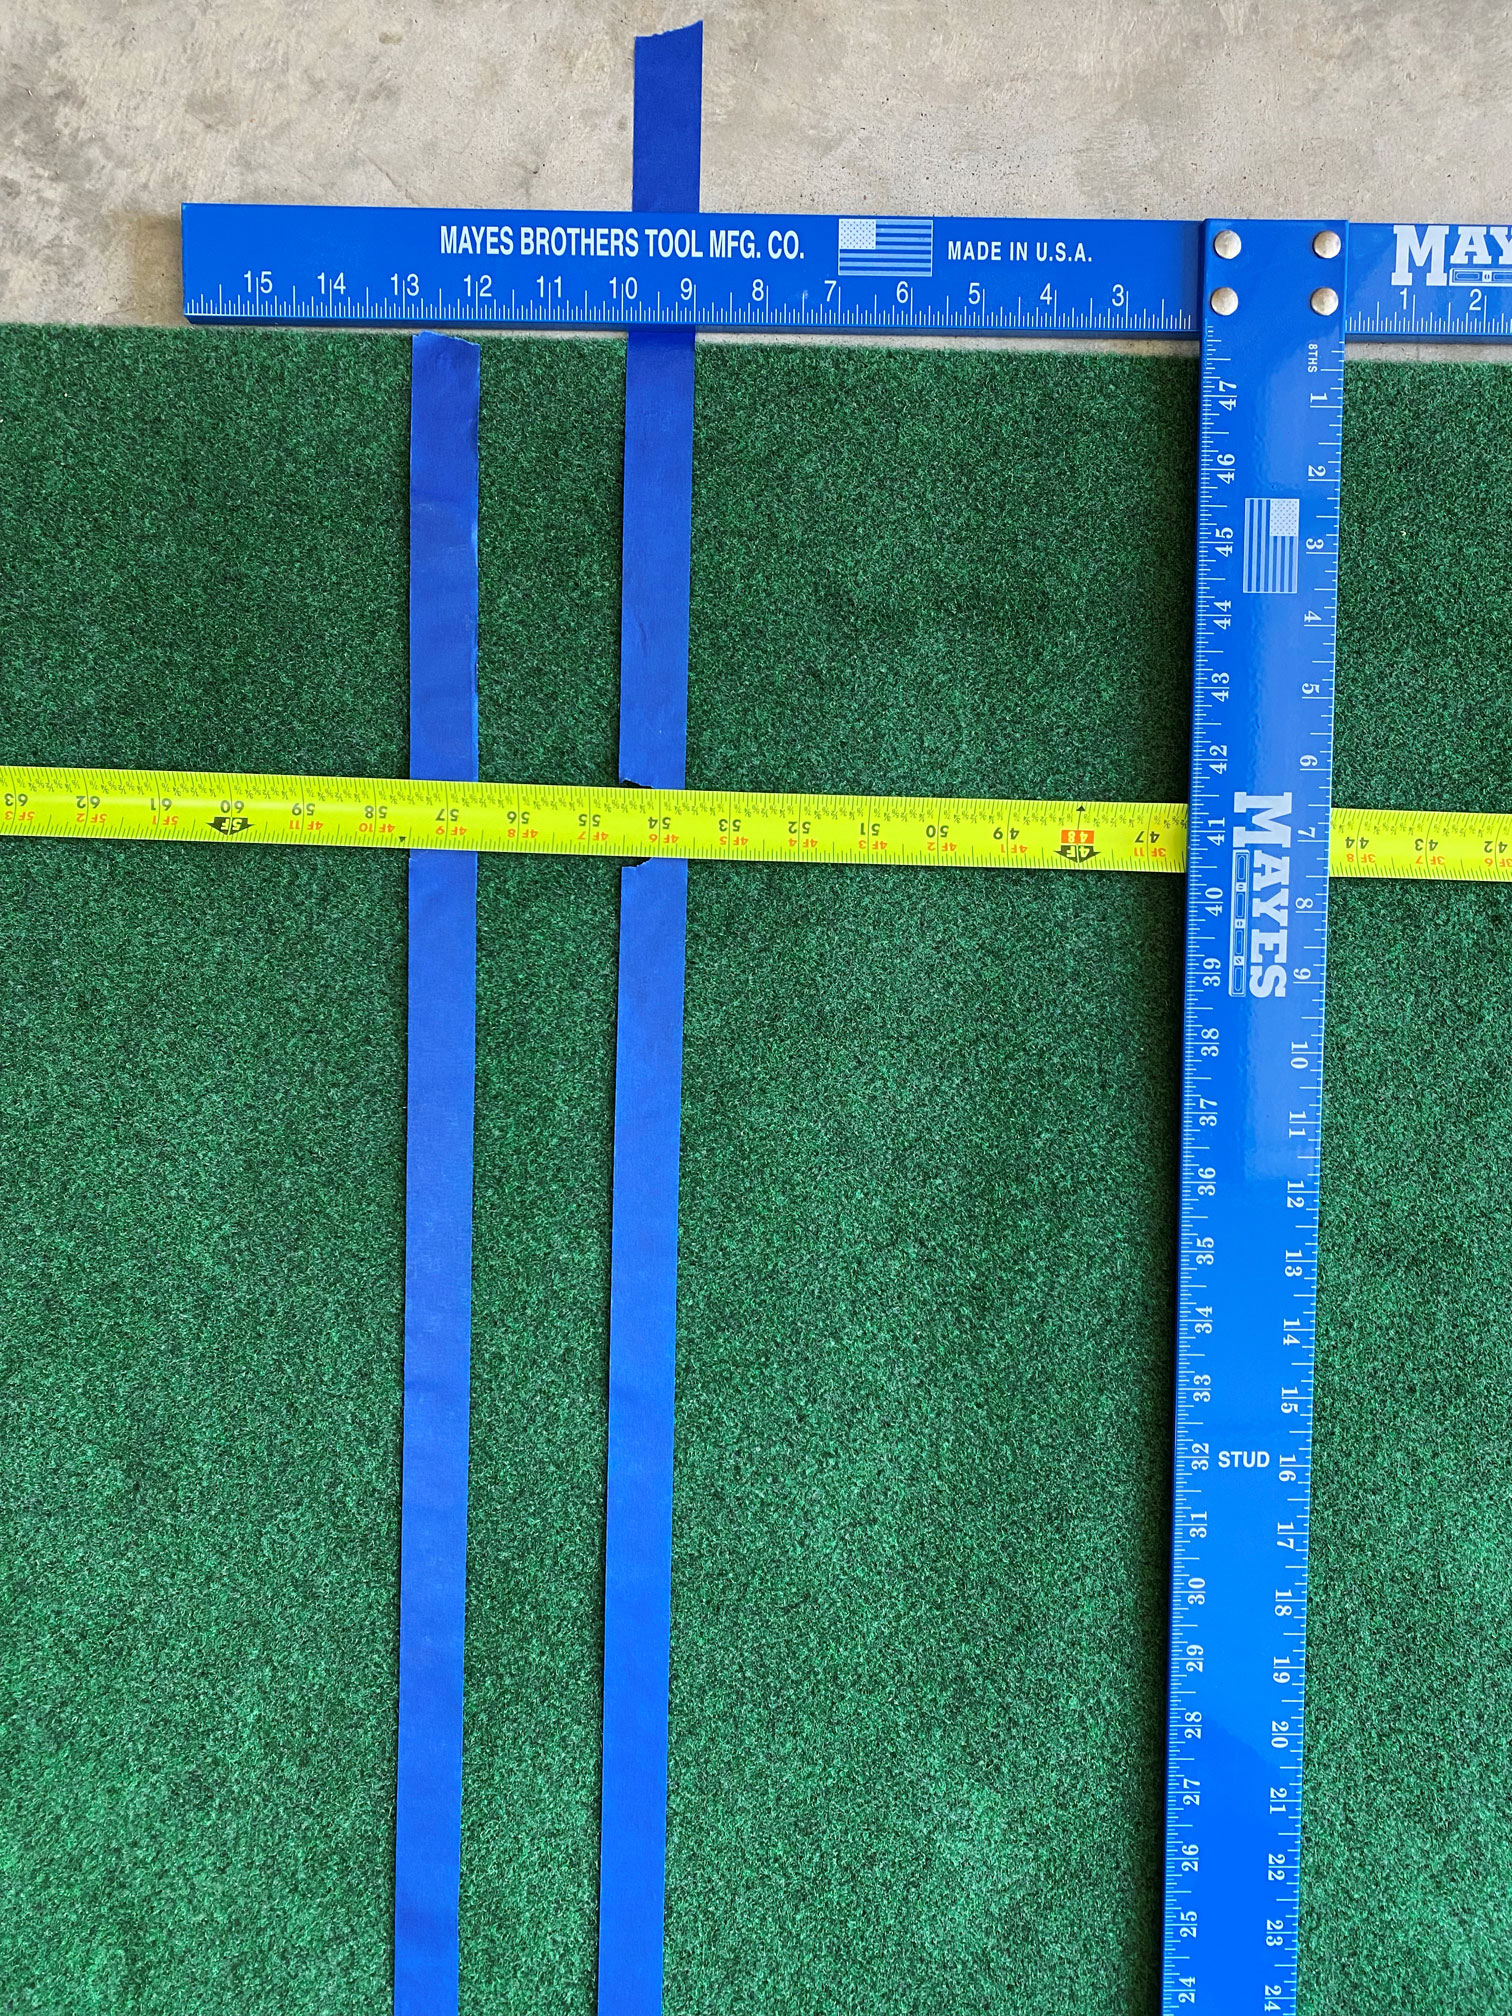
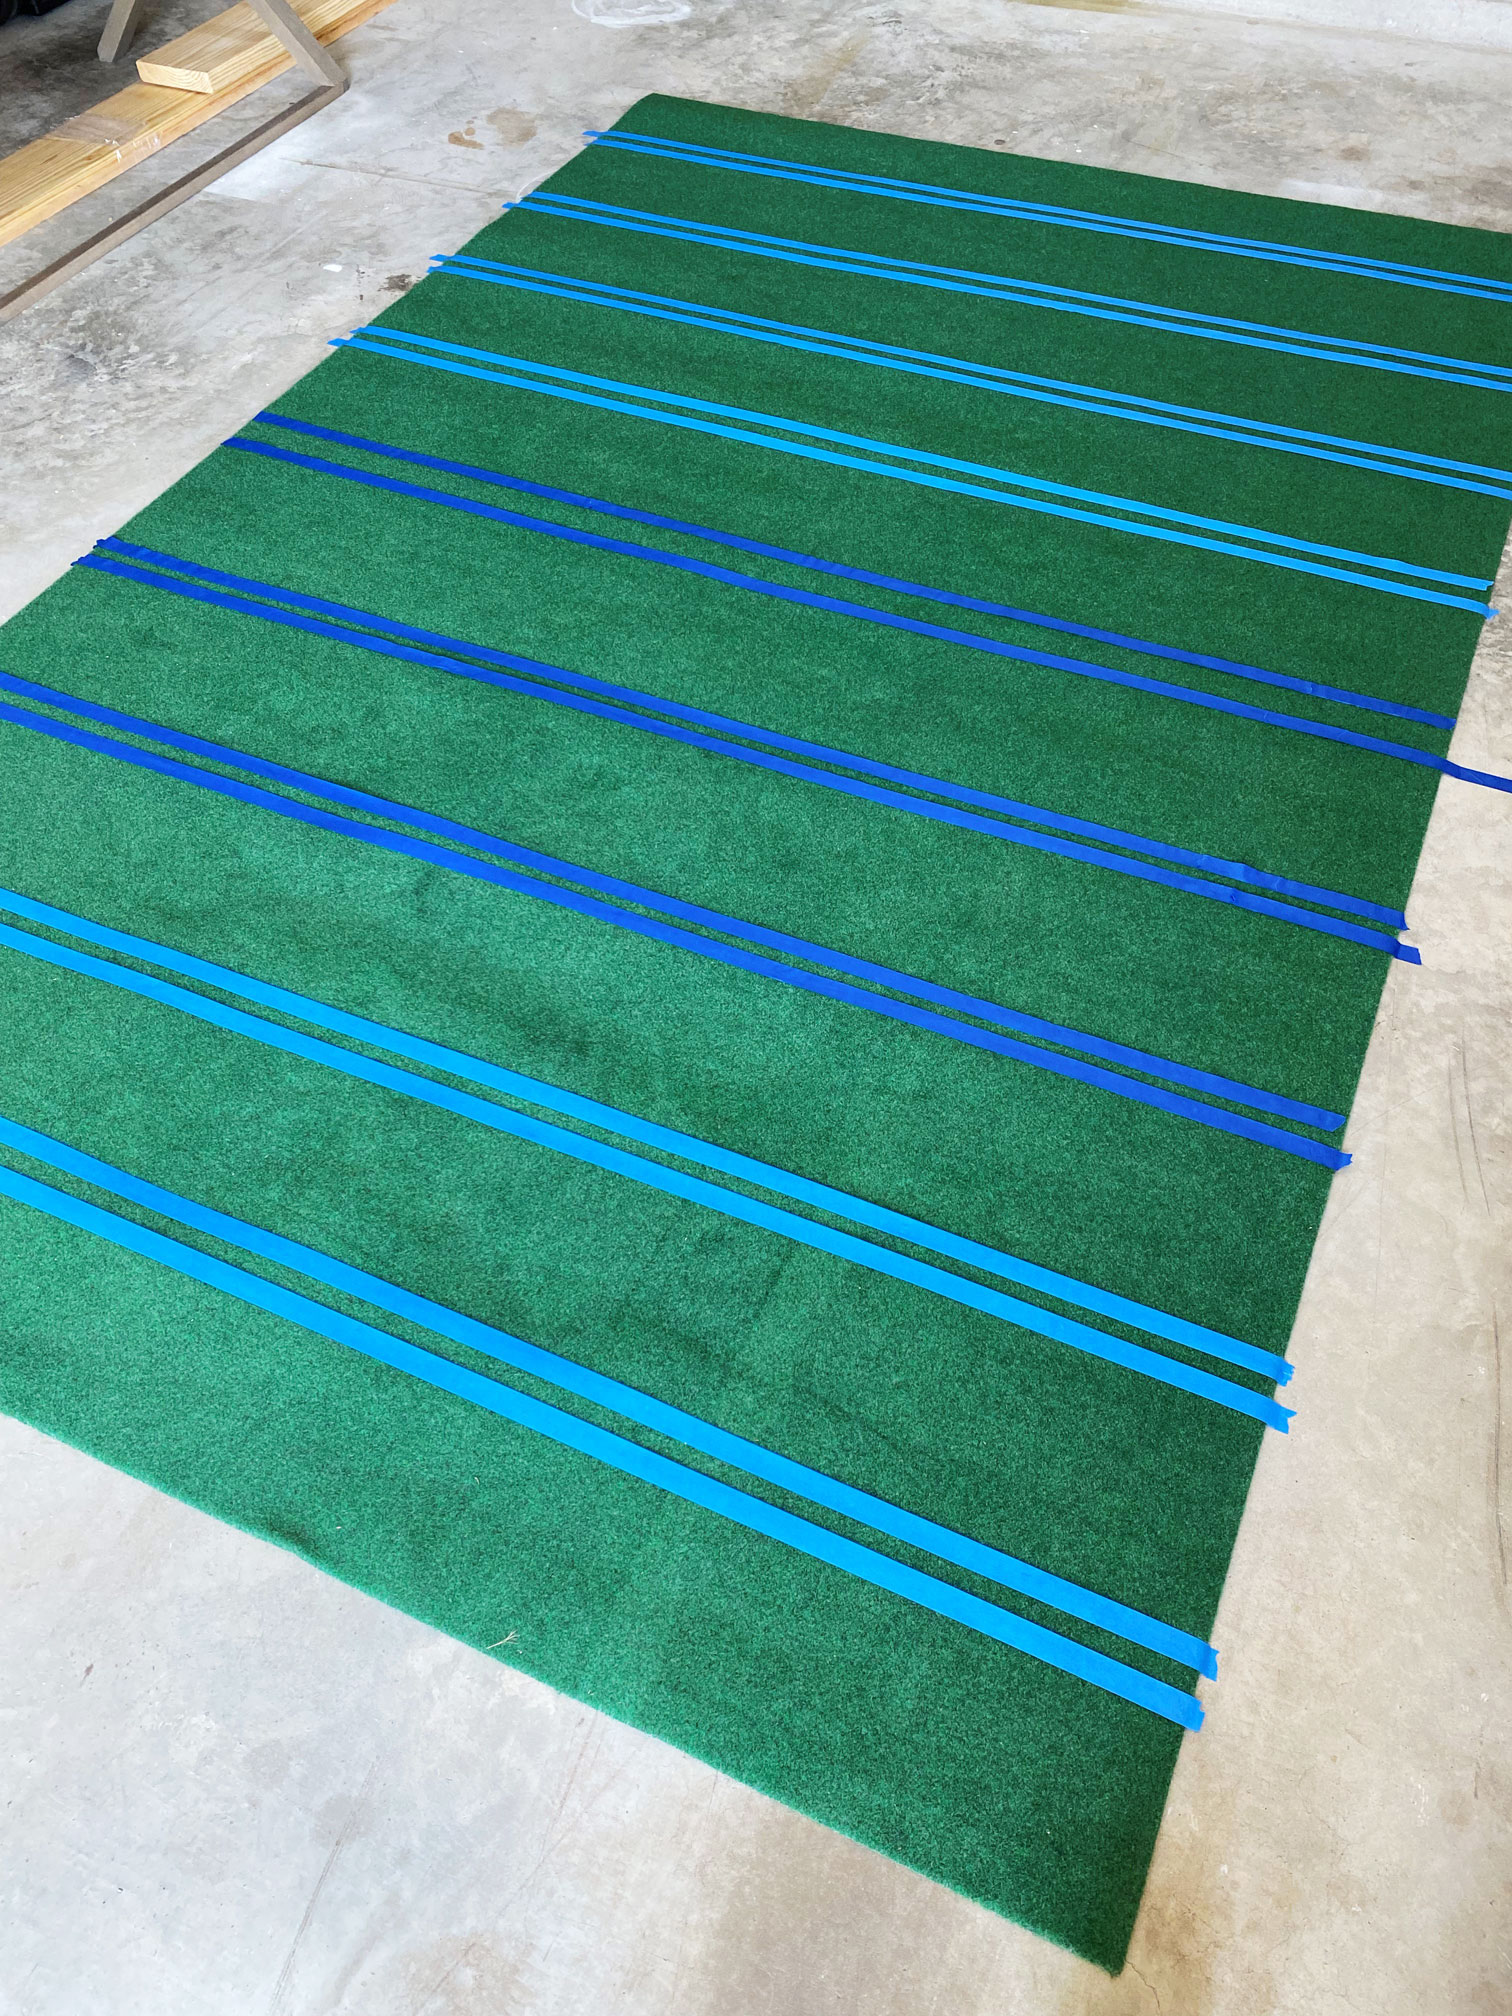
Field replica
An outdoor, rollable rug that looks like turf is the perfect way to achieve a playful football field. Ours was found at Costco, but Home Depot also sells a 6′ x 8′ from TrafficMaster.
AD: projects cost MONEY! That’s why we’ve put our trust in Discover Card Member Services – a reliable and secure line of credit with cashback that puts extra dollars back in our wallet. Get $50 dollars for enrolling with Discover Card as a new member. More dollars BACK IN YOUR WALLET! Special terms and conditions apply*.
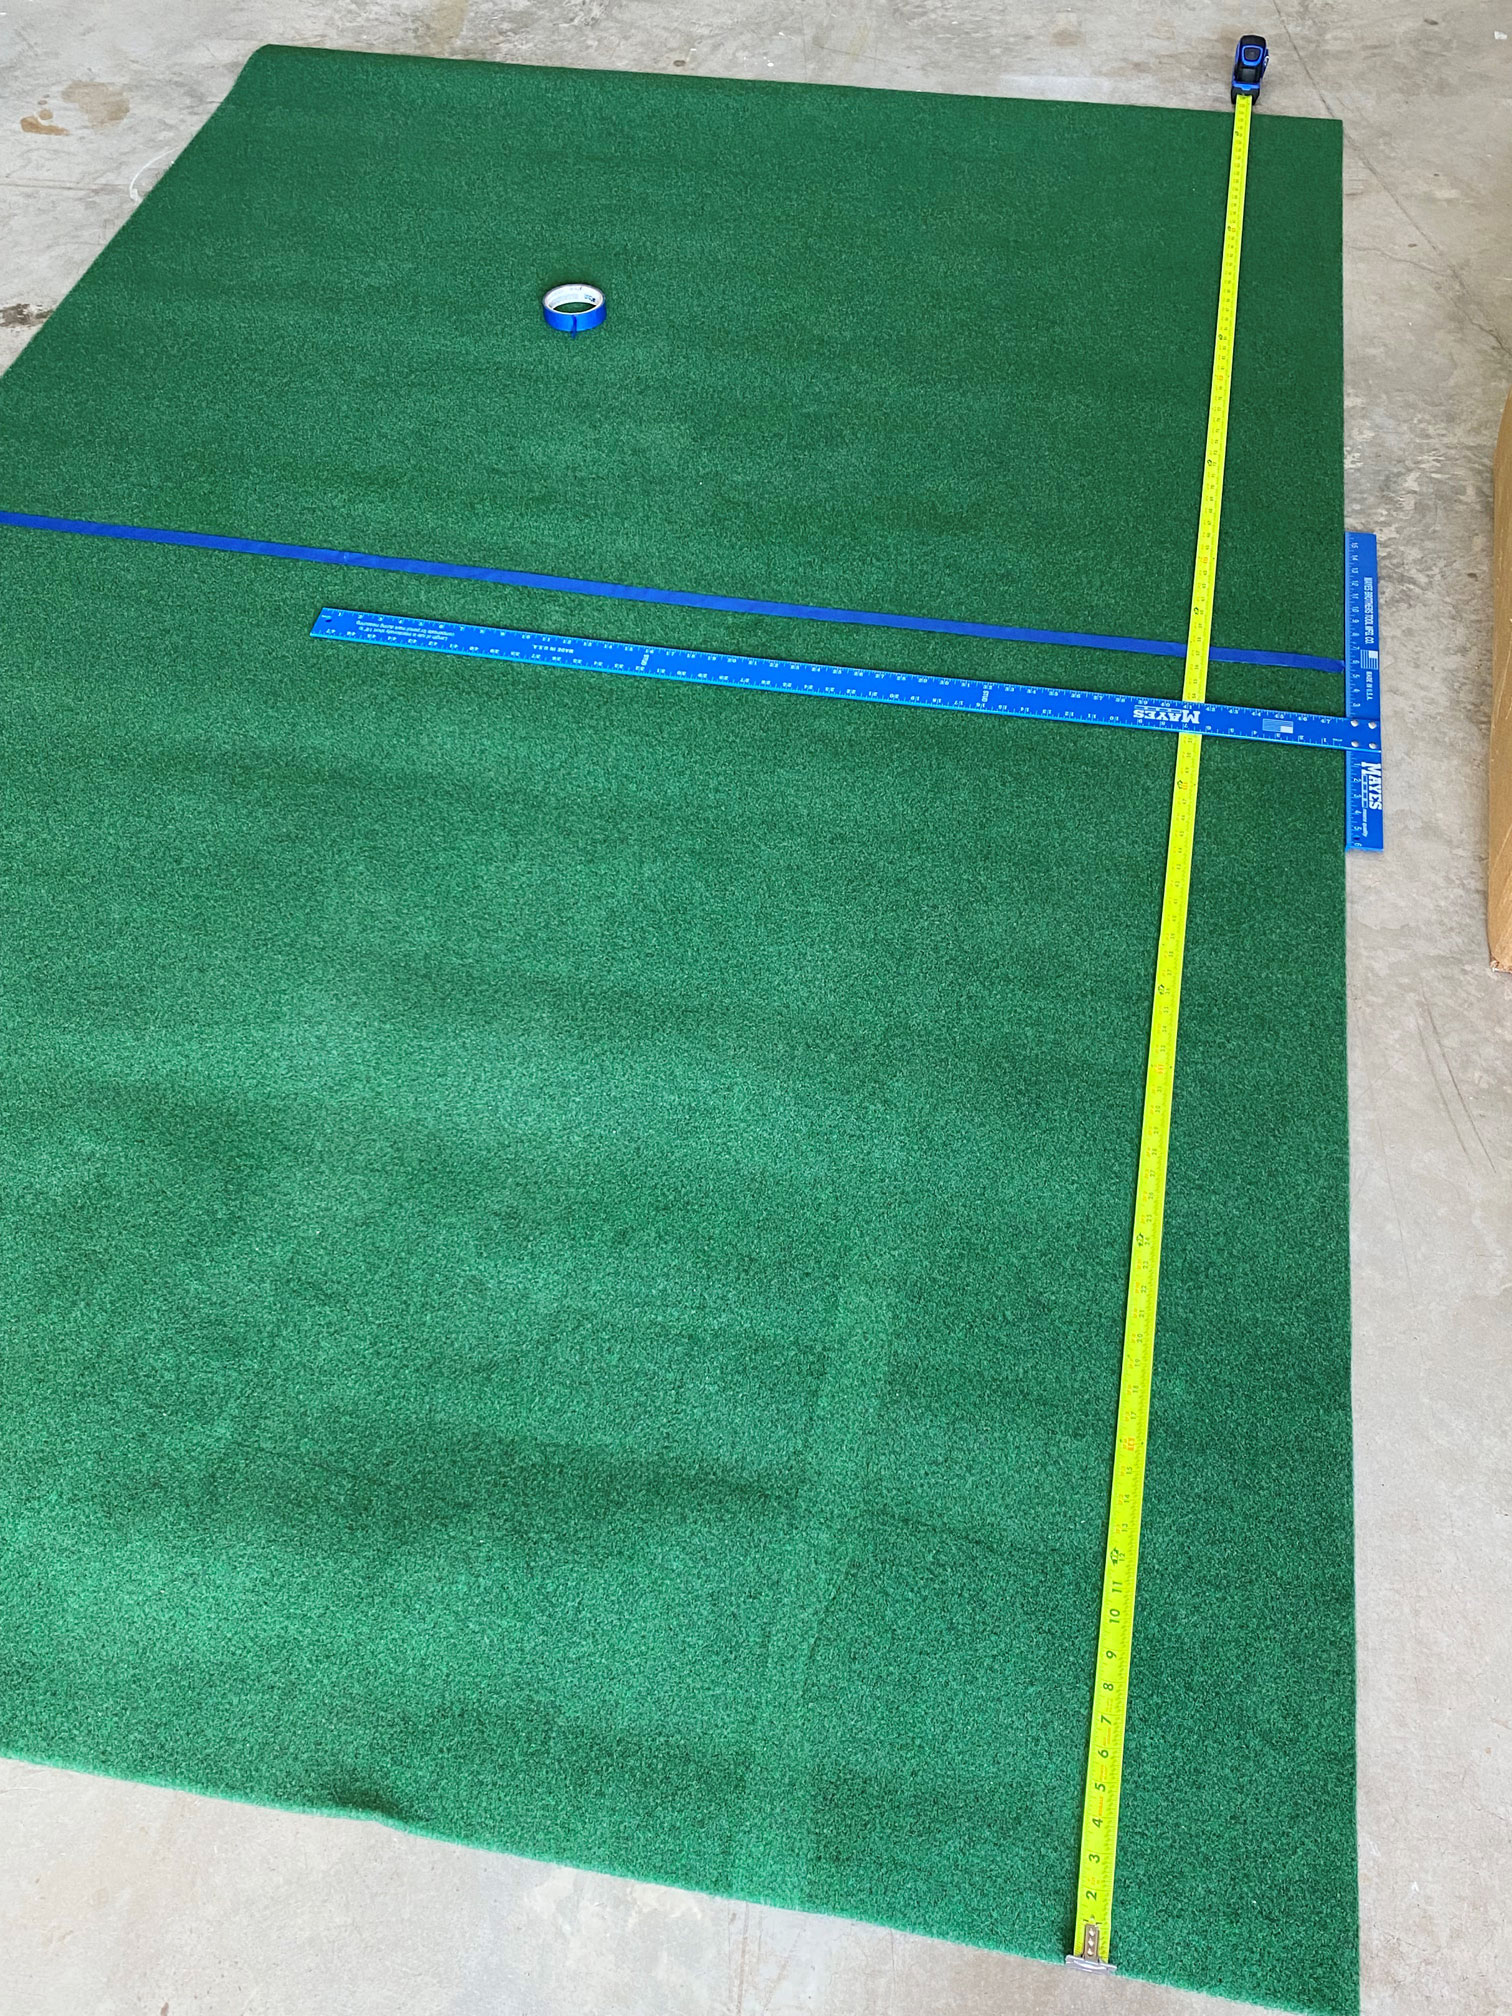
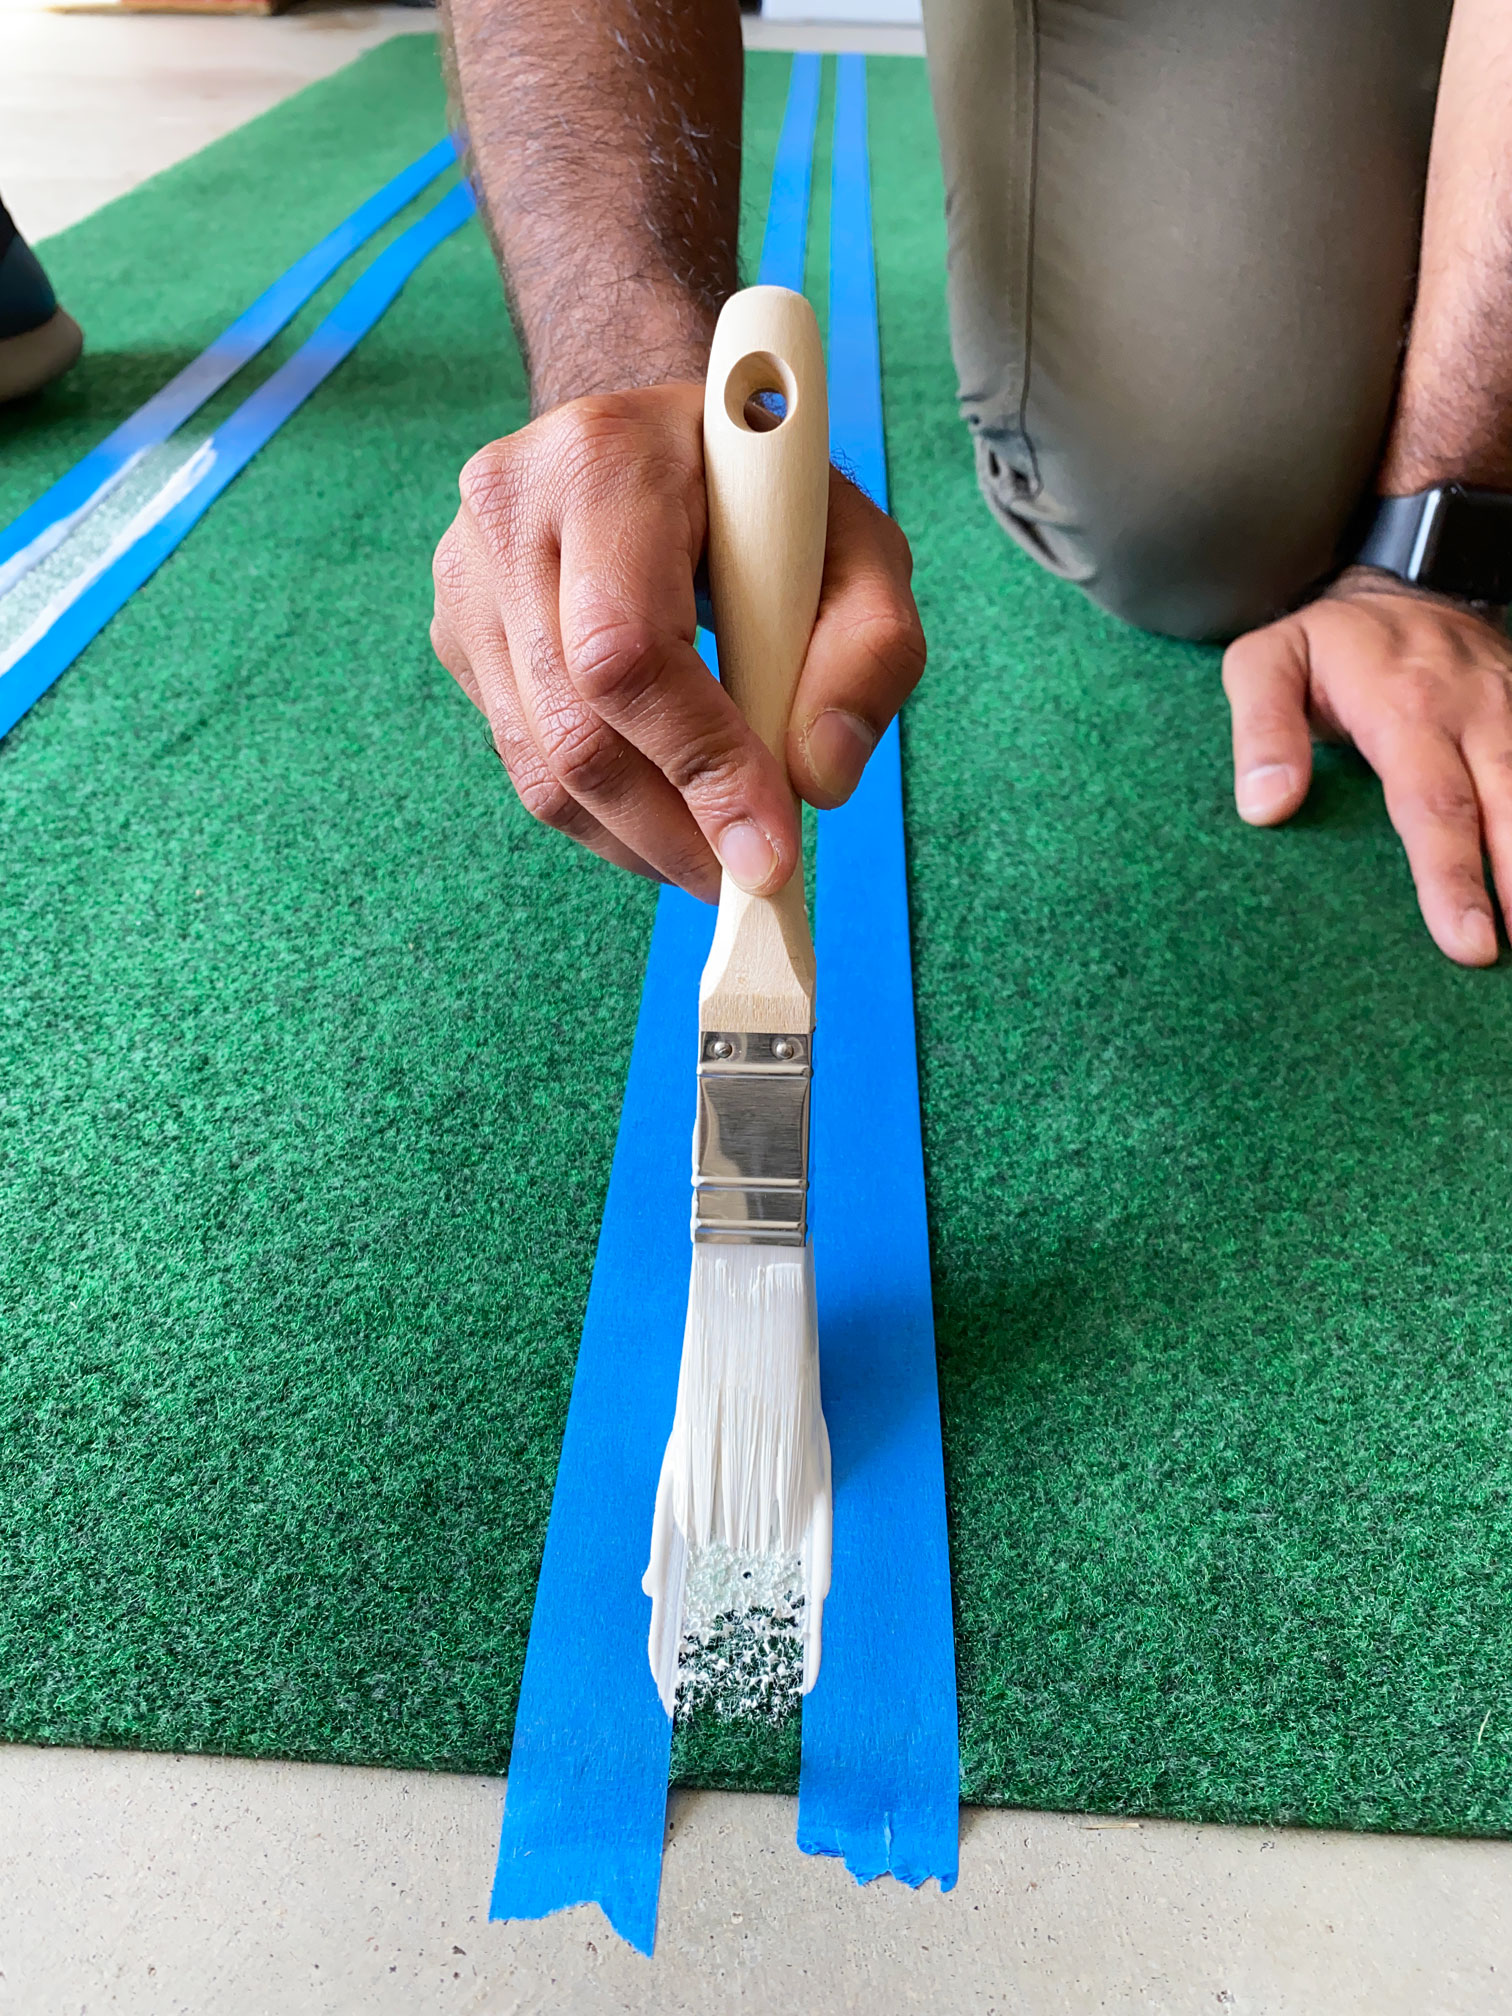
Again, using a drywall T-square, 9 equally spaced lines can be created. For the 50 yard line, a 2″ gap was created using masking tape or painters tape. The remaining lines were gapped off at 1″. We had access to unique Zibra paint brushes that eased painting obstacles. For example, the 2″ gap was filled with white paint using the 2″ chiseled wedge brush. The 1″ gap was filled with a 1″ square molding brush.
(Left over white primer was used, but exterior paint is suggested if this plans to remain outdoors)
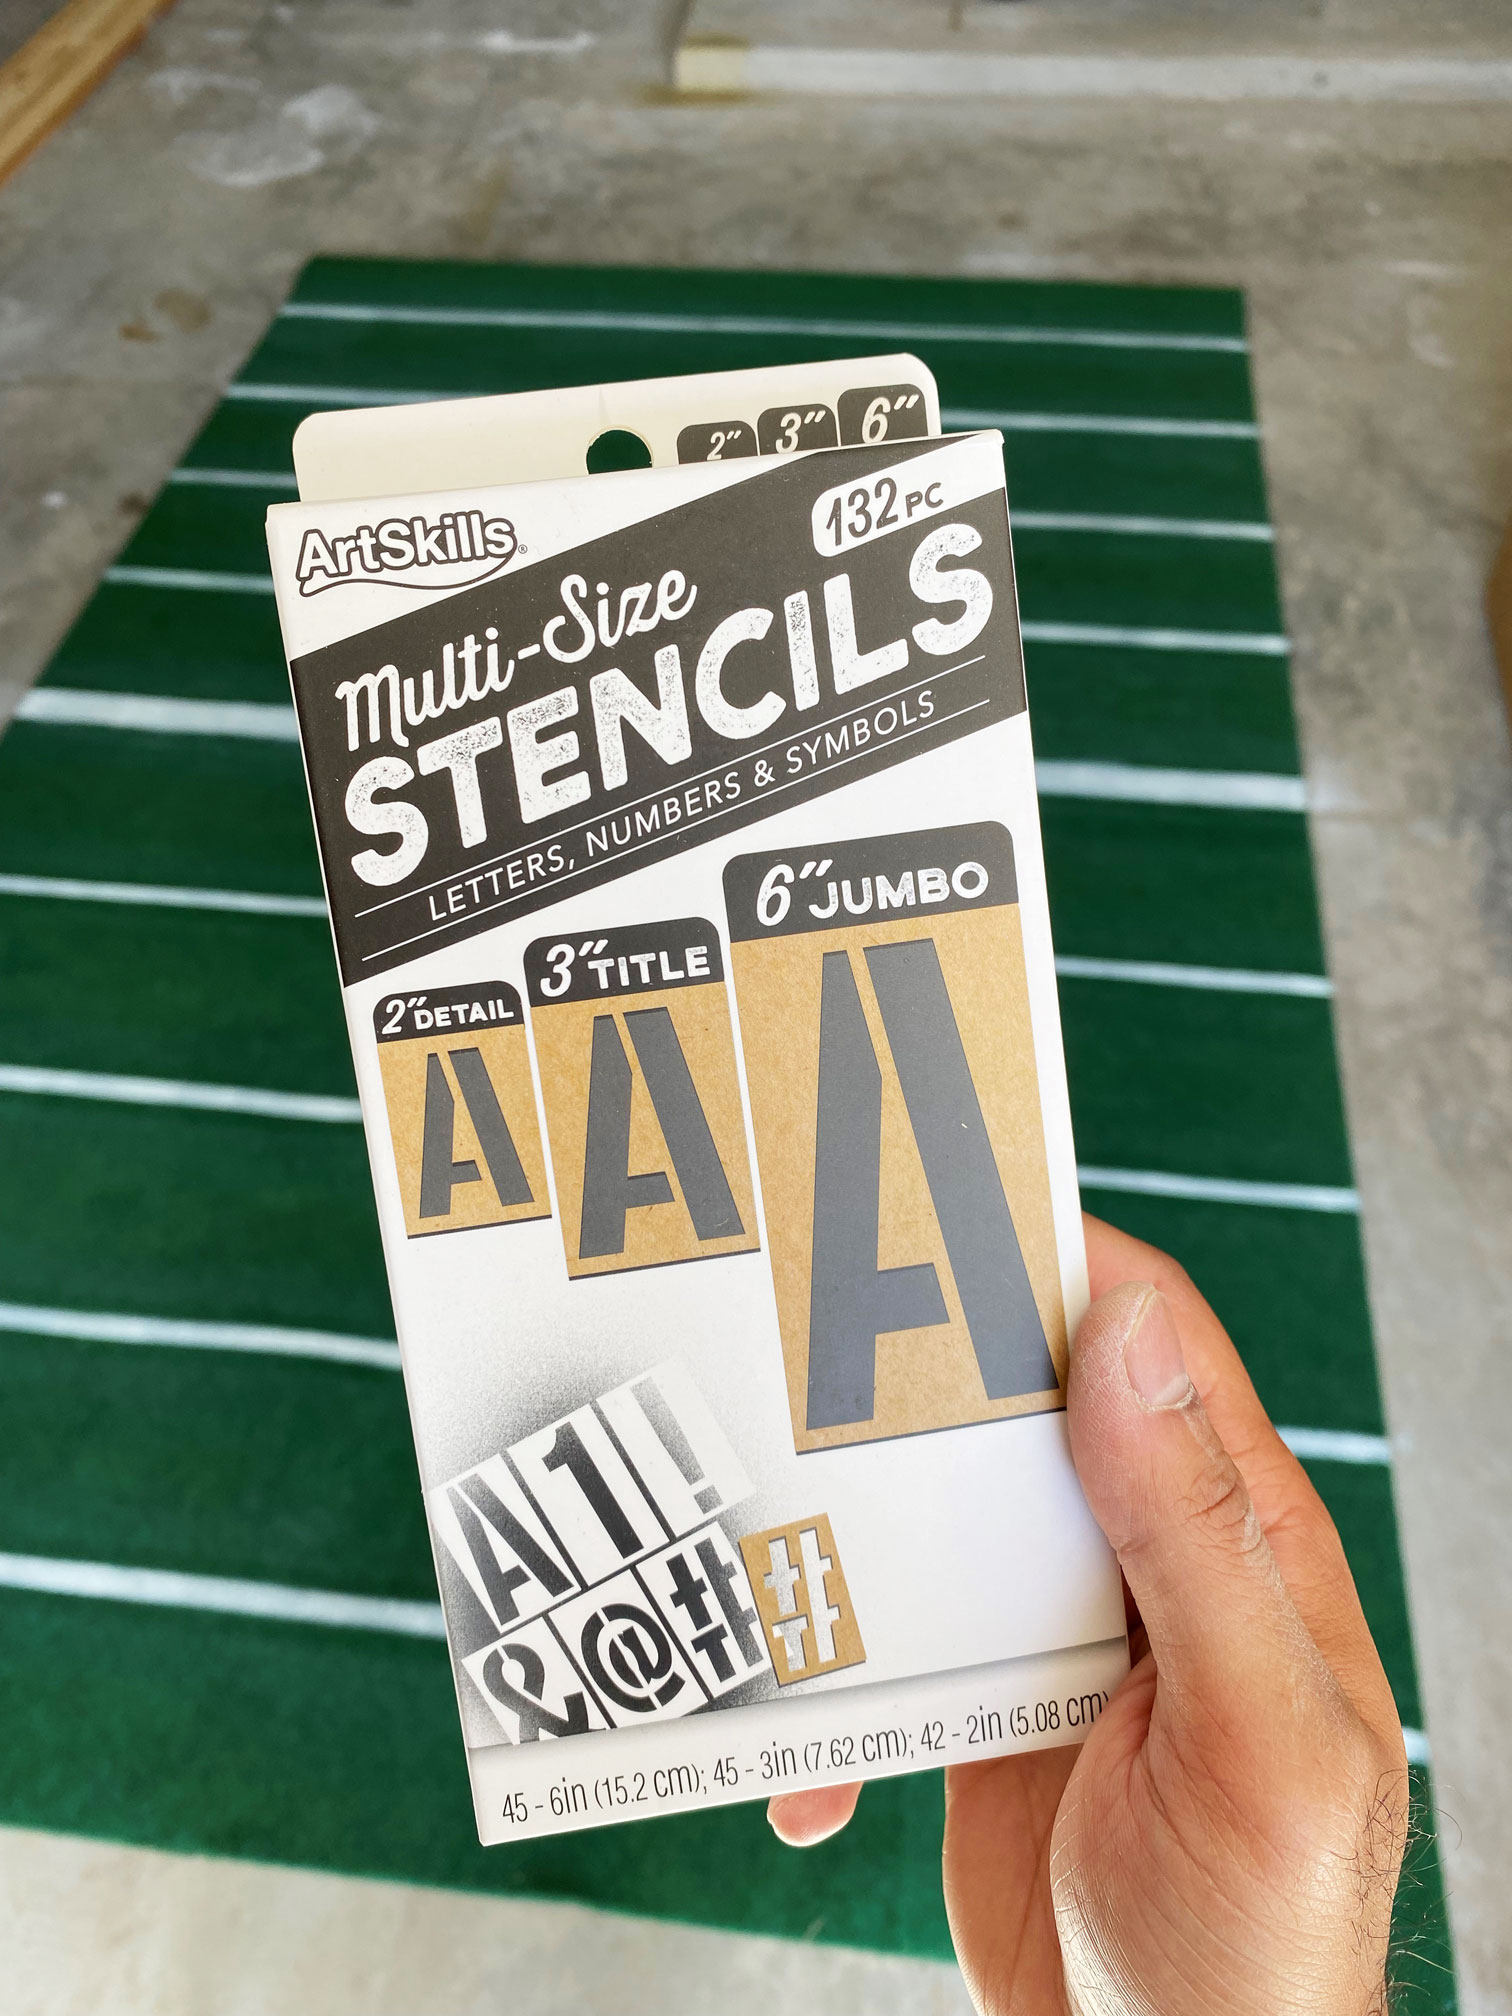
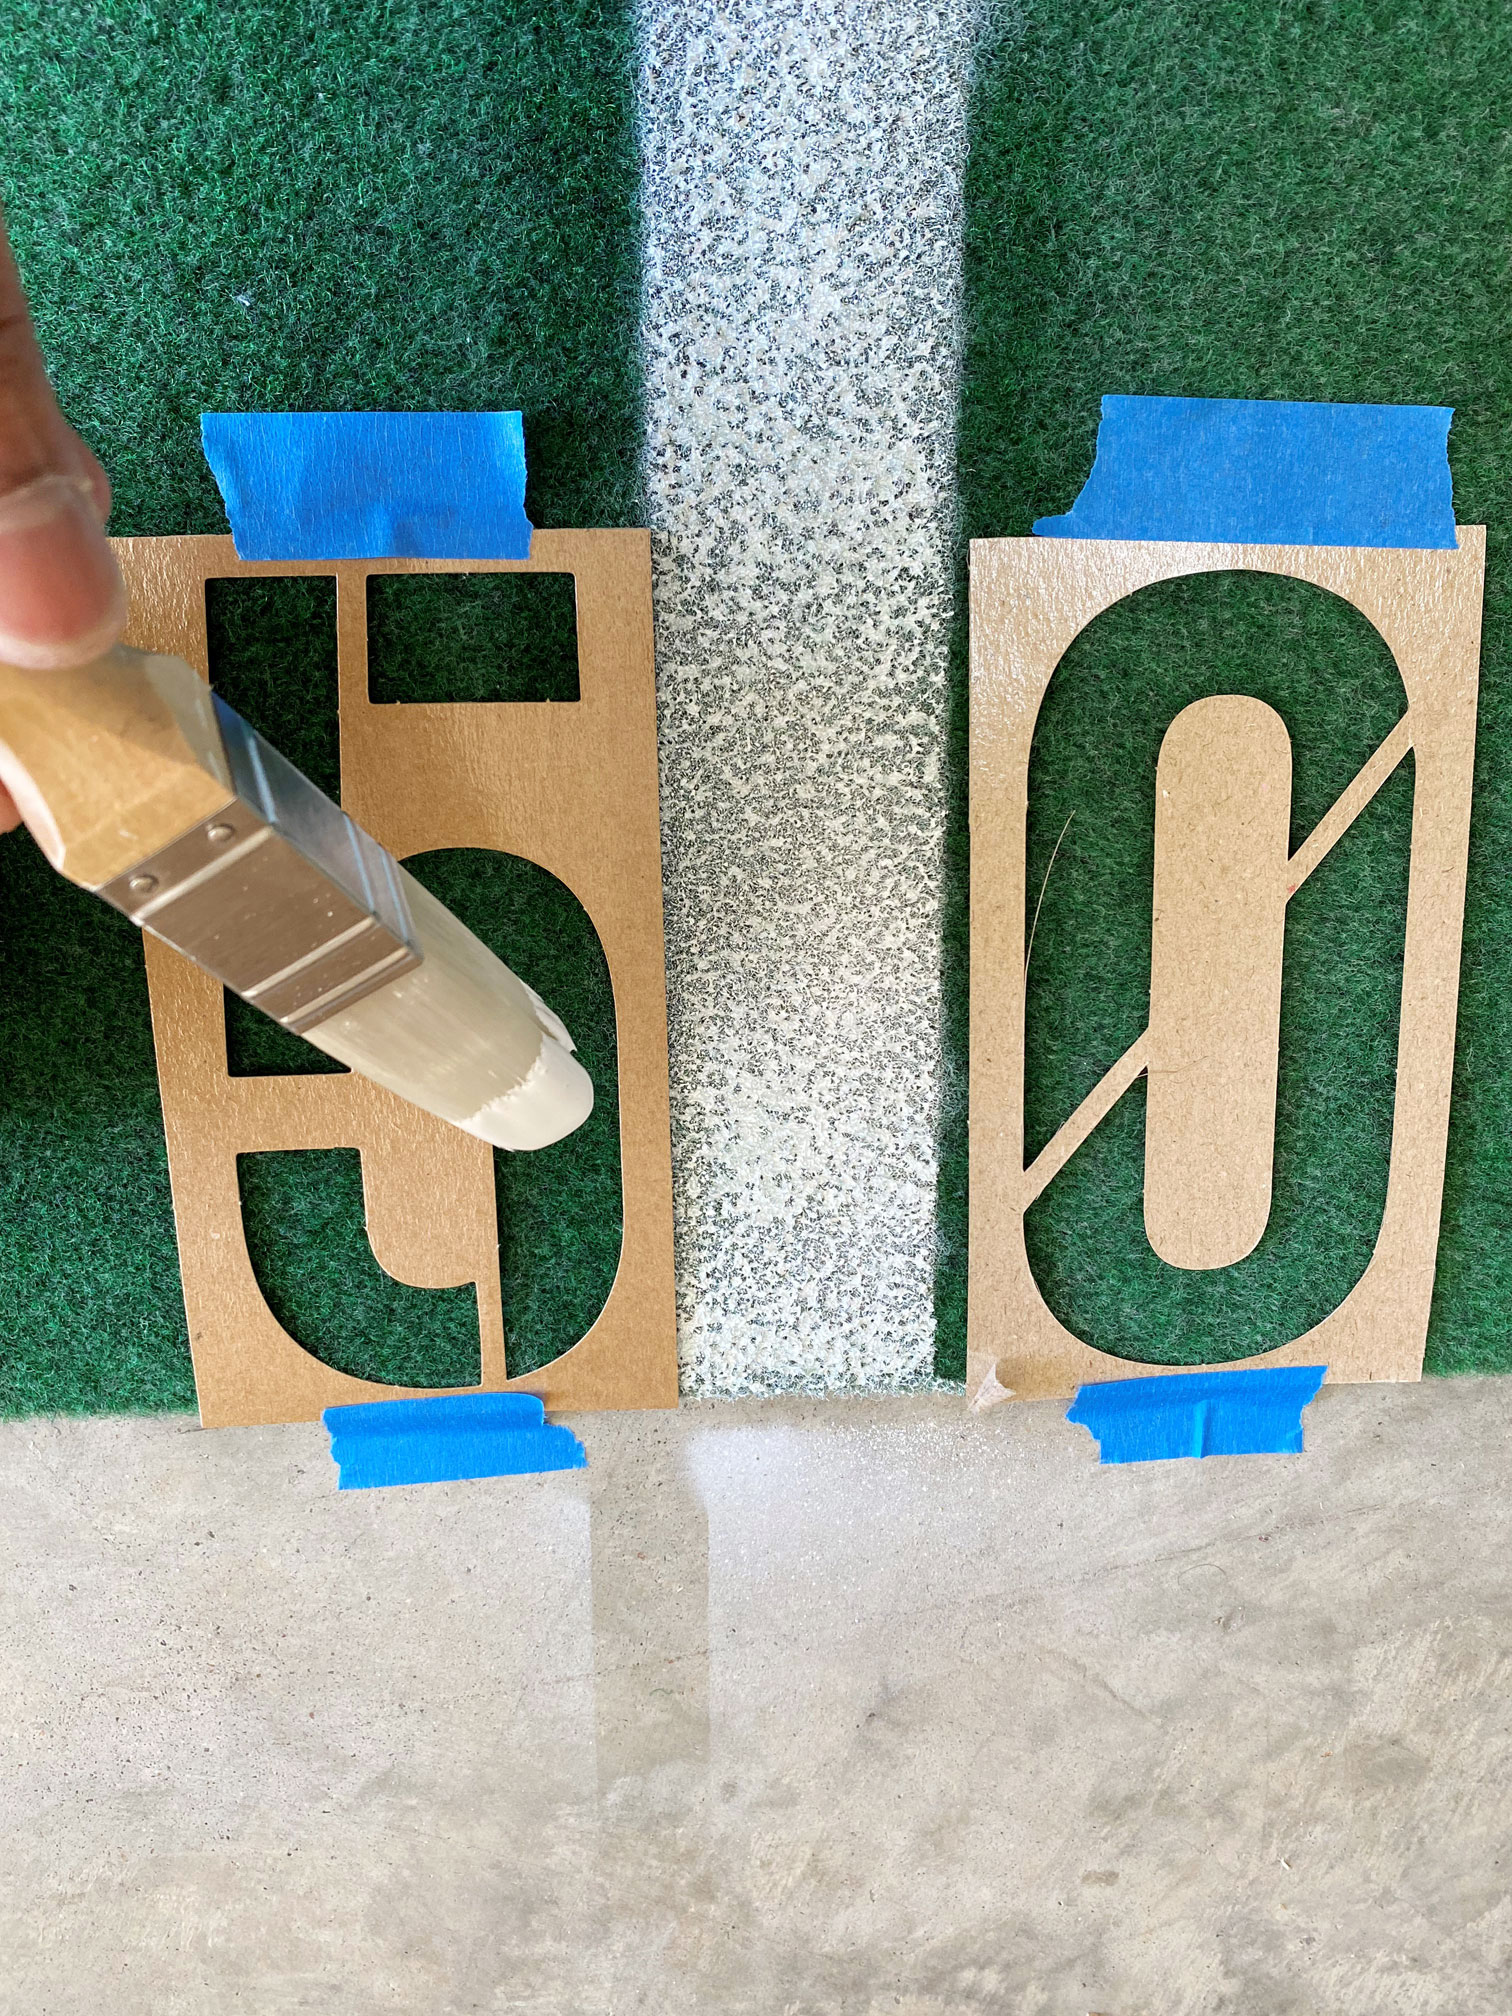
Collegiate stencils can be used to add numbers on the field (we found ours at Walmart). Use masking or painters tape to temporarily hold the number in place. Then paint away. The same numbers will be used repeatedly. Its kind of painstaking, but the desired results – a grungy, rugged feel seems worthwhile.
Although these instructions deviate from a regulation size board. This project is very flexible; my hope is that it inspires to creatively build your own set. What do you think? What improvements might you make?
As always, send us any questions and don’t forget to follow our Instagram stories!
*Build-to-Made is not responsible for third party offers or websites. In rare instances, we receive a very, very small (I mean small) referral bonus that helps run this blog. We typically do not recommend products or services unless we think it will be worth it. But sometimes, even companies falter. That being said, please responsibly read all of the terms and conditions prior to purchase or service activation.