It’s been a busy week, but we’re jumping right into week 2 of the challenge. Don’t hold your breath. It’s DEMO DAY (which really just means moving everything out and tearing down builder grade built-in shelves). In case you missed it, week 1.
A big SHOUT OUT to the One Room Challenge! We’ve already connected with so many TALENTED folks and we’re all smiles down here :).

If you came here from the ORC site, hello! I’m Sanju Patel. By day, I work behind a desk, typically crunching numbers. By night, you can find me in a garage. My wife and I purchased a home in Texas 2 years ago – a quick close without costly bells and whistles. As lifelong fans of DIY, we’ve decided to invest into our home as our family grows with an open invitation to see our process from start to finish.
Where did all of our stuff disappear? Luckily we have an unused room that serves as our storage (for now that is). How many different types of fabric softener does one must have?
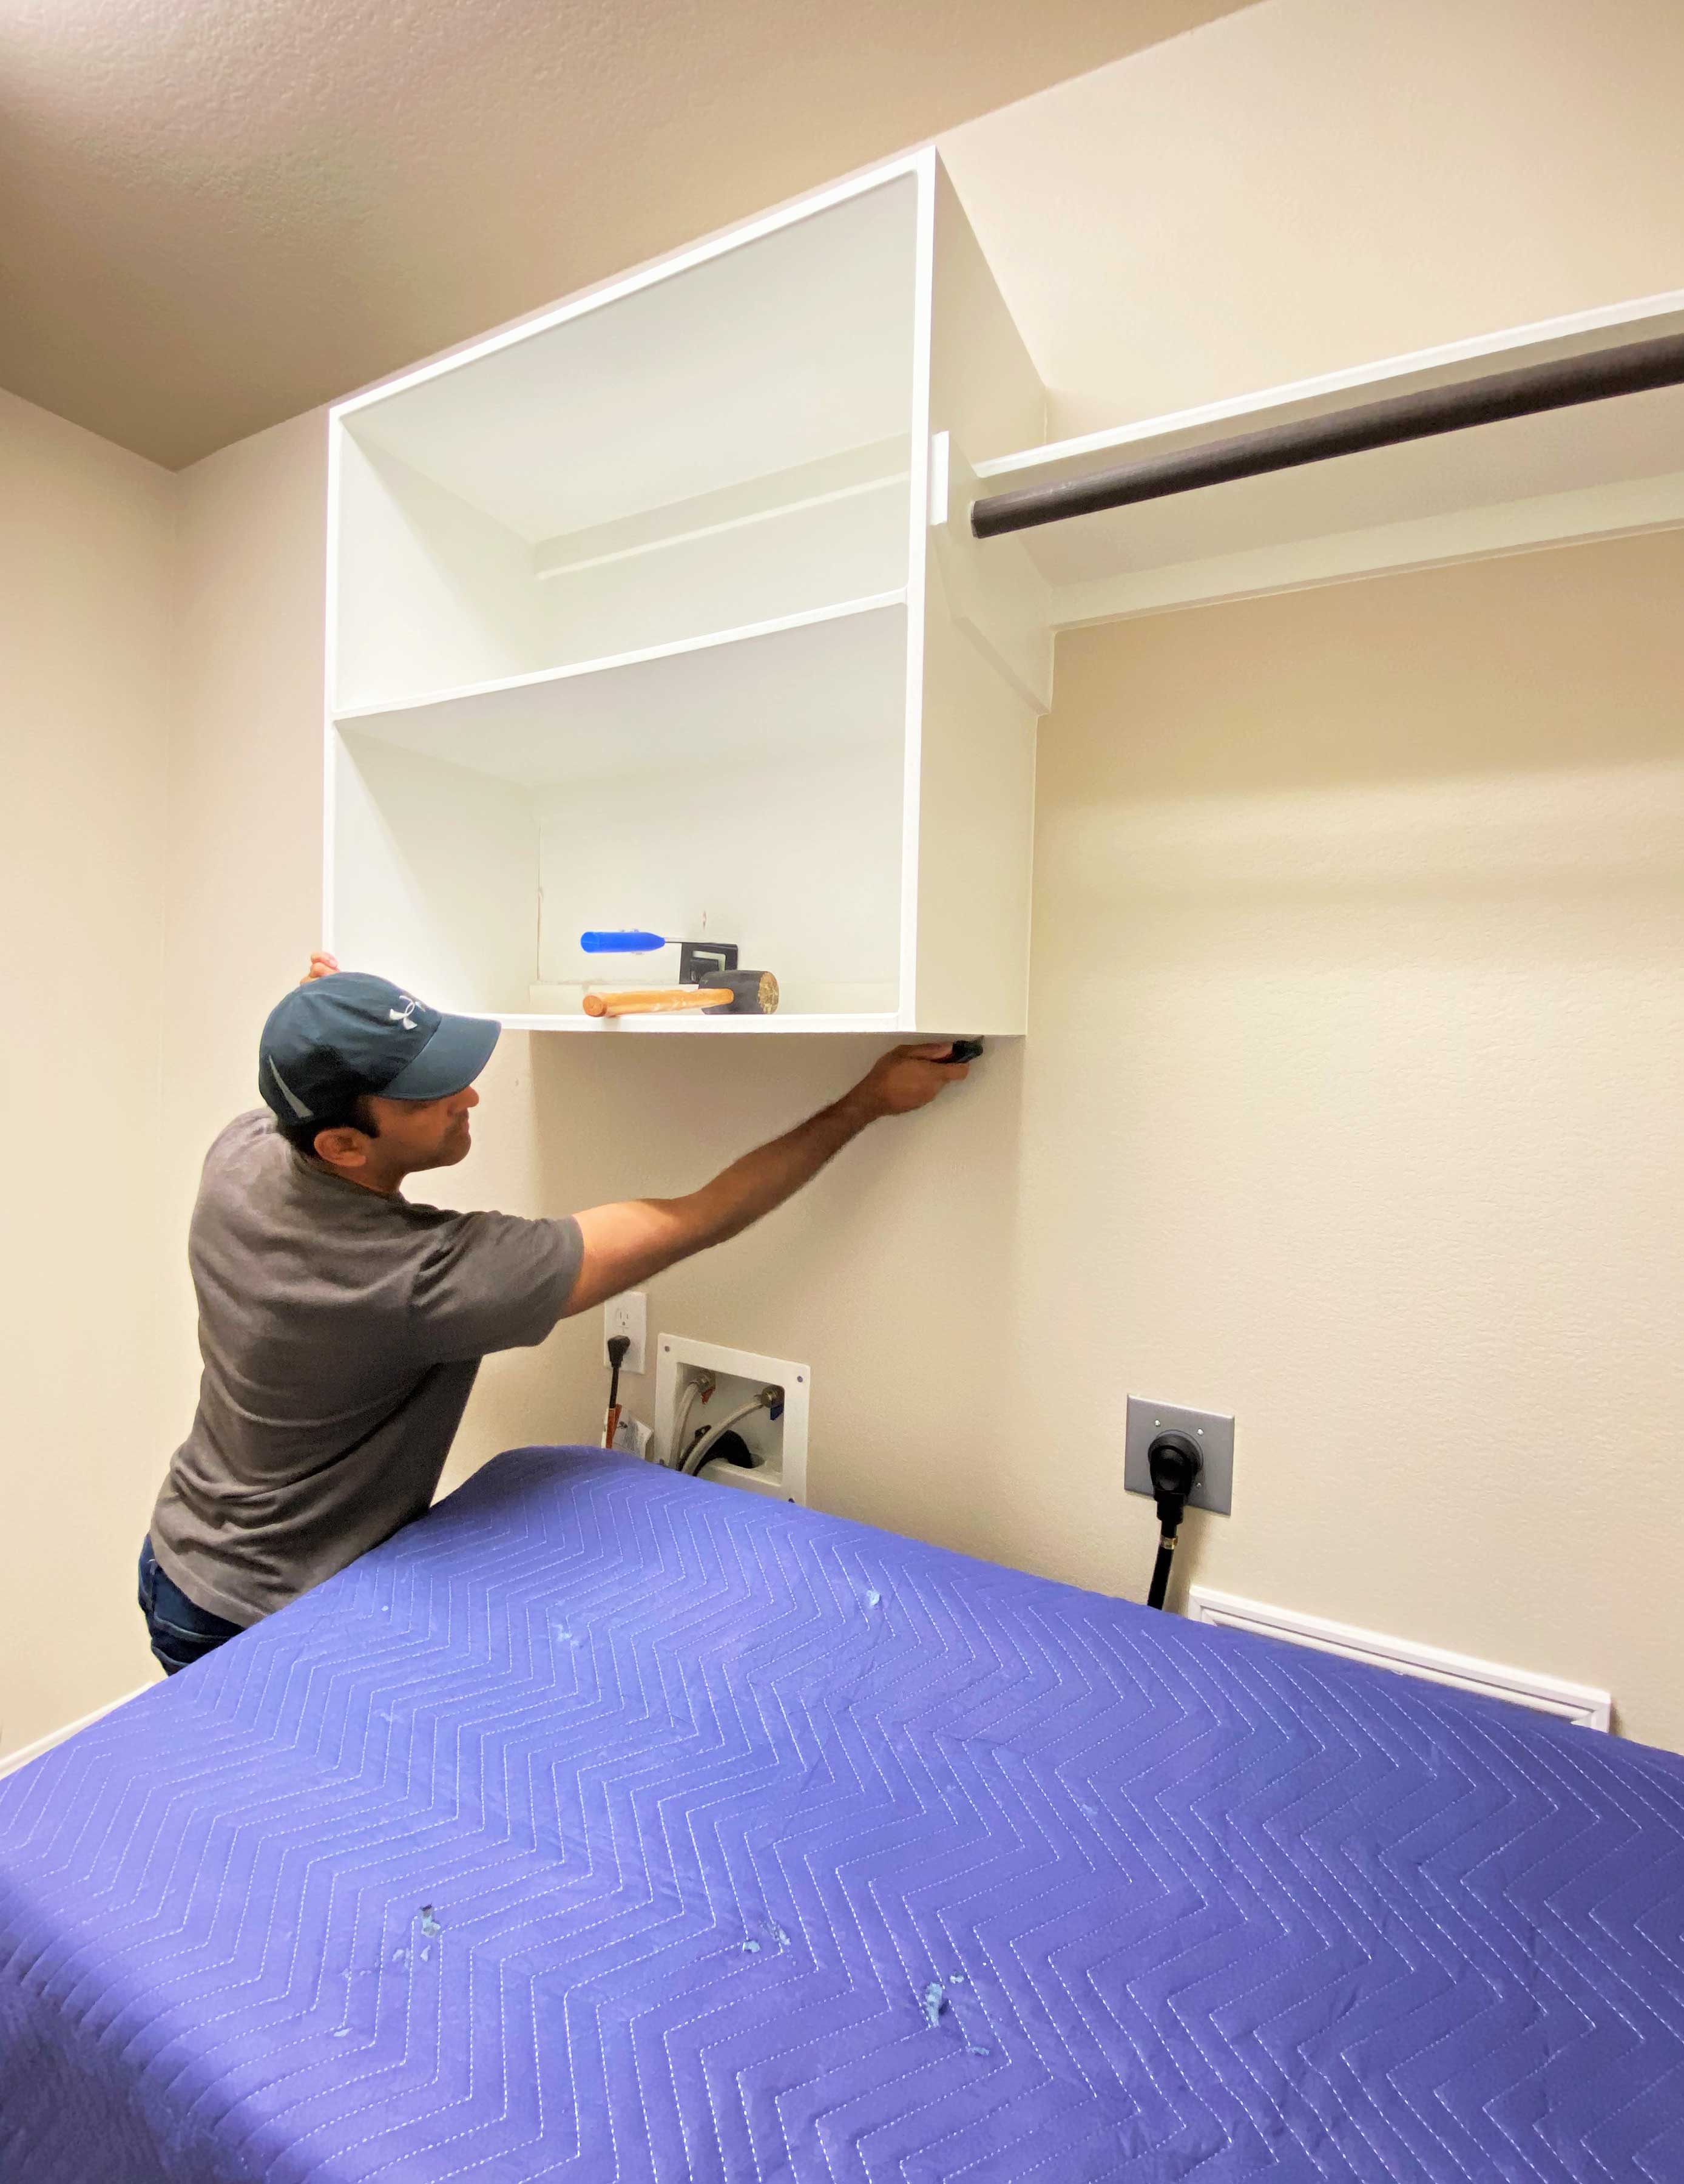

The existing built-in’s were not too terribly difficult to remove. I began by scoring the existing caulking and wedging a trim puller between. Using a rubber mallet, we pounded in and pulled forward. Strategically, you want to start at the top and work your way down. A lesson learned from the closet makeover, always cover anything valuable with a movers blanket (some protection is better than none). In our case, we covered our washer/dryer units.
All Cleaned Up (or so we thought)
After about an hour of wrestling brad nails and MDF, we finally removed the built-in’s. I am NOT a fan of brad nails and MDF to support any sort of weight. Not to knock on home builders, but this is just a cheap feature (and the quality is below average – we’ll get to that in a minute).
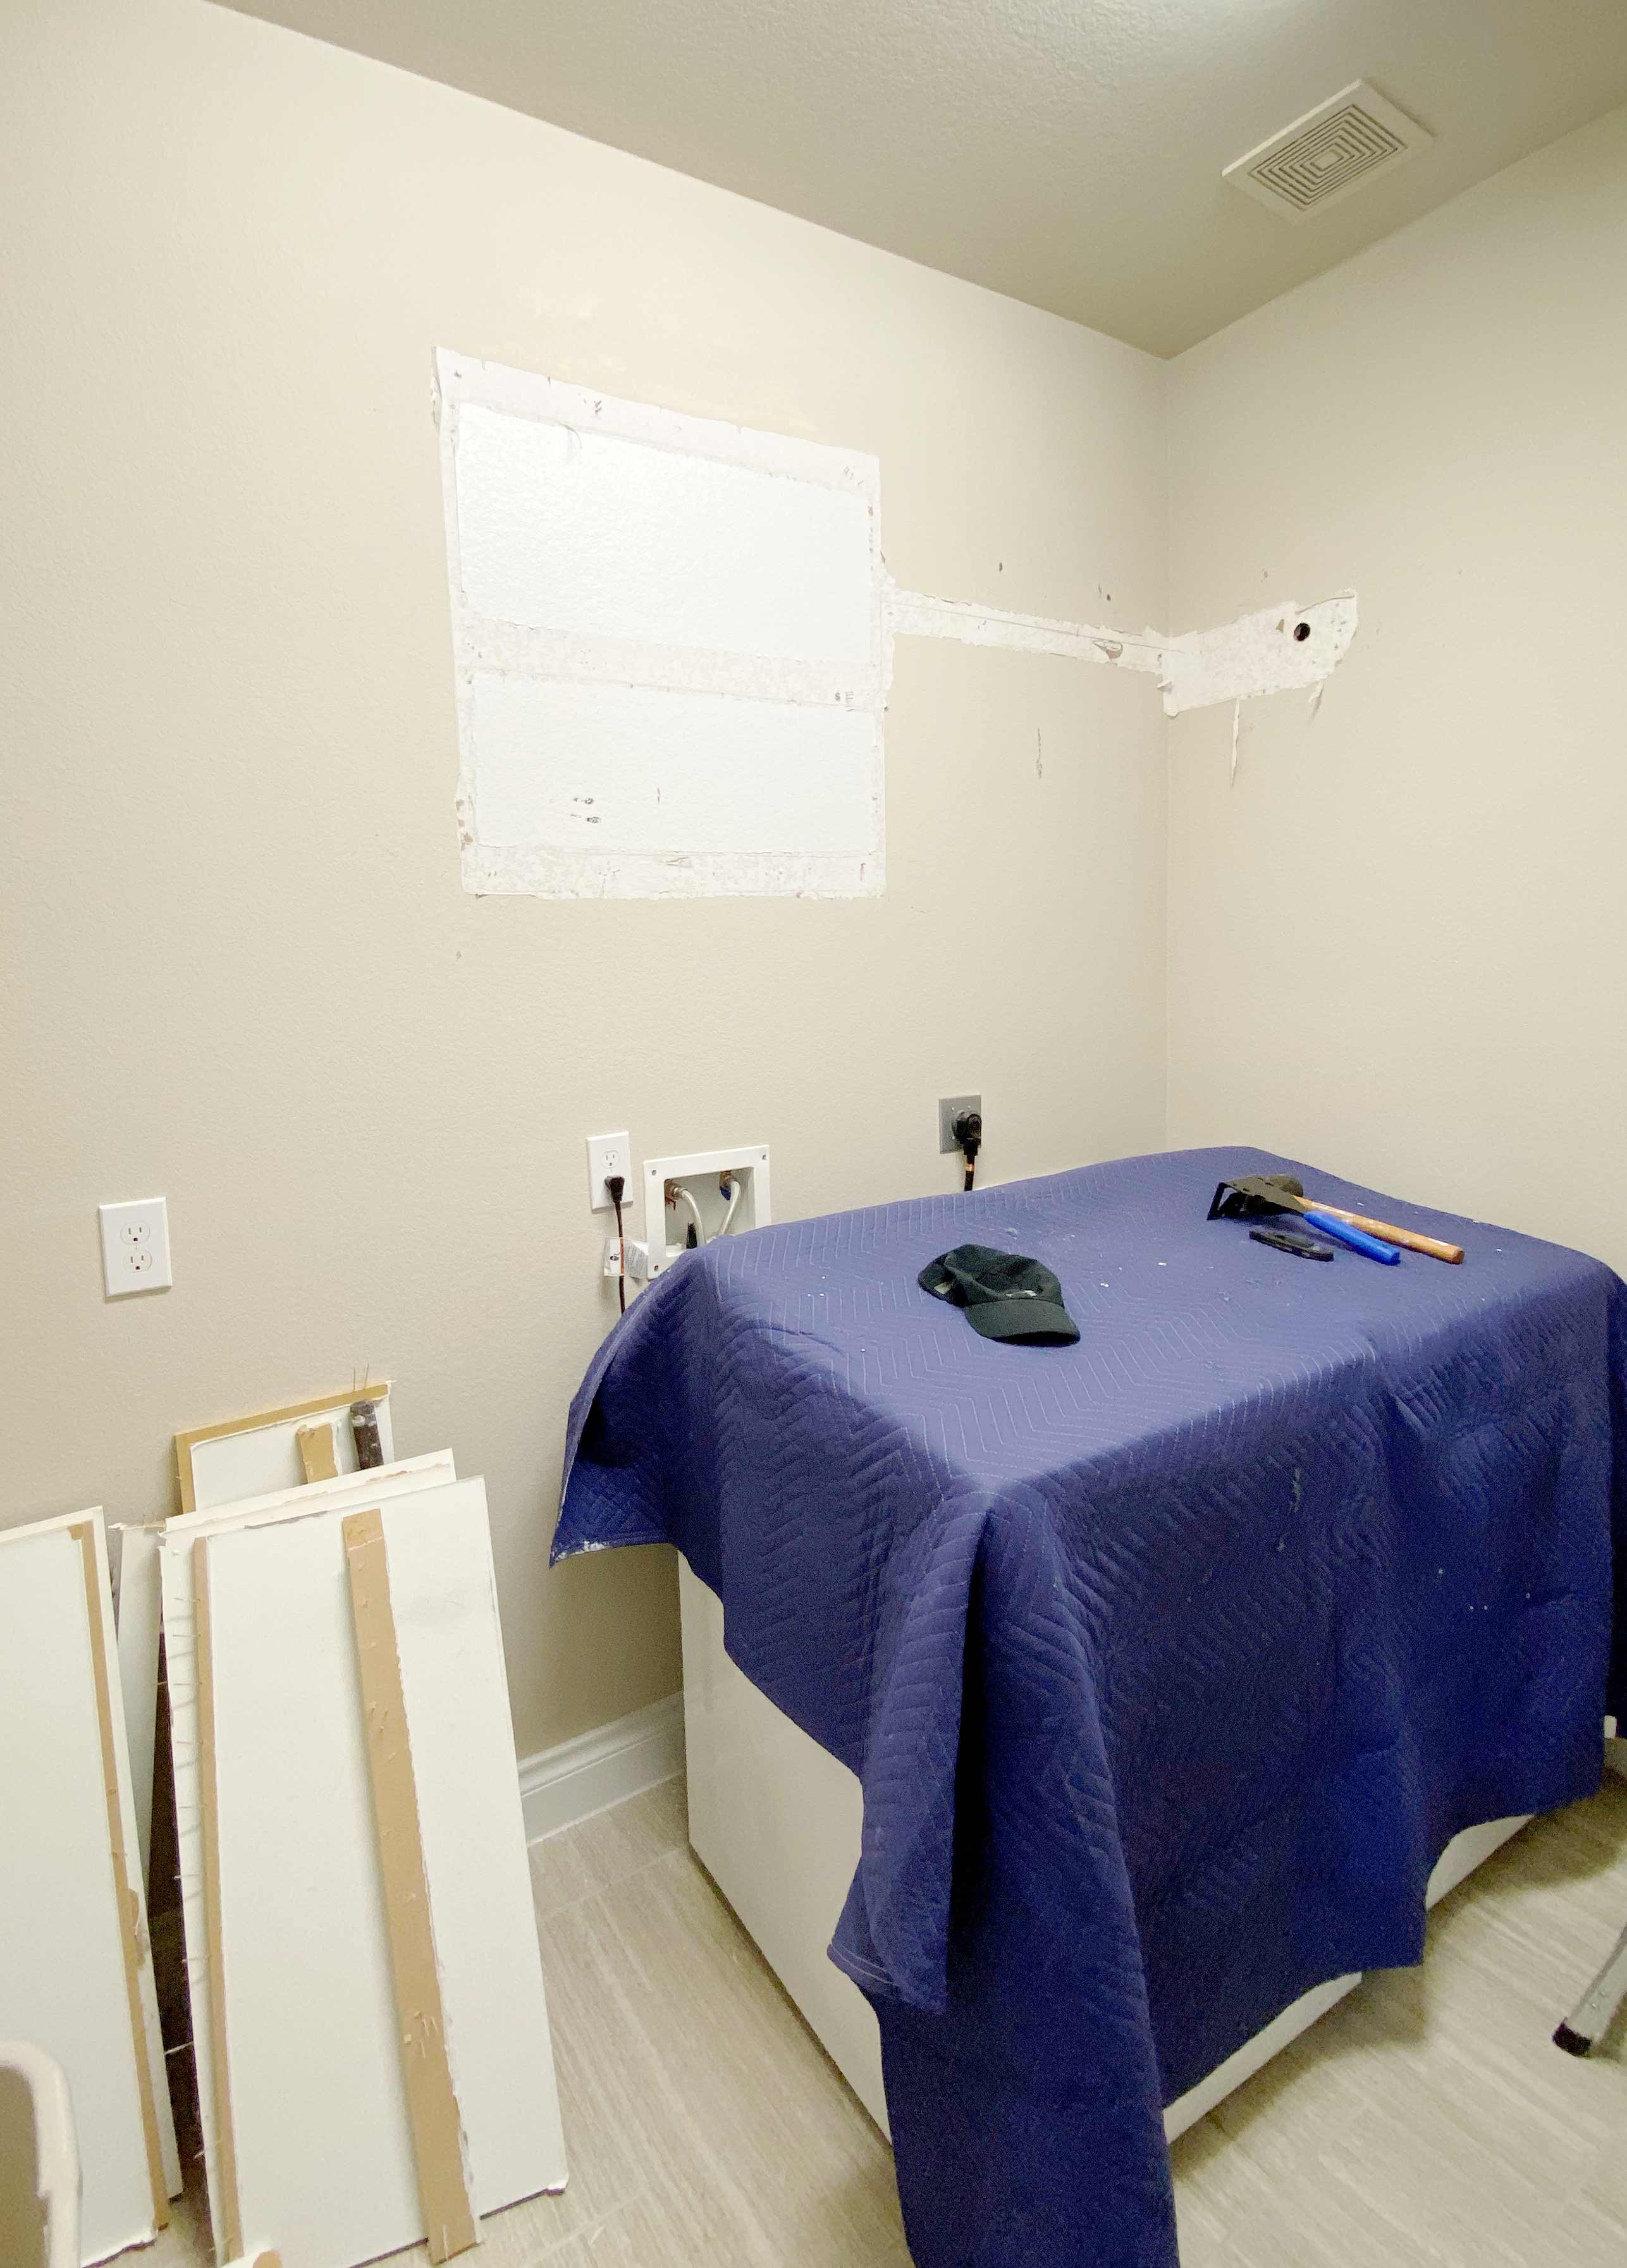
It looks as if we’re ready for the next step, right? An hour later, my wife and I found ourselves standing in a pool of water. We checked the laundry hose – no defects until we looked up. It turns out that our home builder brad nailed the built-in’s THROUGH the sheetrock and INTO the main cold feed! Unbeknownst to us, we yanked the brad nail during demo which then released the water. Sooner or later, that too would have failed from rust or pressure.
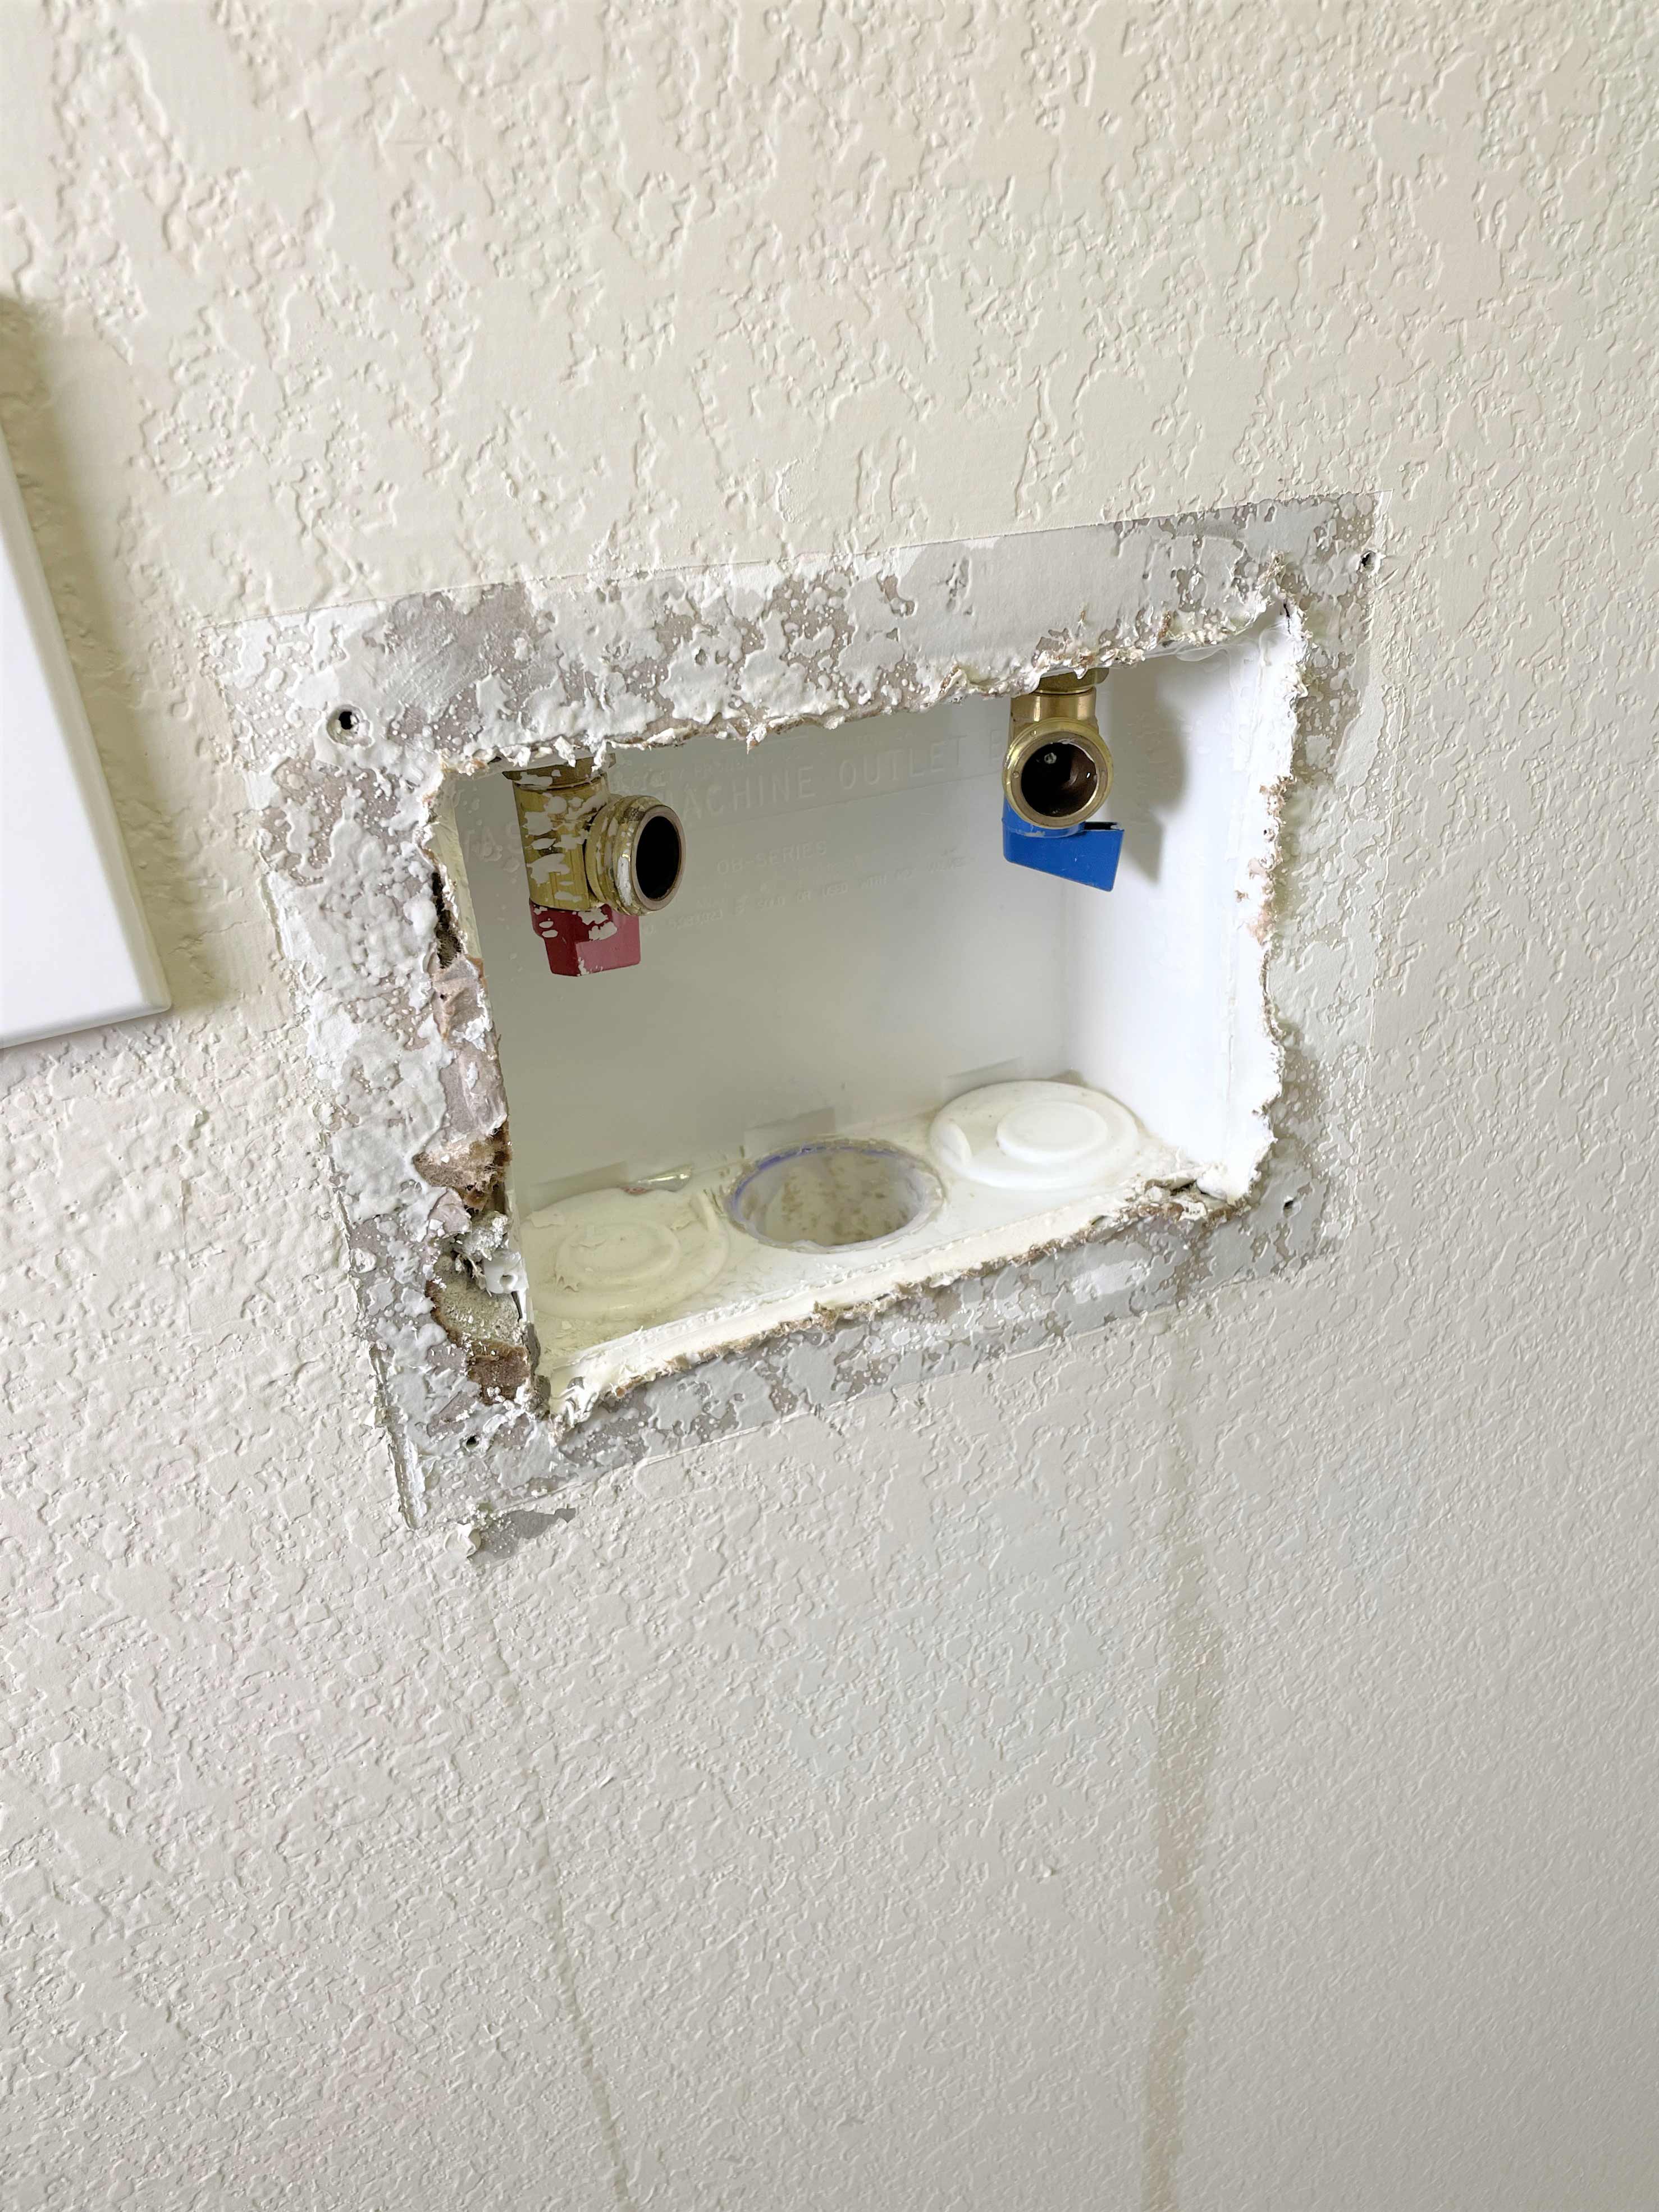
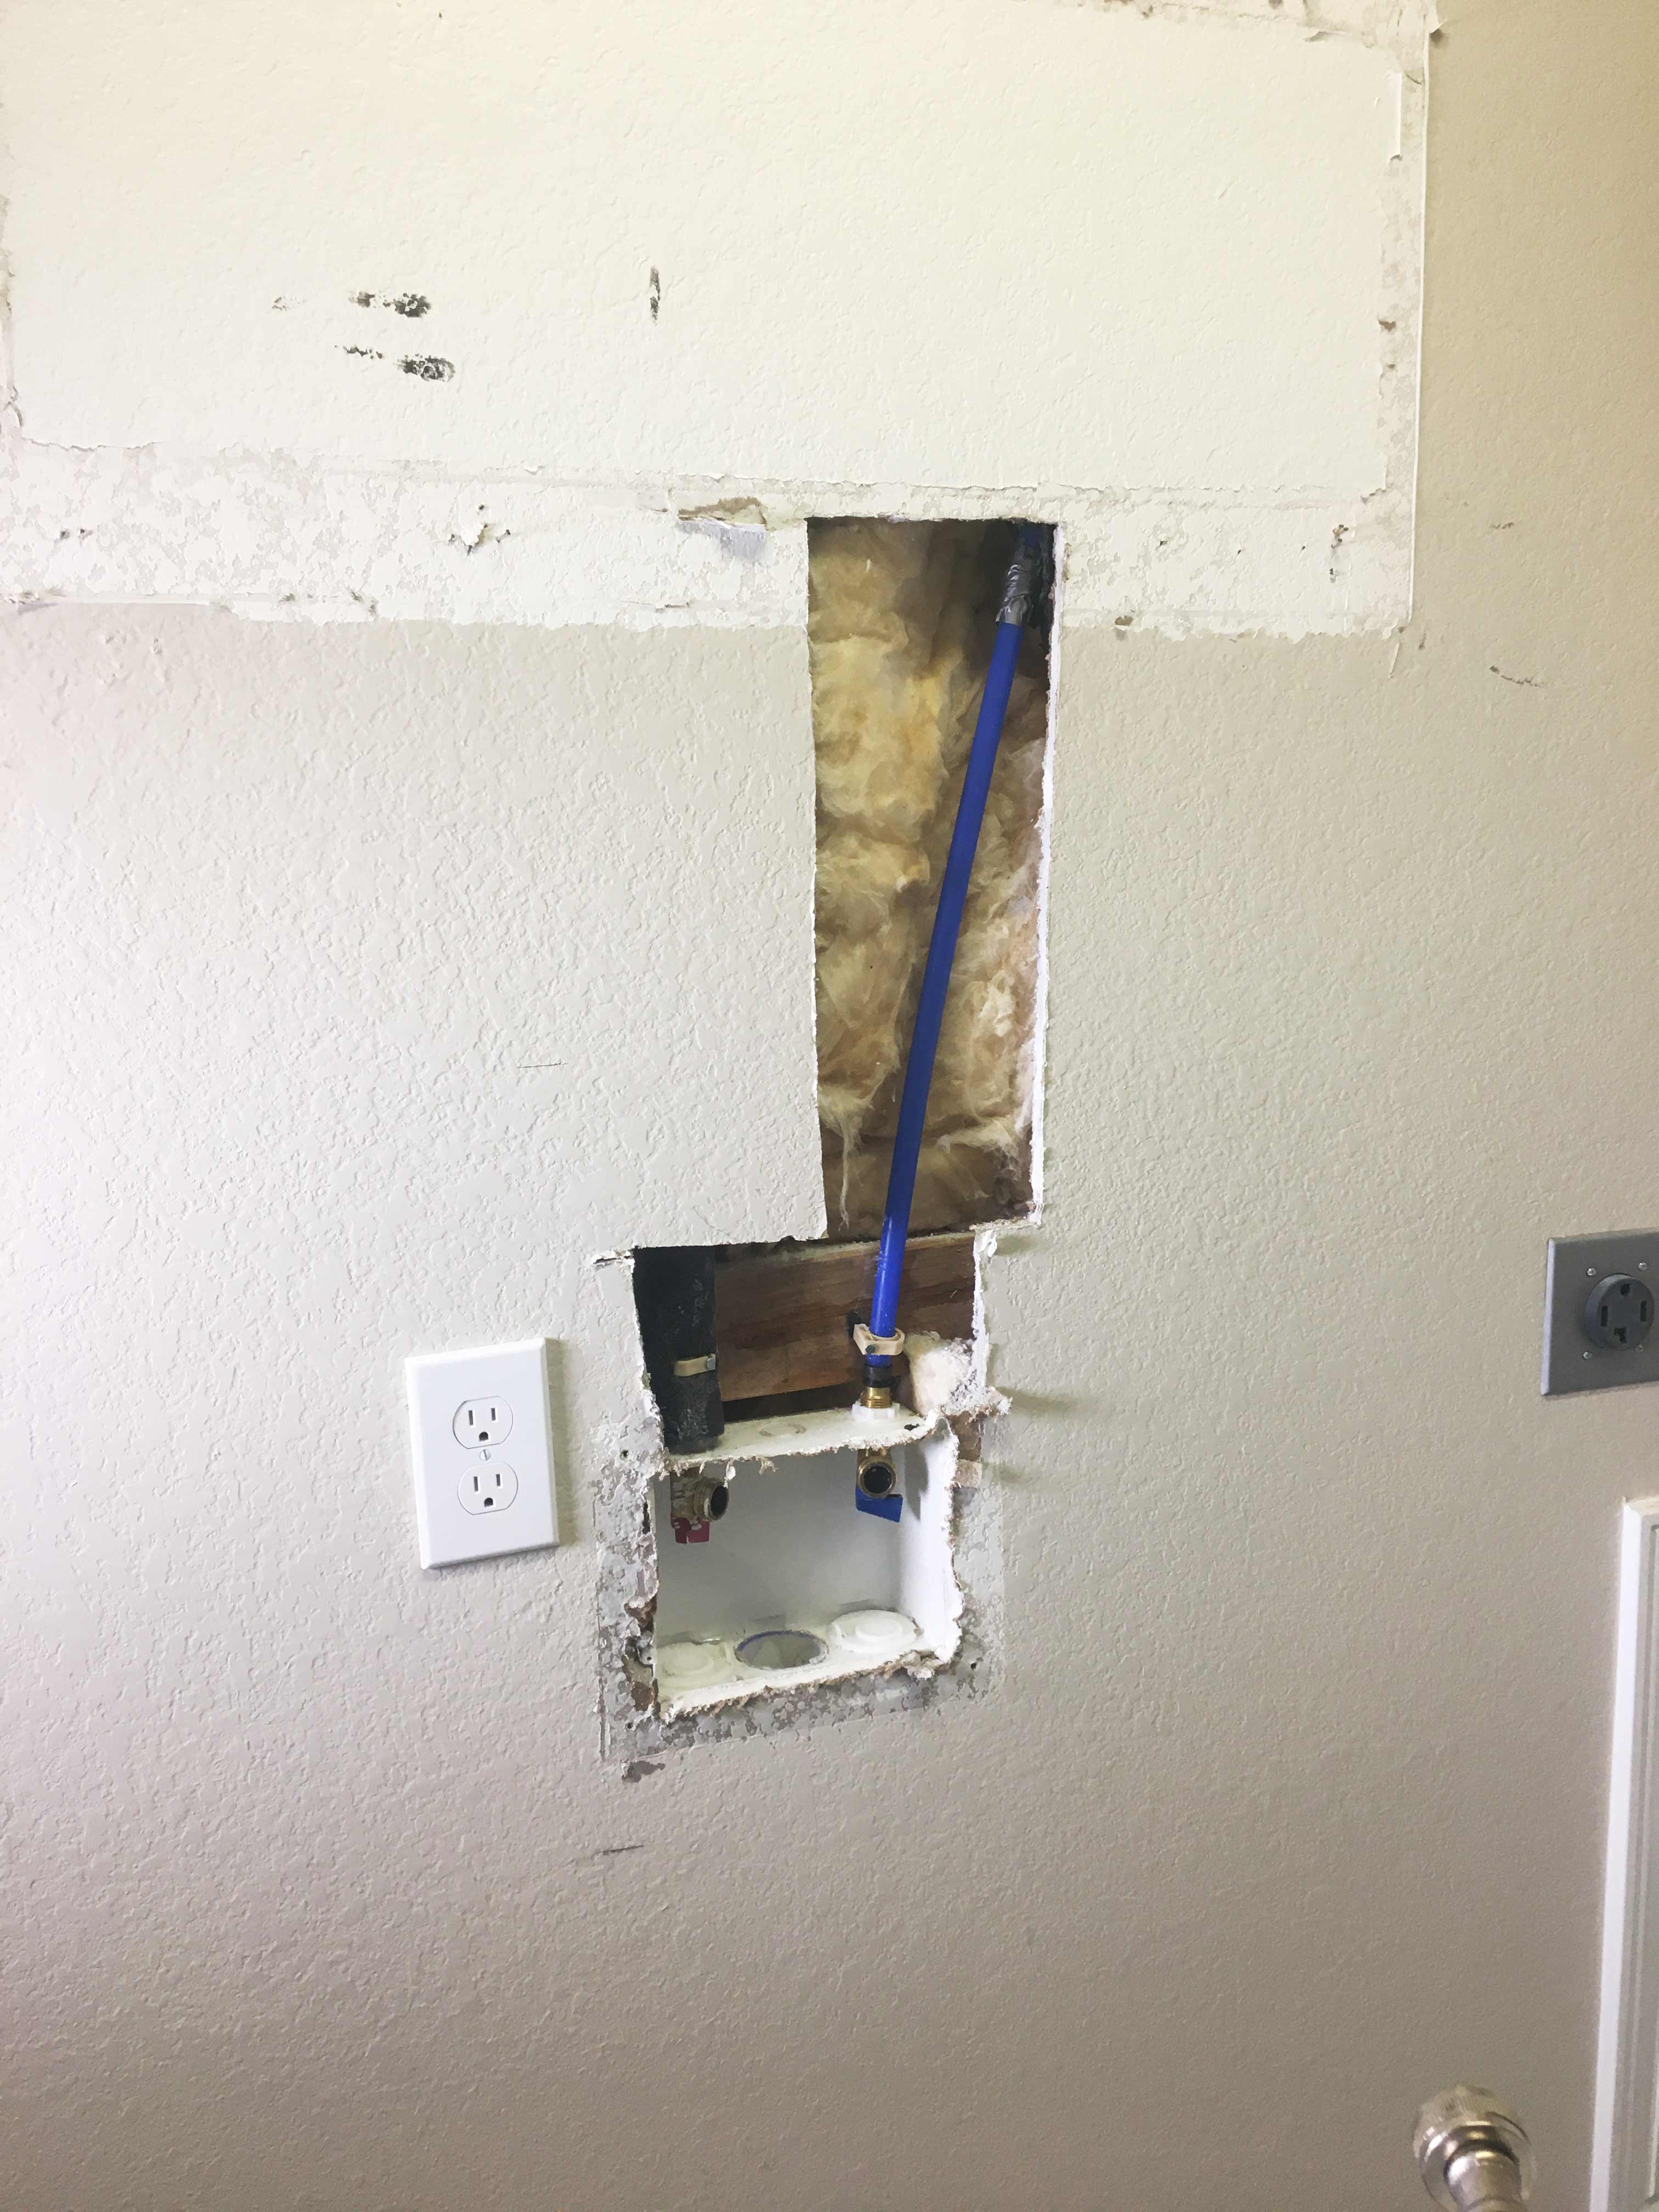
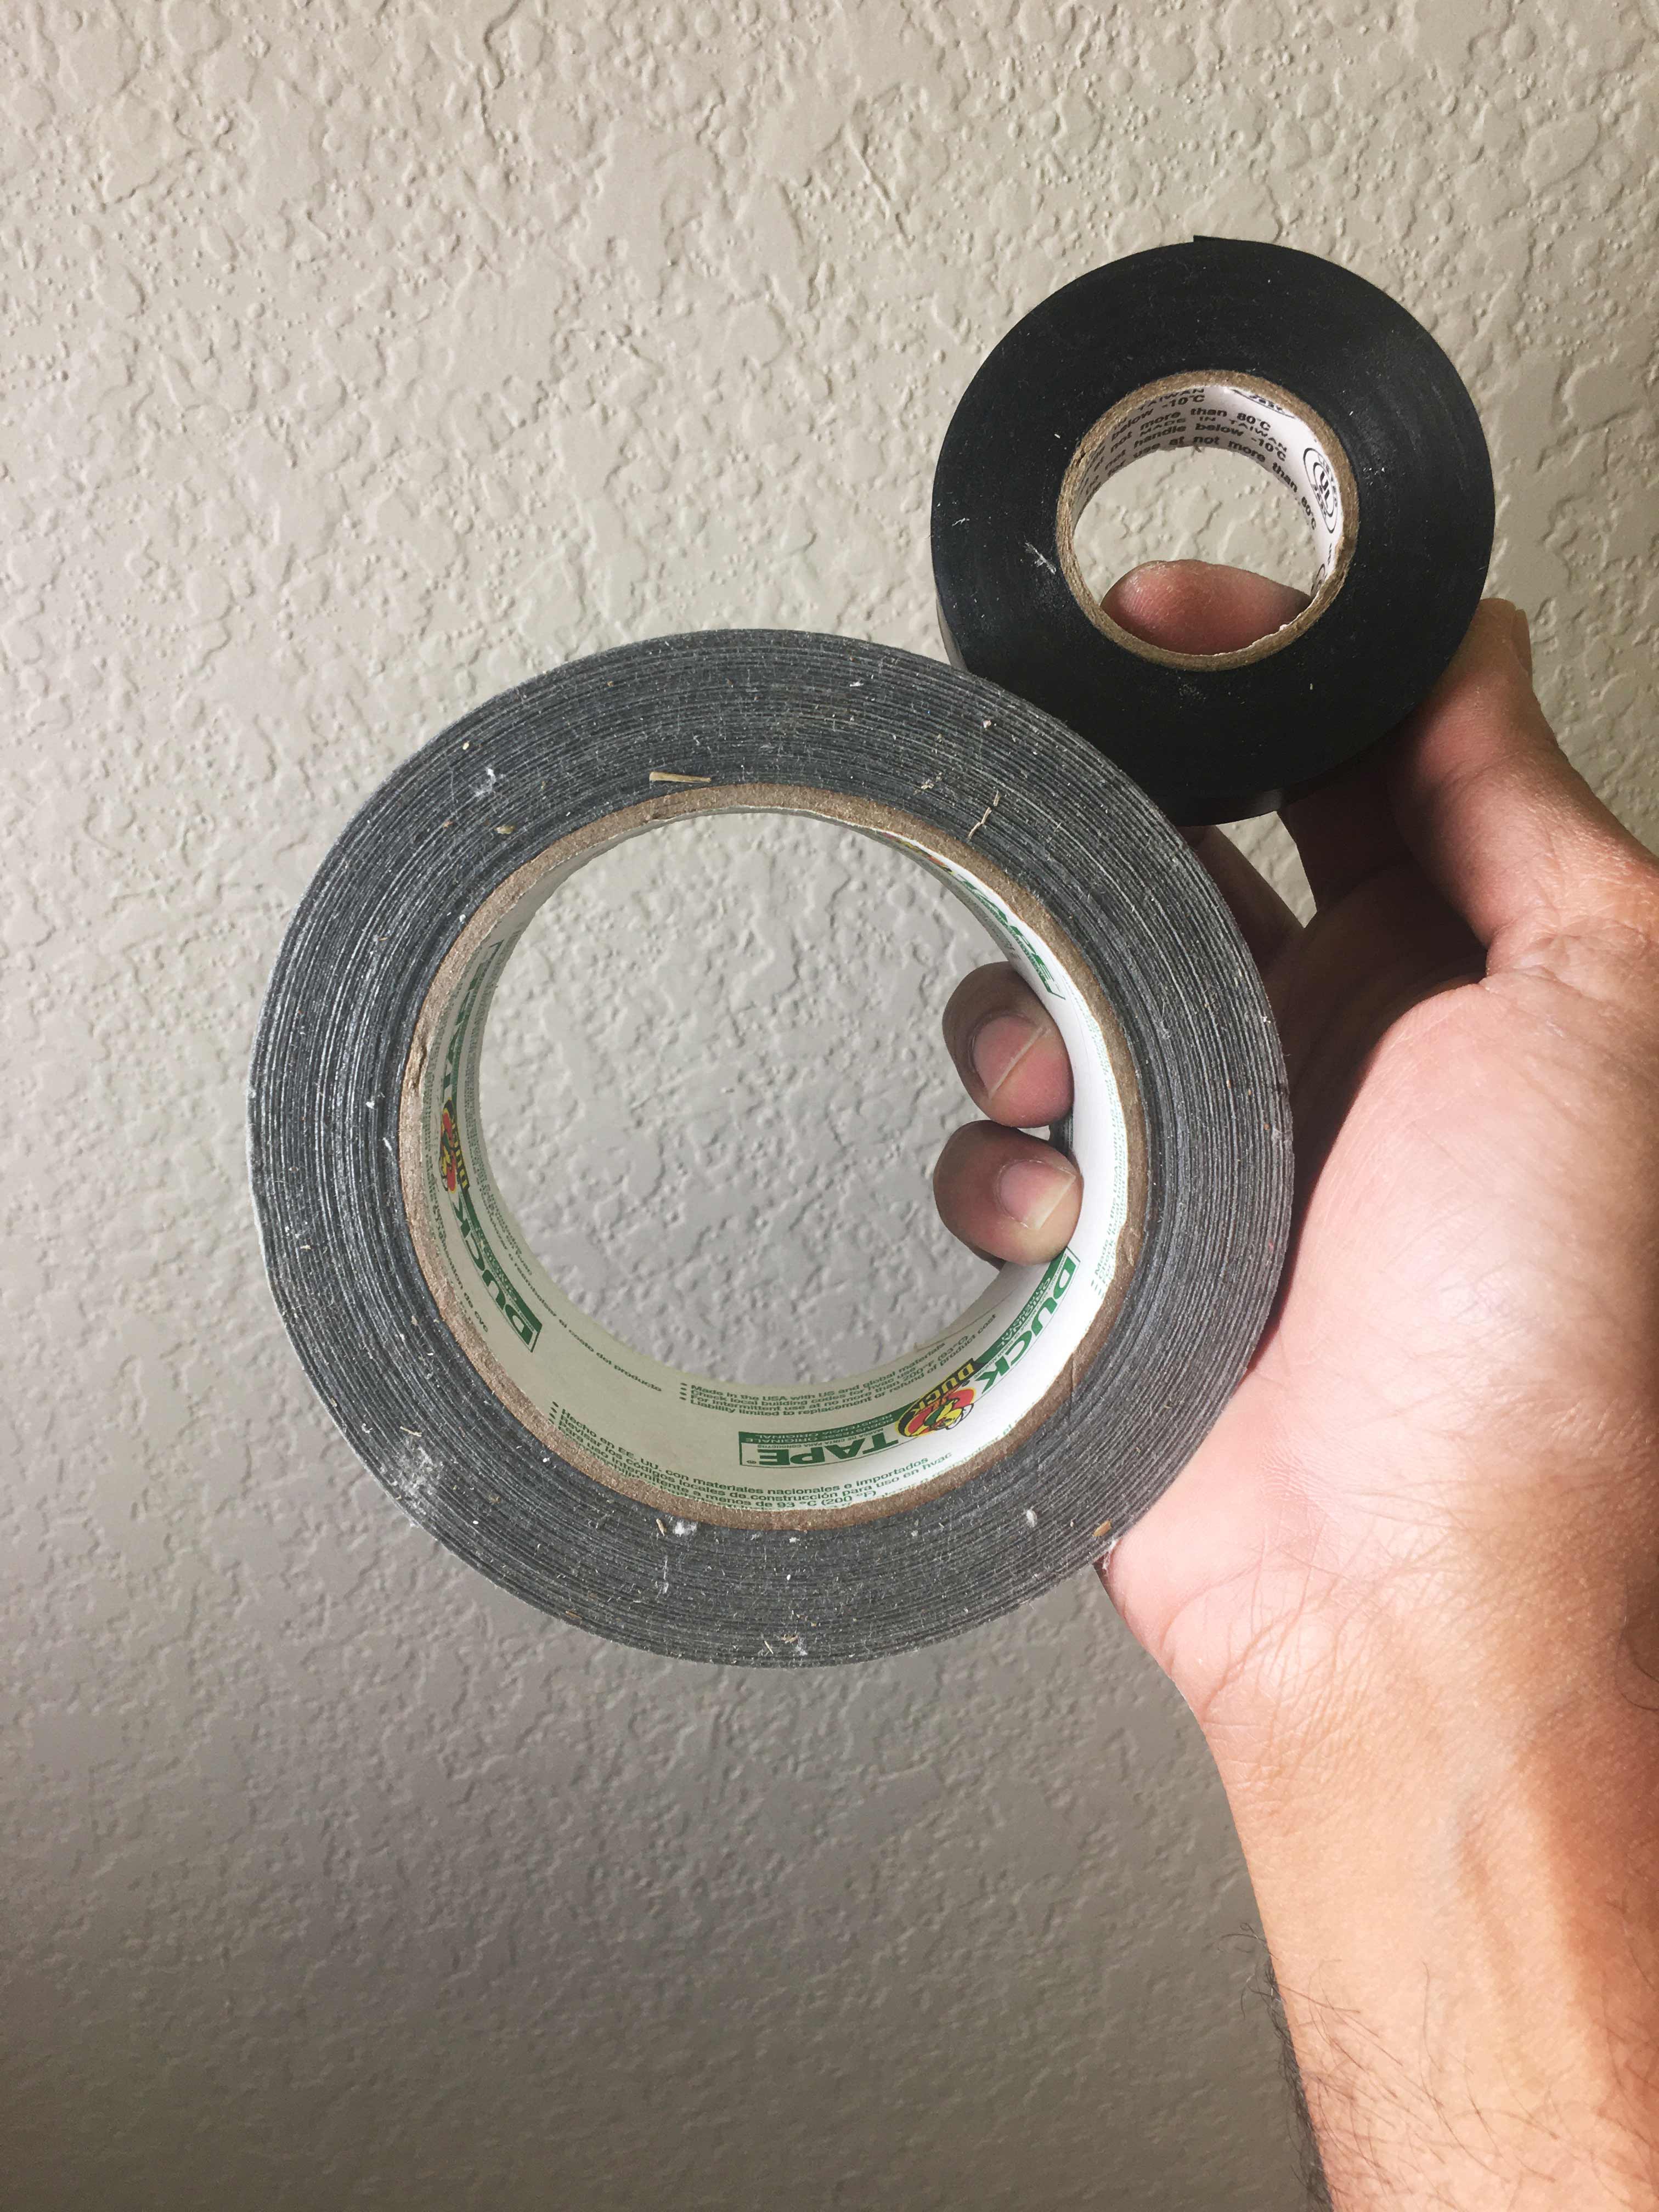
We found ourselves in a pickle, spending the next few hours cutting through sheetrock to locate the puncture. The repair would have been quick had the pipes been PVC. Instead, we have PEX tubing, which I’m a fan of, however, fast repairs are next to impossible without the right parts or tools. At first, we tried to repair the puncture with vinyl tape, followed by duck tape. However, the pressure of the water did not hold the tape. Running to Wal-mart late night, we picked up some Water-weld which might temporarily do the trick.

So, our week 2 isn’t nearly as smooth. Given that next week is flooring, we may have to rethink our budget and plans to fix the tubing first. Stay tuned!
As always, send us any questions and don’t forget to follow our Instagram stories. By the way, there are 20 SUPERB featured designers participating in the One Room Challenge with Better Homes and Gardens as a media partner. These guys and gals totally rock and will not disappoint. Check it out!
Looks fantastic! I am doing our laundry room, too! Can’t wait to see what you come up with!
You guys are rolling with the punches! You’ve got this! Can’t wait to see the flooring next week.