Screwless Wooden Phone Stand
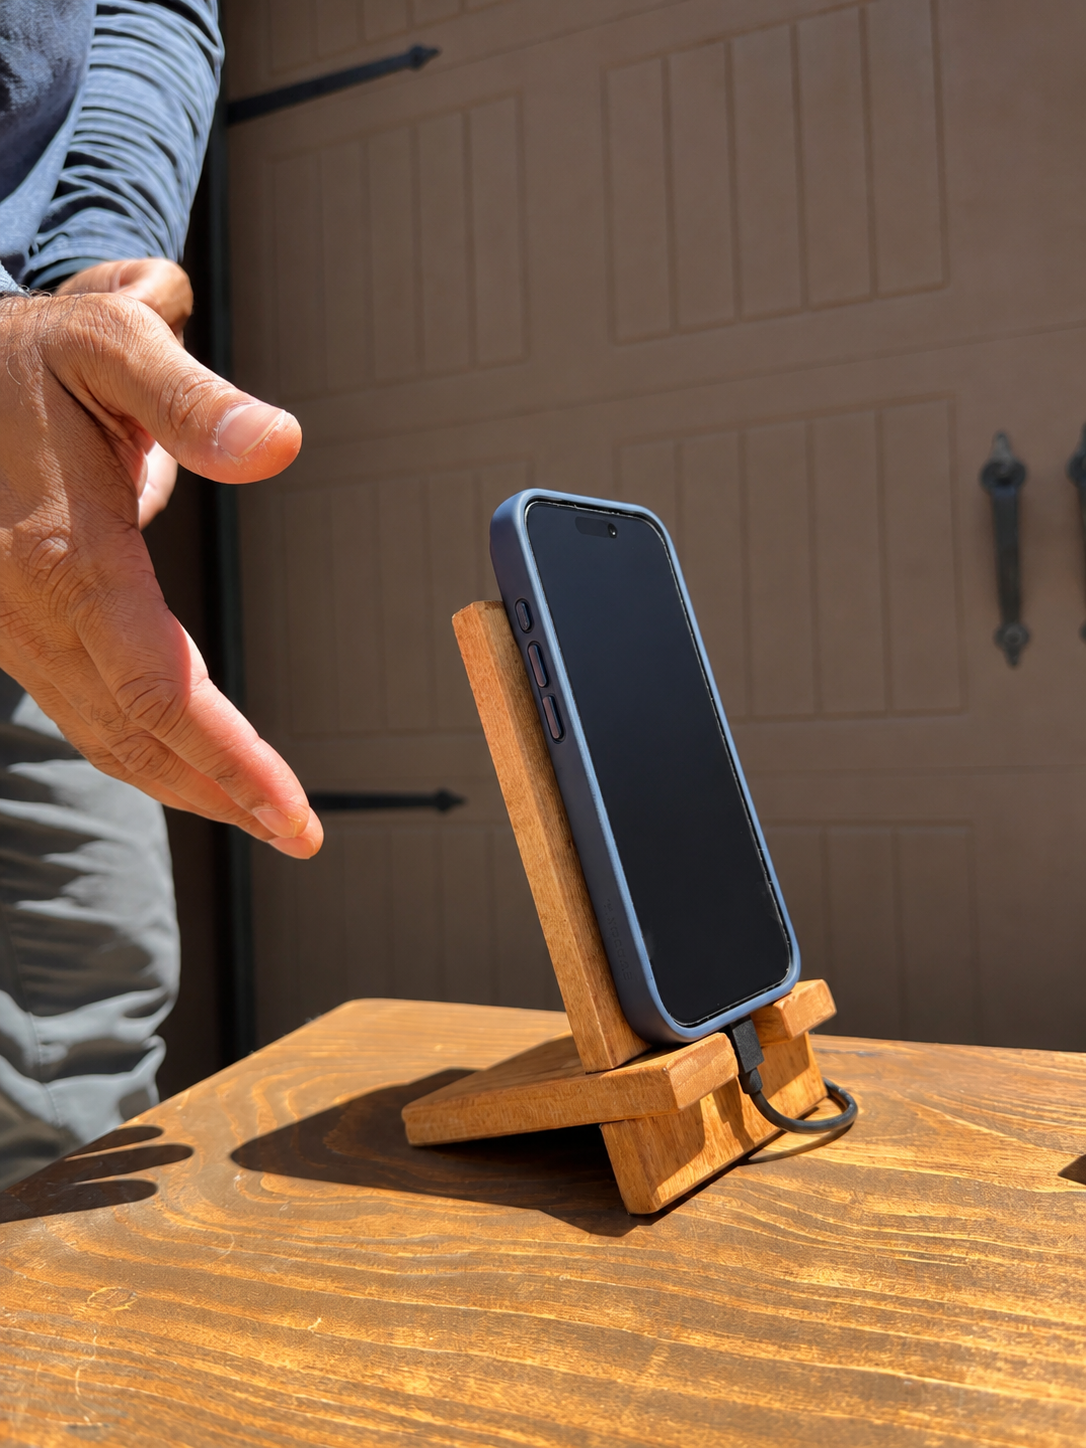
A simple handmade phone stand that locks together without screws, glue, or hardware. Built from a small piece of poplar, it includes a built-in charging cable slot and easily disassembles for storage or travel.
Materials
– 1/2″ poplar board (3-1/2″ x 24″)
– Wood filler
– Ipswich Pine stain
– Polyurethane finish
– Sandpaper (80 and 120 grit)
Tools
– Tape measure
– Pencil
– Flush cut saw
– Chisel
– Sanding block or sander
– Paint brush or rag for finish
Steps
- Cut an 11″ section from a 1/2″ x 3-1/2″ poplar board. This project uses leftover material and only requires about 11″ of board length.
- Mark the following measurements from one end of the board: 5″, 5-1/2″, 6-3/8″, 9-1/8″, and 10-1/4″.
- Cut the board at the 6-3/8″ and 10-1/4″ marks. This creates two pieces: the larger back support and the smaller base.
- On the larger back piece, locate the area between the 5″ and 5-1/2″ marks. Measure in 1-1/4″ from each edge and mark the center section. Remove the material on both sides of the center section to create a centered tab that extends from 5″ to 5-1/2″.
- Use a flush cut saw to make multiple passes in the waste areas, then remove the material with a chisel. Sand the tab smooth with 80-grit followed by 120-grit sandpaper.
- On the smaller base piece, locate the 9-1/8″ line. Measure in 1-1/8″ from each end and mark the center slot area.
- Remove the center section to create a slot that will accept the tab from the back piece. Use the same process of saw cuts, chiseling, and sanding until the fit is snug.
- Test fit the two pieces together. Adjust the slot or tab with light sanding until the stand slides together securely without forcing.
- The open slot in the base also provides a path for a charging cable to pass up through the stand while supporting the phone.
- Fill any chipped areas or tear-out with wood filler. Once dry, sand the entire project smooth.
- Apply stain and allow it to dry according to the manufacturer’s instructions.
- Finish with polyurethane for added durability and protection.
- Assemble the stand by sliding the tab on the back piece into the slot on the base.
Notes
- Fit is important for stability, but avoid making the slot too tight.
- Multiple shallow saw passes help prevent splitting and make chisel work easier.
- Test fit often while sanding to avoid removing too much material.
- The stand collapses into two flat pieces for easy storage or travel.
- Works well on a nightstand, side table, office desk, or workshop bench.
Difficulty: Easy
Estimated Time: 1-2 hours