Simple One Board Viking Chair
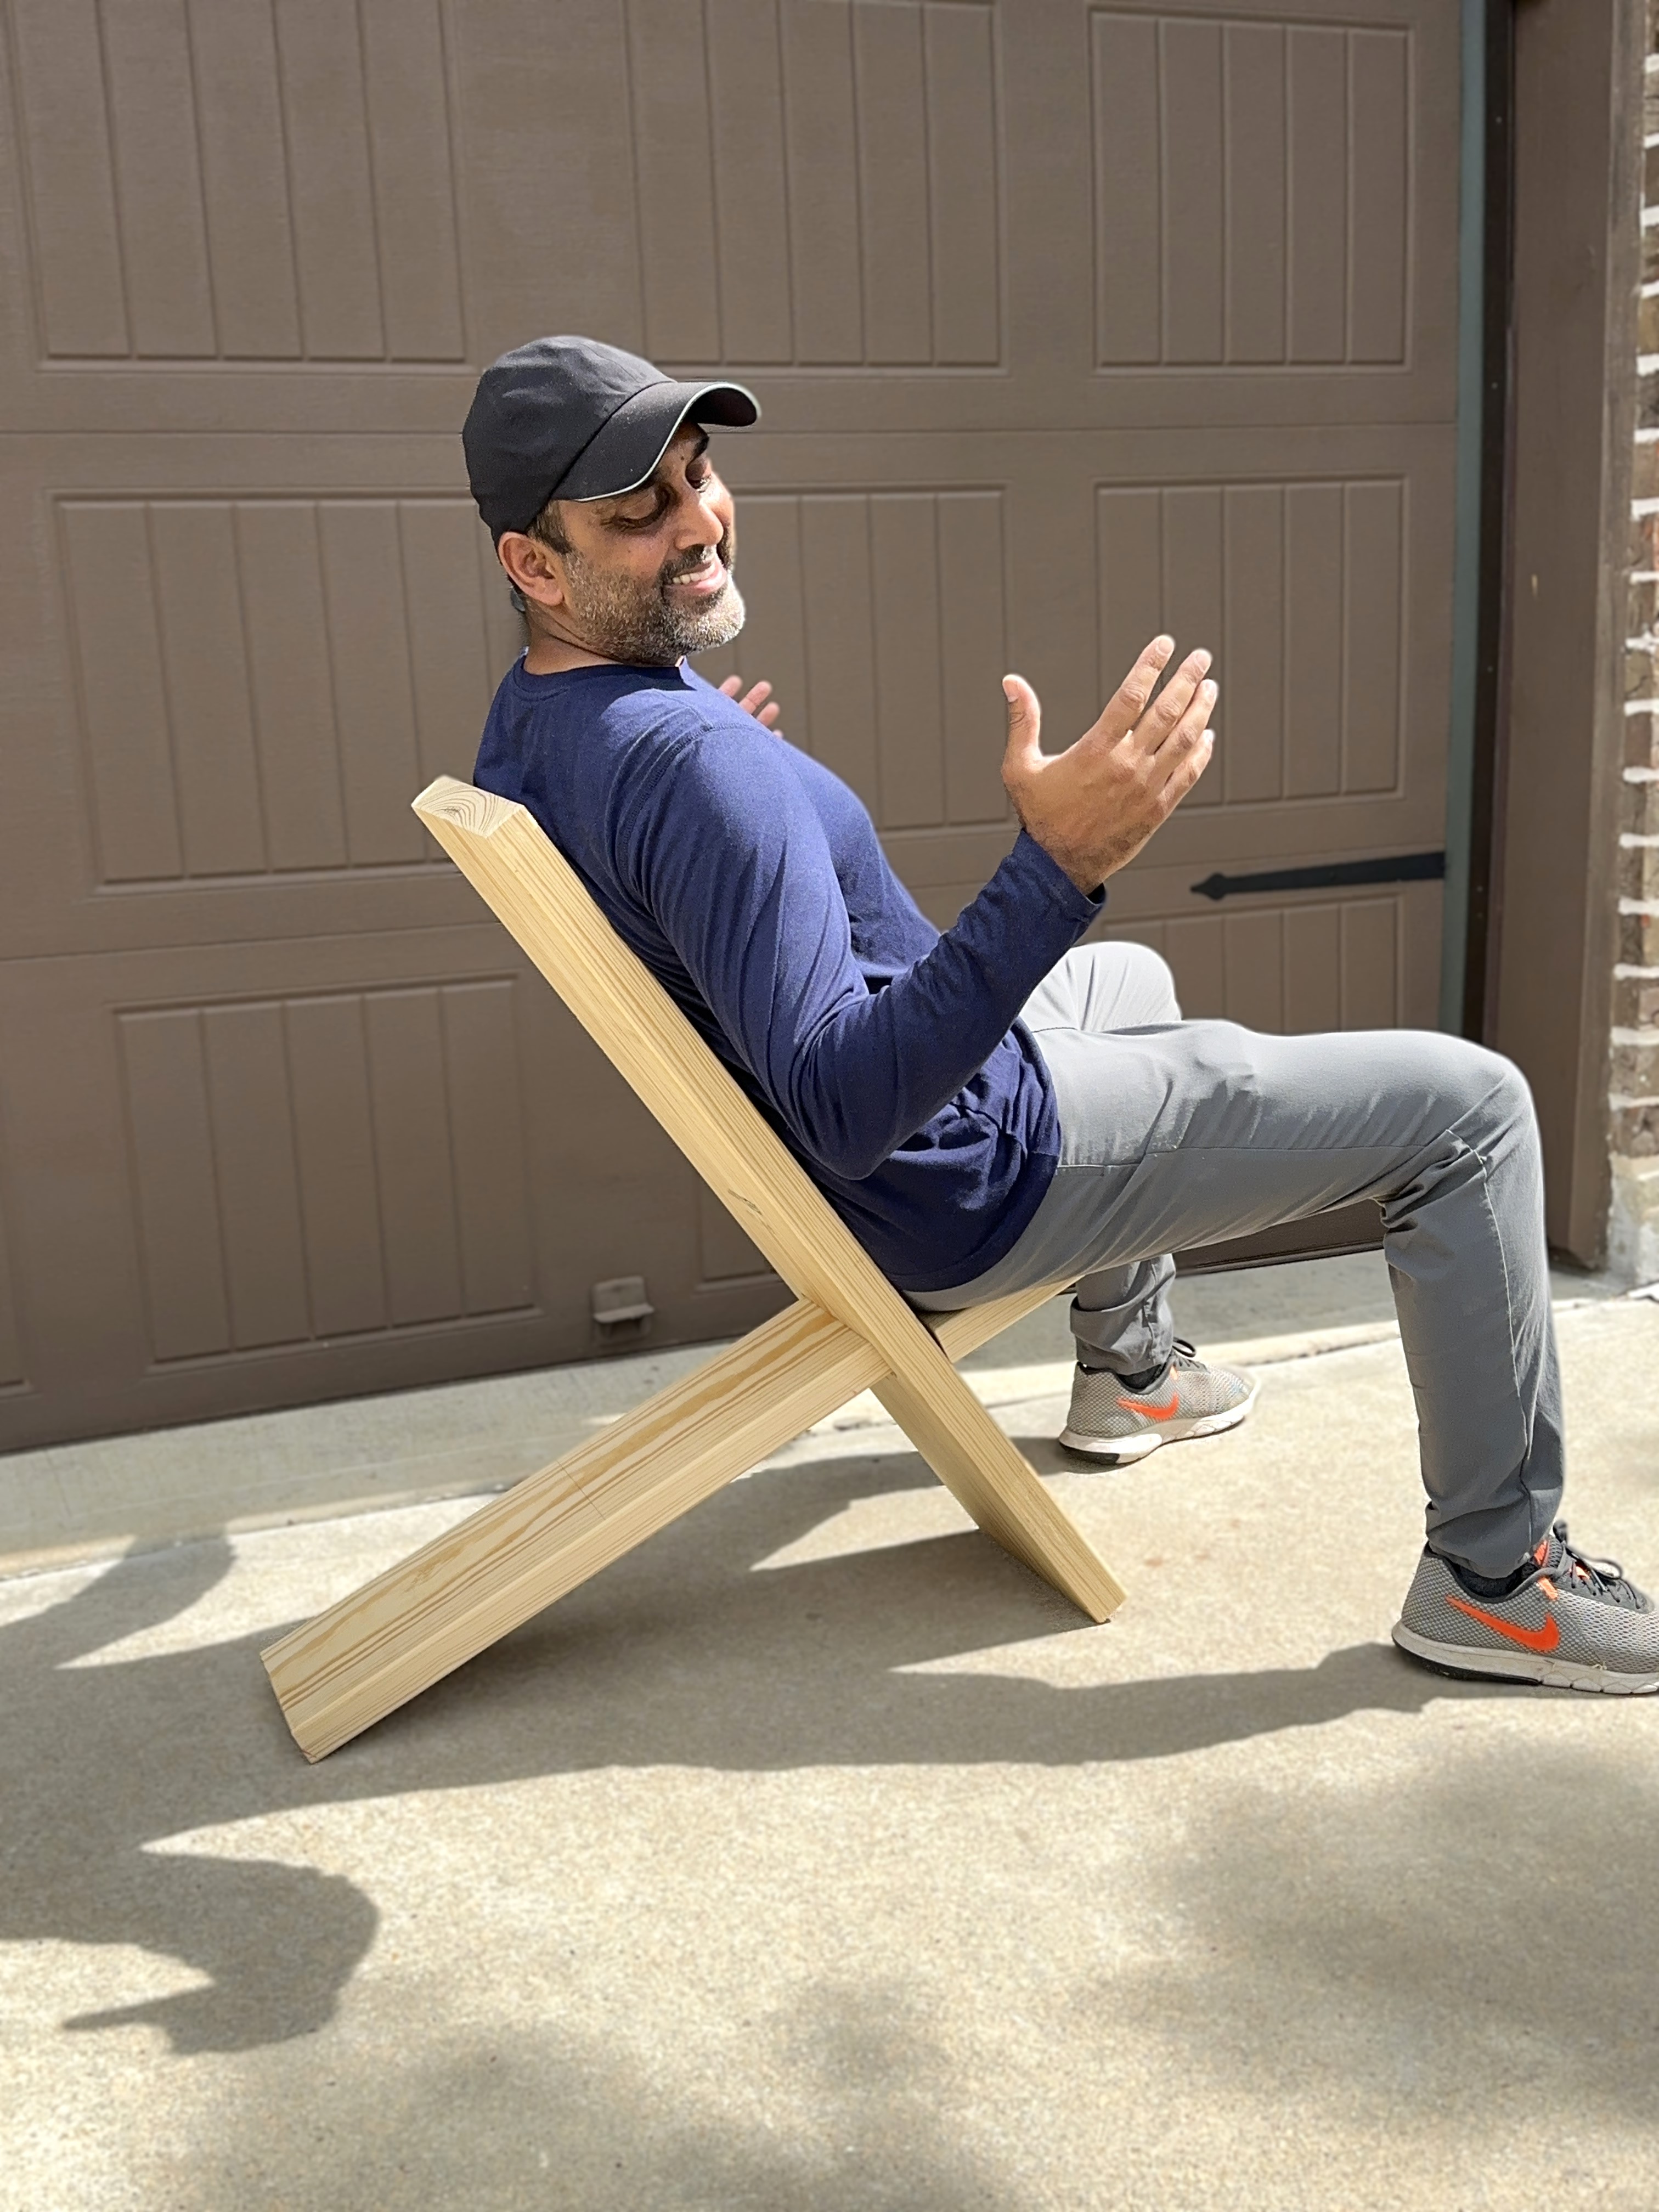
Build a classic Viking chair using one 2×10 board and a few basic tools. This simple two-piece chair breaks down flat, stores easily, and works well for camping, fire pits, or backyard seating.
Materials
– 1 2×10 board, at least 72″ long
– Sandpaper
Tools
– Circular saw
– Jigsaw or handsaw
– Drill
– Tape measure
– Pencil
– Speed square
Steps
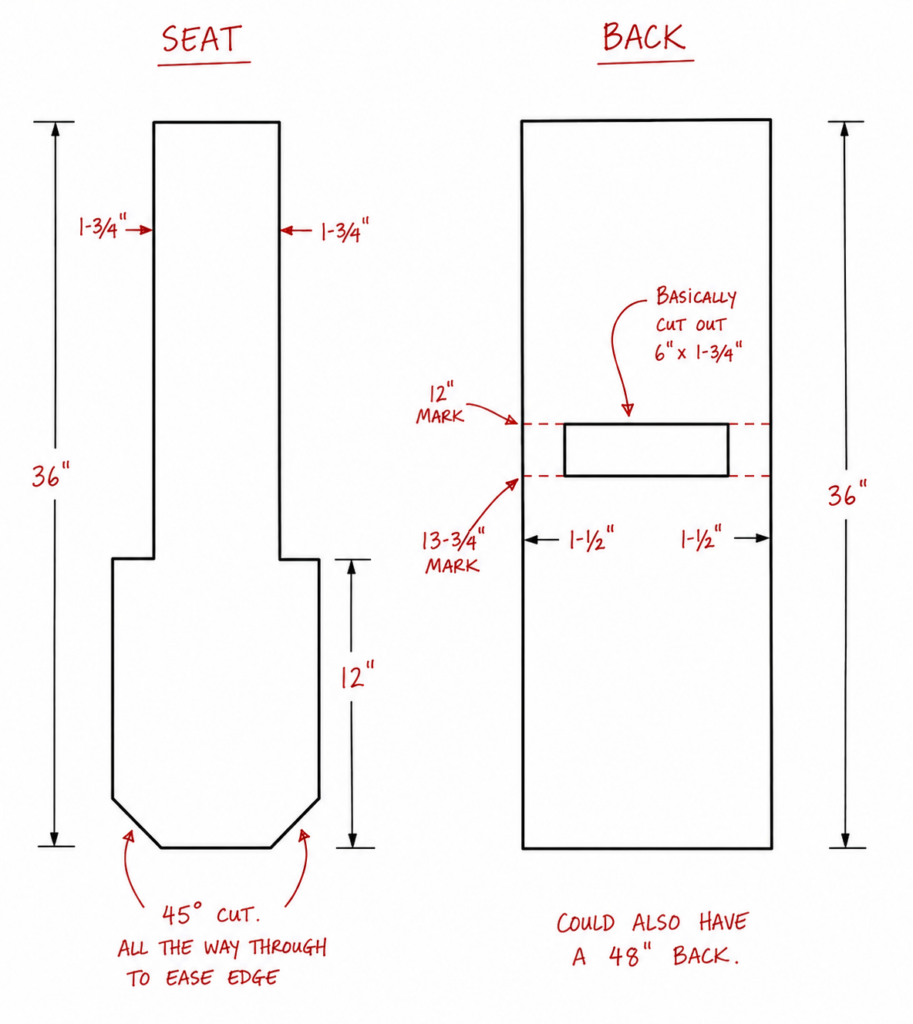
- Cut the 2×10 board so you have two 36″ pieces.
- For the seat piece, measure 12″ up from the bottom and mark a horizontal stop line.
- From each side edge, measure in 1 3/4″ and mark straight vertical cut lines from the top down to the 12″ stop line.
- Cut along both vertical lines with a circular saw, stopping just before the 12″ mark. Finish the cuts with a jigsaw or handsaw so you do not overcut the seat notch.
- For the back piece, measure and mark two horizontal lines at 12″ and 13 3/4″ from the bottom.
- Measure in 1 1/2″ from each side edge to create the slot layout for the seat to slide through.
- Drill holes at all four corners of the slot, then use a jigsaw to cut out the opening.
- Test fit the seat into the back piece and adjust the slot or seat edges as needed until the chair locks together. A little wiggle is ok.
- Sand all cut edges smooth, especially around the seat notch and back slot.
- Optional: Cut or round the front corners of the seat so they are more comfortable
Notes
- Stop the circular saw cuts just shy of the 12″ line to avoid cutting too far into the seat.
- A jigsaw gives better control when finishing the notch and cutting the back slot.
- Test fit before sanding too much material away.
- Any leftover board can be used to make a small matching tablet or iPad stand.
- Assumption: This build uses a standard 96″ long 2×10 board cut into two equal 36″ pieces.
- Chair design has been around for years under names like Viking chair, camp chair, one-board chair, bog chair, stargazer chair, and African birthing chair.
- There’s a January 1919 Popular Science reference to a Comfortable Chair from a 12-inch Board.
- I’m not the inventor, this is simply a version with my own measurements, cuts, and build process.
Difficulty: Easy
Estimated Time: 1-2 hours