$24 Outdoor Coffee Table
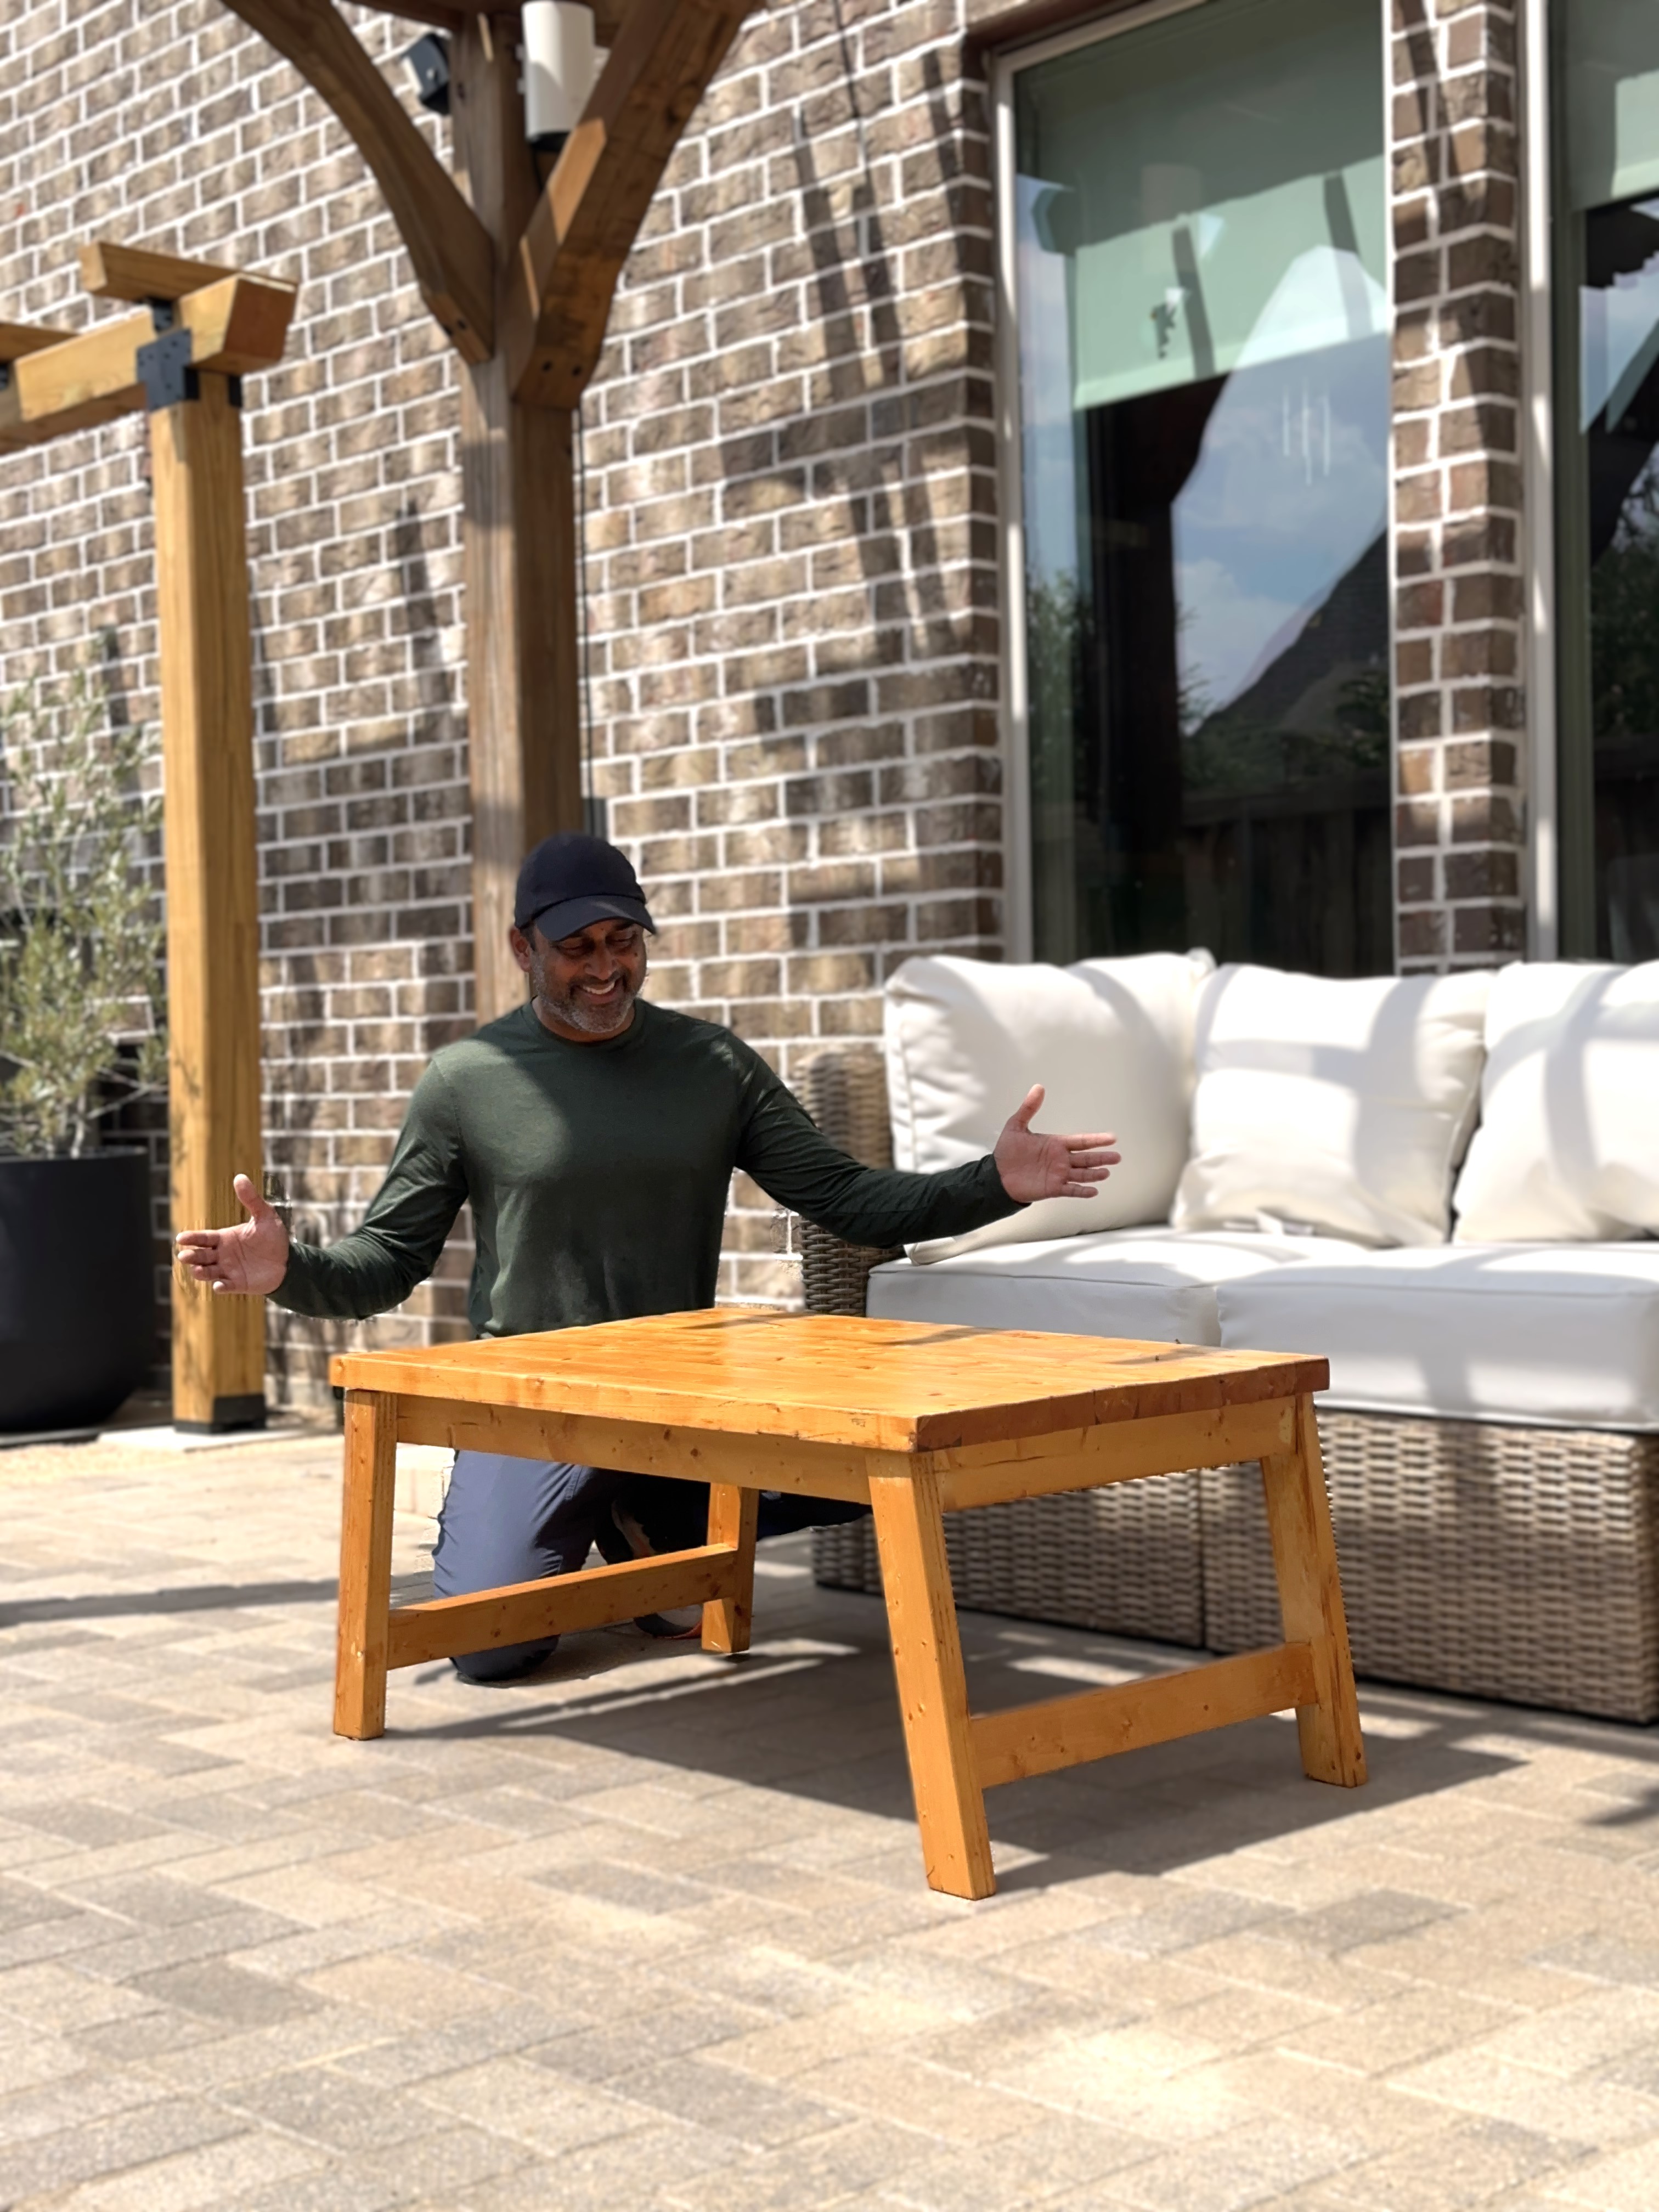
Build a simple outdoor coffee table from seven inexpensive 2×3 studs, with flared legs, lower stretchers, and a glued-up solid wood top. Figure-8 fasteners secure the tabletop while allowing for seasonal wood movement.
Materials
- 2×3 studs (7)
- Scrap wood for 45-degree corner brackets (4)
- Wood glue
- Wood screws
- Figure-8 tabletop fasteners
- 80-grit and 120-grit sandpaper
- Cedar-tone exterior wood finish
Tools
- Miter or circular saw
- Drill/driver
- Forstner bit
- Bar clamps
- Smaller clamps for assembly
- Random orbital sander
- Tape measure
- Speed square
Steps
- Straighten or rip the edges of the 2×3 studs as needed so the boards fit together cleanly. Cut two long aprons at 35″, two short aprons at 20″, two lower stretchers at 20″, and four legs at 16″.
- Cut both ends of each leg at 10 degrees with the cuts parallel to each other. This gives the legs a slight outward flare while keeping the top and bottom surfaces parallel.
- Cut four 45-degree corner brackets from 2×3 scraps. Assemble the 35″ long aprons and 20″ short aprons around the corner brackets. Apply glue, predrill to reduce splitting, and secure the brackets to the aprons with screws.
- Apply a generous amount of glue where each leg meets the corner assembly. Clamp the legs in position and drive screws through the corner brackets to secure them.
- Install the two 20″ lower stretchers between the legs. Glue and screw them in place to stiffen the base, reduce wobble, and give the table a heavier look.
- Glue up the tabletop from the remaining straightened 2×3 material. Arrange the boards edge-to-edge, apply glue along the joints, and clamp the entire panel tightly with bar clamps. Leave the panel clamped overnight to cure.
- Remove the tabletop from the clamps and flatten it as much as possible. Sand first with 80-grit paper, then move to 120 grit. Trim the ends of the glue-up square to create a finished tabletop approximately 37″ x 20″.
- Position the tabletop on the completed base. Mark the locations for the figure-8 tabletop fasteners and use a Forstner bit to create shallow recesses in the top edge of the frame so each fastener sits flush.
- Screw the figure-8 fasteners to the base, position the tabletop, and secure the other side of each fastener to the underside of the top.
- Finish the table with an exterior cedar-tone finish and allow it to dry before use.
Notes
- Predrilling is especially helpful around the corner brackets and near the ends of the 2x3s to prevent splitting.
- A planer makes it much easier to flatten a glued-up tabletop. Without one, expect some variation between boards and a more rustic finished surface.
- Figure-8 fasteners are a good choice for the solid wood top because they allow the tabletop to expand and contract instead of fastening it rigidly to the base.
- For a future outdoor version, small gaps between tabletop boards could improve drainage and eliminate the need for a large panel glue-up.
- Pine is an inexpensive option for this build, but an exterior-rated finish and regular maintenance will help it hold up outdoors.
Difficulty: Intermediate
Estimated Time: 2-3 days