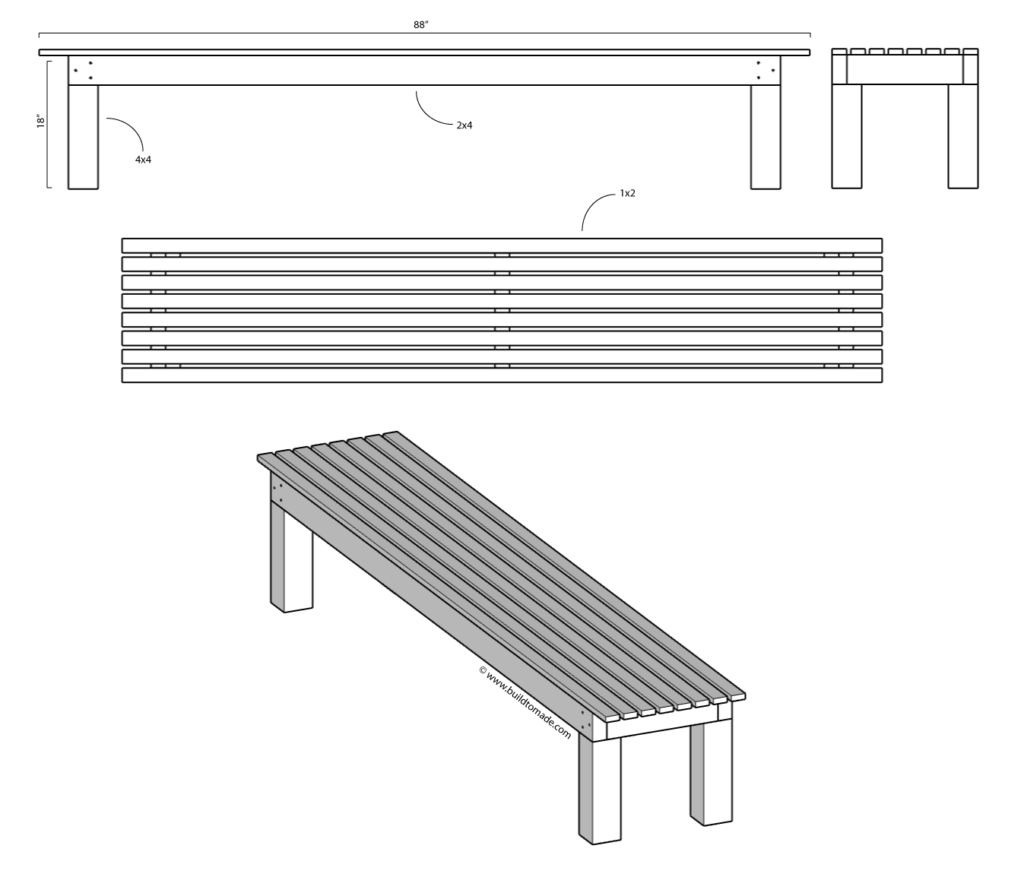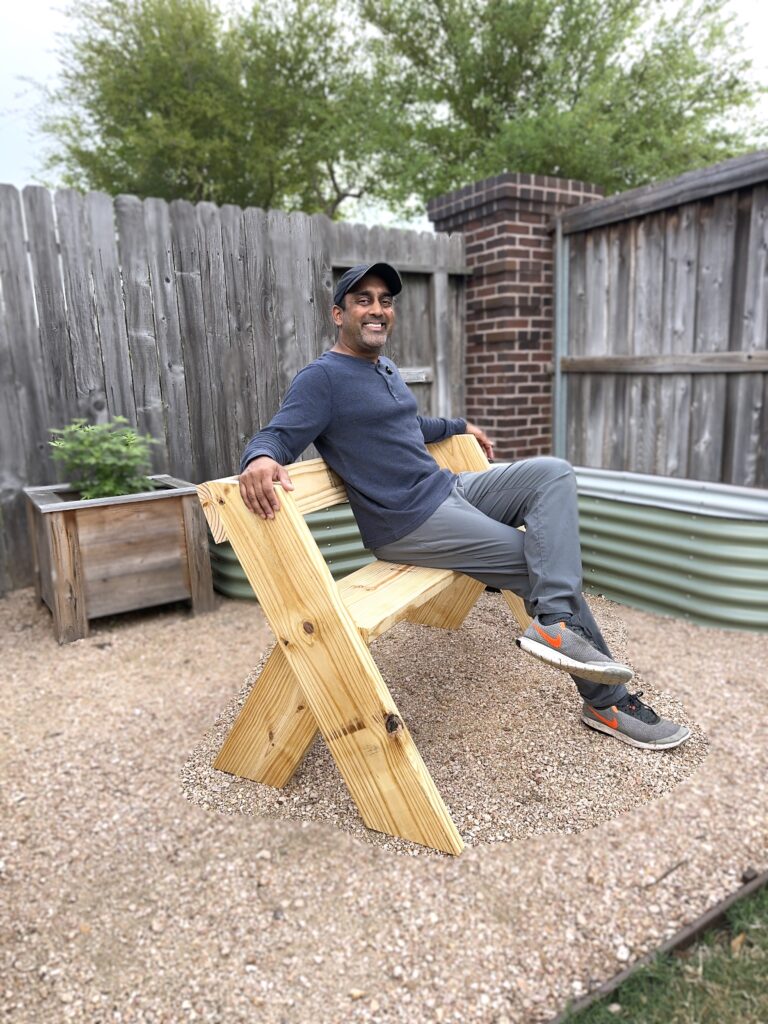
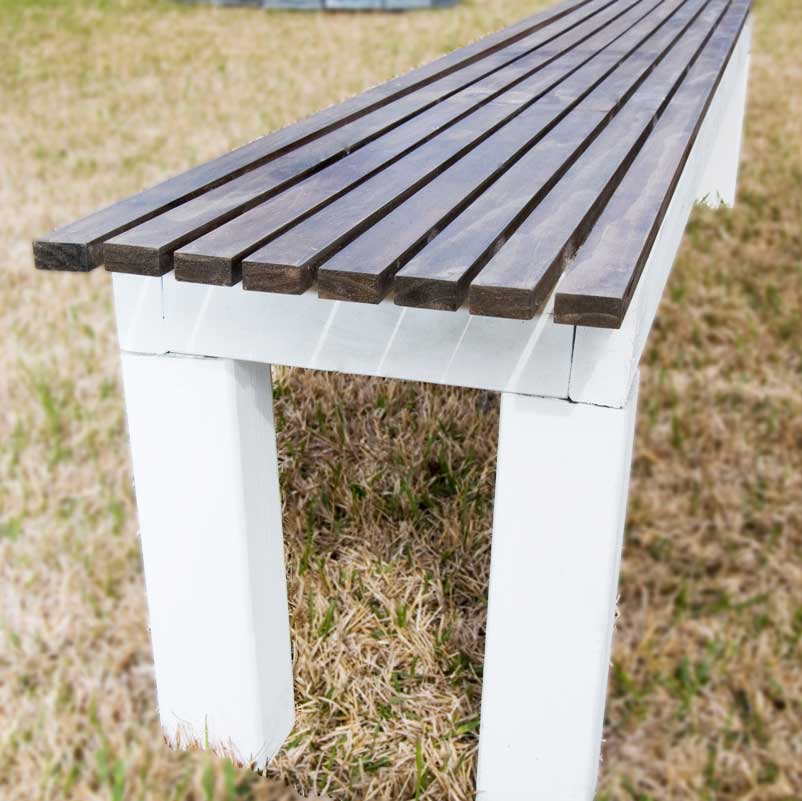
Rock Solid Outdoor Bench
This outdoor bench was one of my first larger woodworking projects and still holds up years later outside on a patio. Built mostly from framing lumber and simple tools, it’s a sturdy weekend project that can be modified to fit almost any space.
Materials
– (3) 2x4x8 studs
– (1) 4x4x8 post
– (8) 1x2x8 pine strips
– 2” #10 exterior screws
– 1-1/2” brad nails or stainless finish nails
– Optional: wood glue
Tools
– Drill
– Miter saw
– Table saw
– Chisel
– Brad nailer
– Optional: Kreg Jig
Steps
- Cut two 2x4s down to 88”.
- Cut three 11” support pieces from the remaining 2×4.
- Cut four 18” legs from the 4×4.
- Trace the 2×4 profile onto the top of each 4×4 leg.
- Use a table saw and chisel to notch the legs so the bench frame nests into them.
- Attach the legs to the long 2×4 rails using screws or pocket holes.
- Connect the frame using the 11” support pieces.
- Sand, stain, or paint the base before attaching the top.
- Attach the 1×2 top slats evenly across the bench using brad nails or screws.
- Fill holes, sand lightly, and finish as desired.
Notes
- Adding a center rear leg helps with long-term support.
- Pocket holes create a cleaner look, but direct screws work fine.
- Check framing lumber carefully for straight boards and fewer knots.
Difficulty: Moderate
Estimated Time: 1 day