Entryway Bench
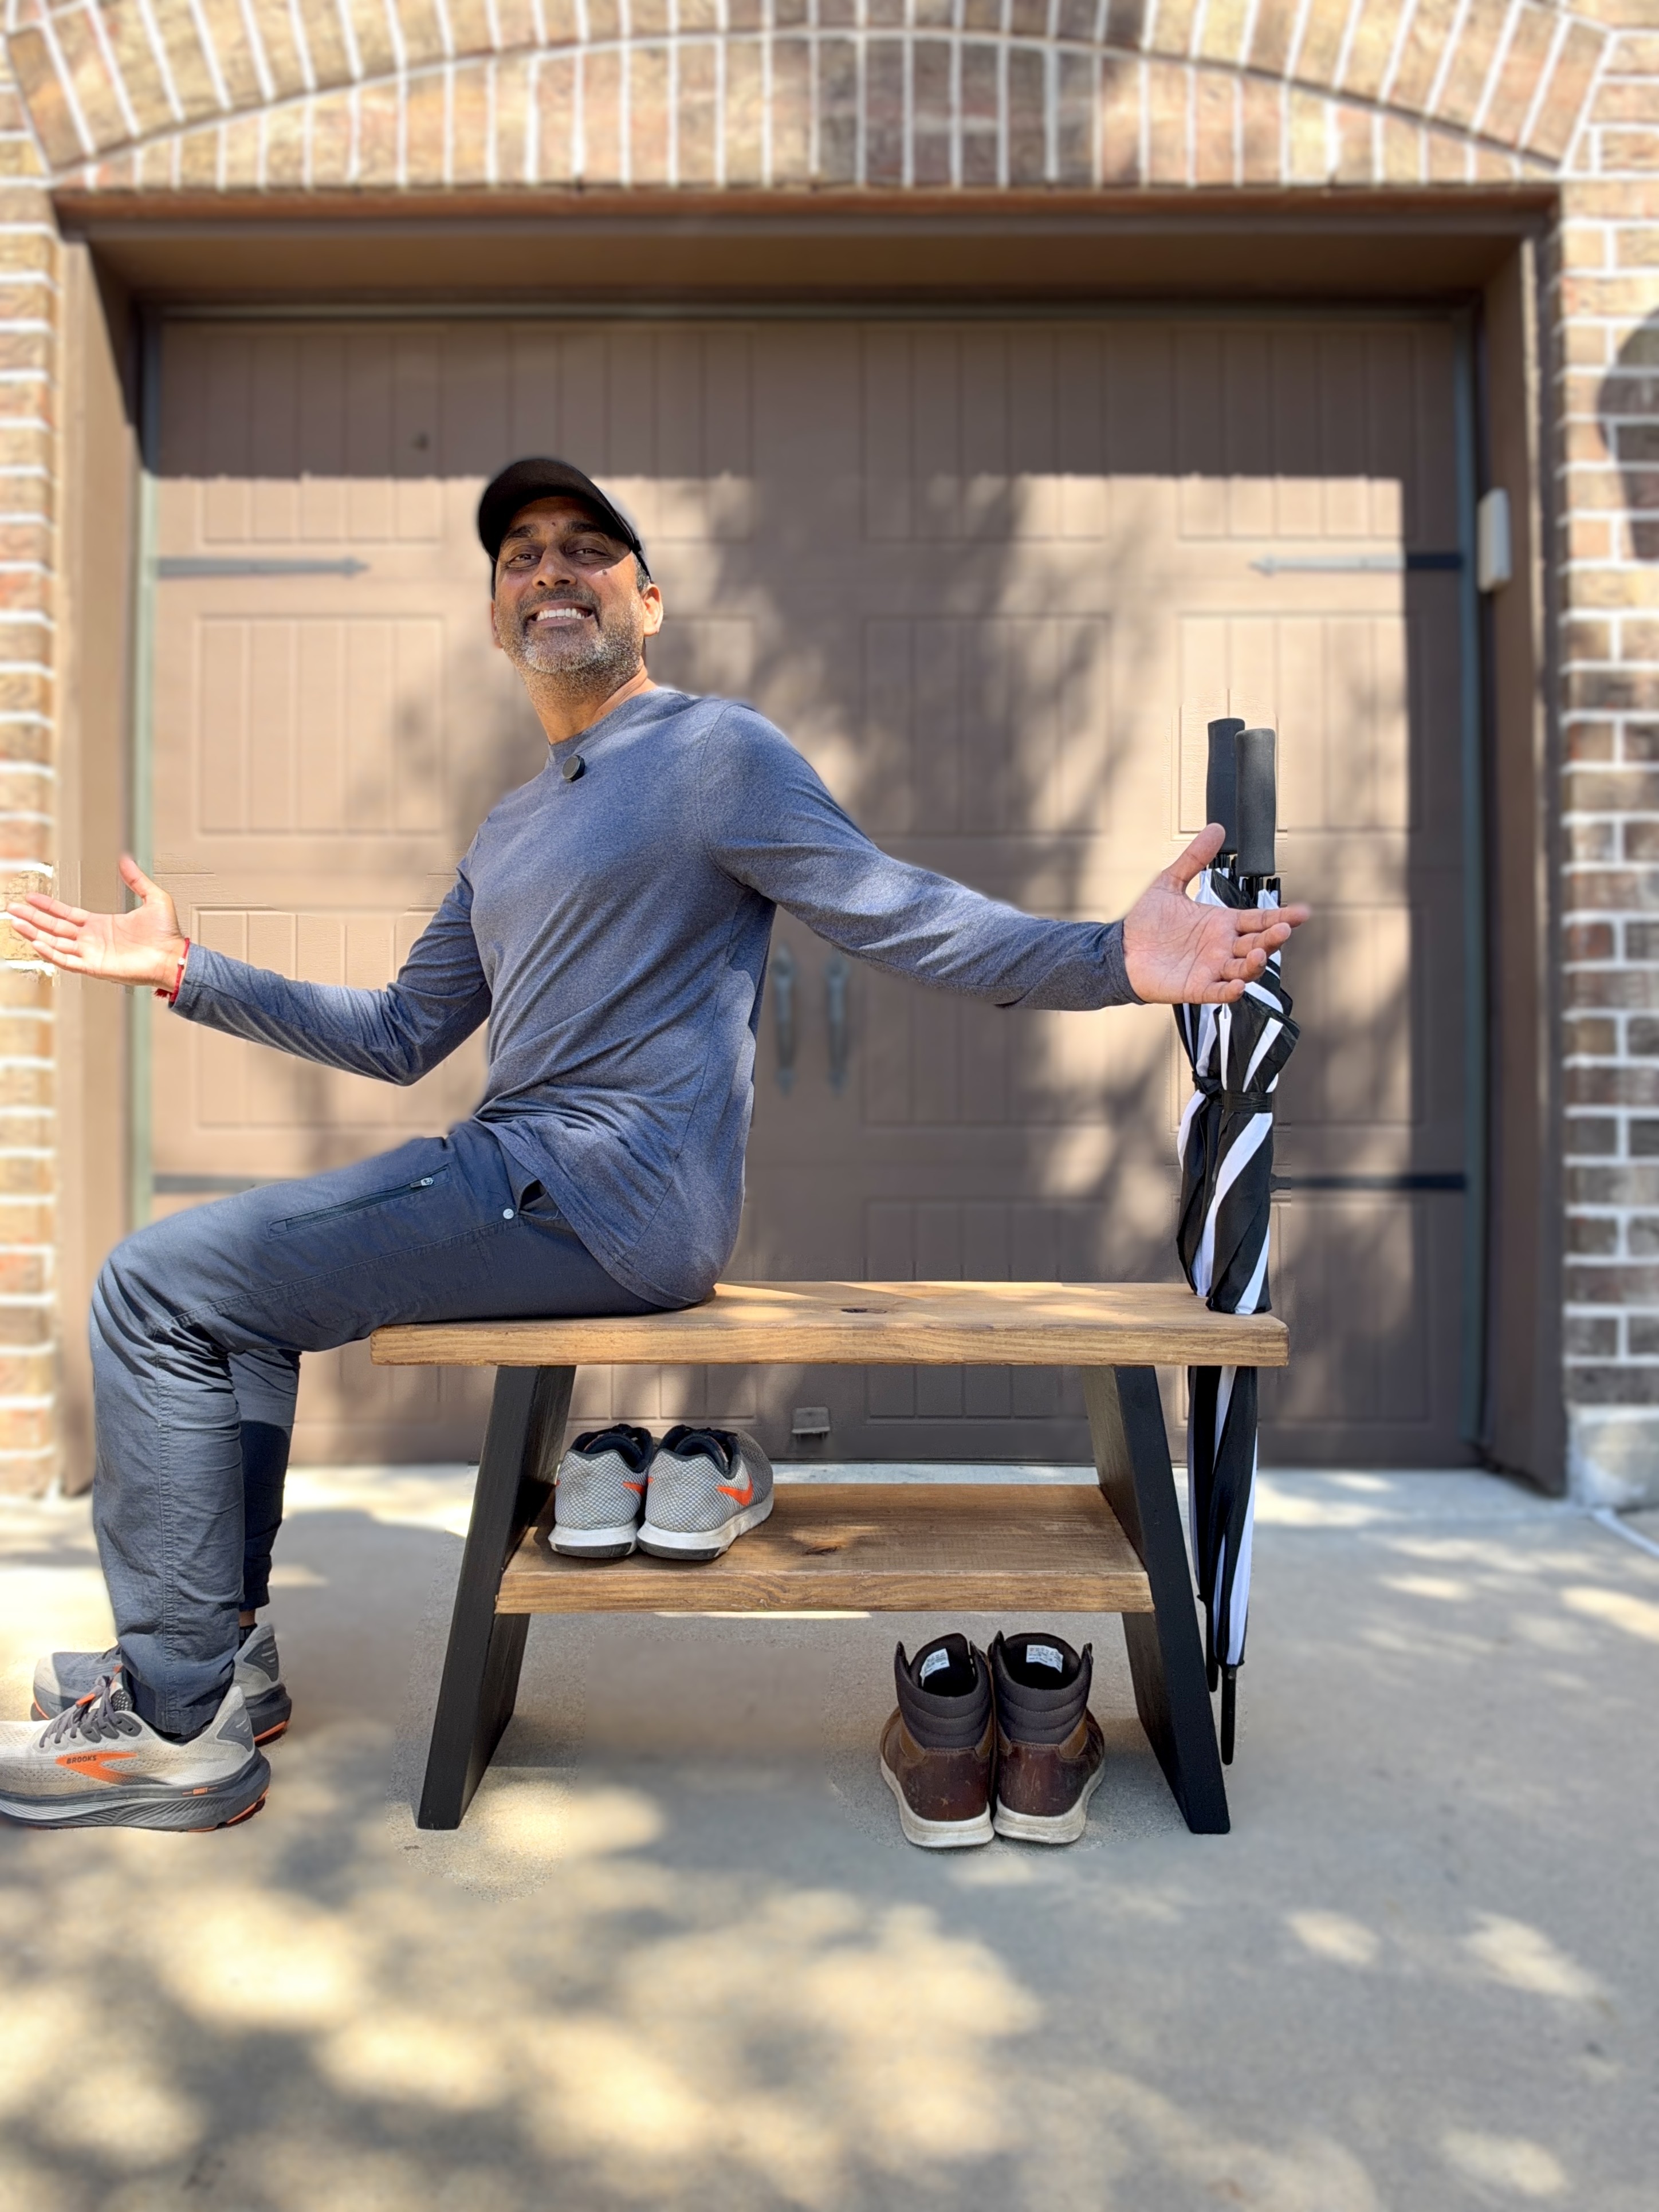
I built this DIY entryway bench from one board and just $17 in lumber to organize the shoes and umbrellas piling up by our front door. It features angled legs, lower shoe storage, built-in umbrella holders, and chalkboard-painted legs for the kids.
Materials
- 1 wood board (2x12x8)
- 3-inch wood screws
- Wooden dowels for covering screw holes
- Antique oak wood stain
- Black chalkboard paint
- Sandpaper
Tools
- Drill/driver
- Miter saw or circular saw
- Measuring tape
- Square
- Pencil
- Forstner Bits
- Sander or sanding block
- Paintbrush or finishing applicator
Steps
- Plan and measure the bench. I used four main pieces: a 33½-inch top, two 17¼-inch legs, and a 23¼-inch center brace. The design creates a compact bench with room underneath for shoes.
- Cut the bench top. Measure and cut the board to 33½ inches long. My board was approximately 11 inches wide, so make sure your saw has enough crosscut capacity. A 10-inch miter saw without a sliding mechanism may not cut across the entire width.
- Cut the angled legs. Cut two pieces to 17¼ inches each. Set your saw’s bevel to 10° and cut both ends of each leg parallel to one another. These angled cuts allow the legs to flare outward when installed.
- Cut the center brace. Cut the remaining brace to 23¼ inches with matching 10° angled cuts. This piece connects the legs and helps create the lower shoe-storage area.
- Attach the legs to the bench top with wood glue and screws. Measure 4½ inches inward from each end of the top to position the legs. One trick that helped me was starting the 3-inch screws through the top before holding the legs in place. This made assembly easier because I wasn’t trying to hold everything together while starting each screw.
- Install the center brace. Position the 23¼-inch brace between the angled legs, aligning the beveled ends with the leg geometry. Secure it in place and check that the bench sits evenly without rocking.
- Plug the screw holes and sand. I used wooden dowels to cover the visible screw holes. Trim the plugs flush, then sand the bench until the surfaces and edges are smooth.
- Add the umbrella holders. This was an idea I came up with during the build. I added two openings in the sides of the bench to create dedicated umbrella storage. Check your umbrella handle sizes and available clearance before laying out the openings.
- Apply the finishes. I stained the top with antique oak stain + polyurethane and painted the legs black with chalkboard paint. The contrast gives the bench a clean look, and the chalkboard legs give my kids somewhere to draw while they’re hanging out by the front door. Follow the finishing products’ instructions for preparation and drying.
- Organize the entryway. Once the finish has fully cured, move the bench into place, use the lower area for shoes, and place umbrellas in the built-in holders. The finished project combines seating and storage without taking up much space.
Notes
- The $17 price was for lumber only. Screws, dowels, paint, stain, tools, and other supplies were not included. Lumber prices vary depending on location and retailer.
- Both ends of each leg receive parallel 10° bevel cuts. The center brace also uses 10° angled cuts. These are not parallel cuts.
- The recorded cut lengths do not specify whether angled pieces were measured along their long edges, short edges, or another reference point. Confirm this before treating the measurements as a complete precision cut plan.
- Always check your saw’s actual crosscut capacity. Blade diameter alone doesn’t determine how wide a board the saw can cut.
- Starting the screws before positioning the legs made assembly noticeably easier. Predrill as necessary.
- The exact screw quantity, pilot-hole layout, and center-brace mounting height may vary.
- I added the umbrella holders before finishing, which saved me from having to drill or cut into freshly painted wood.
- The chalkboard-painted legs were a fun addition for the kids, but a built-in coat rack could be another option for a future variation.
- The bench’s load capacity has not been tested or documented. Check the rigidity of the assembled bench and verify that its construction is suitable for seating before use.
- The lumber cost was low because I used a simple one-board design, but the actual materials cost will depend on what you already have available.
Difficulty: Intermediate
Estimated Time: 3-6 hours