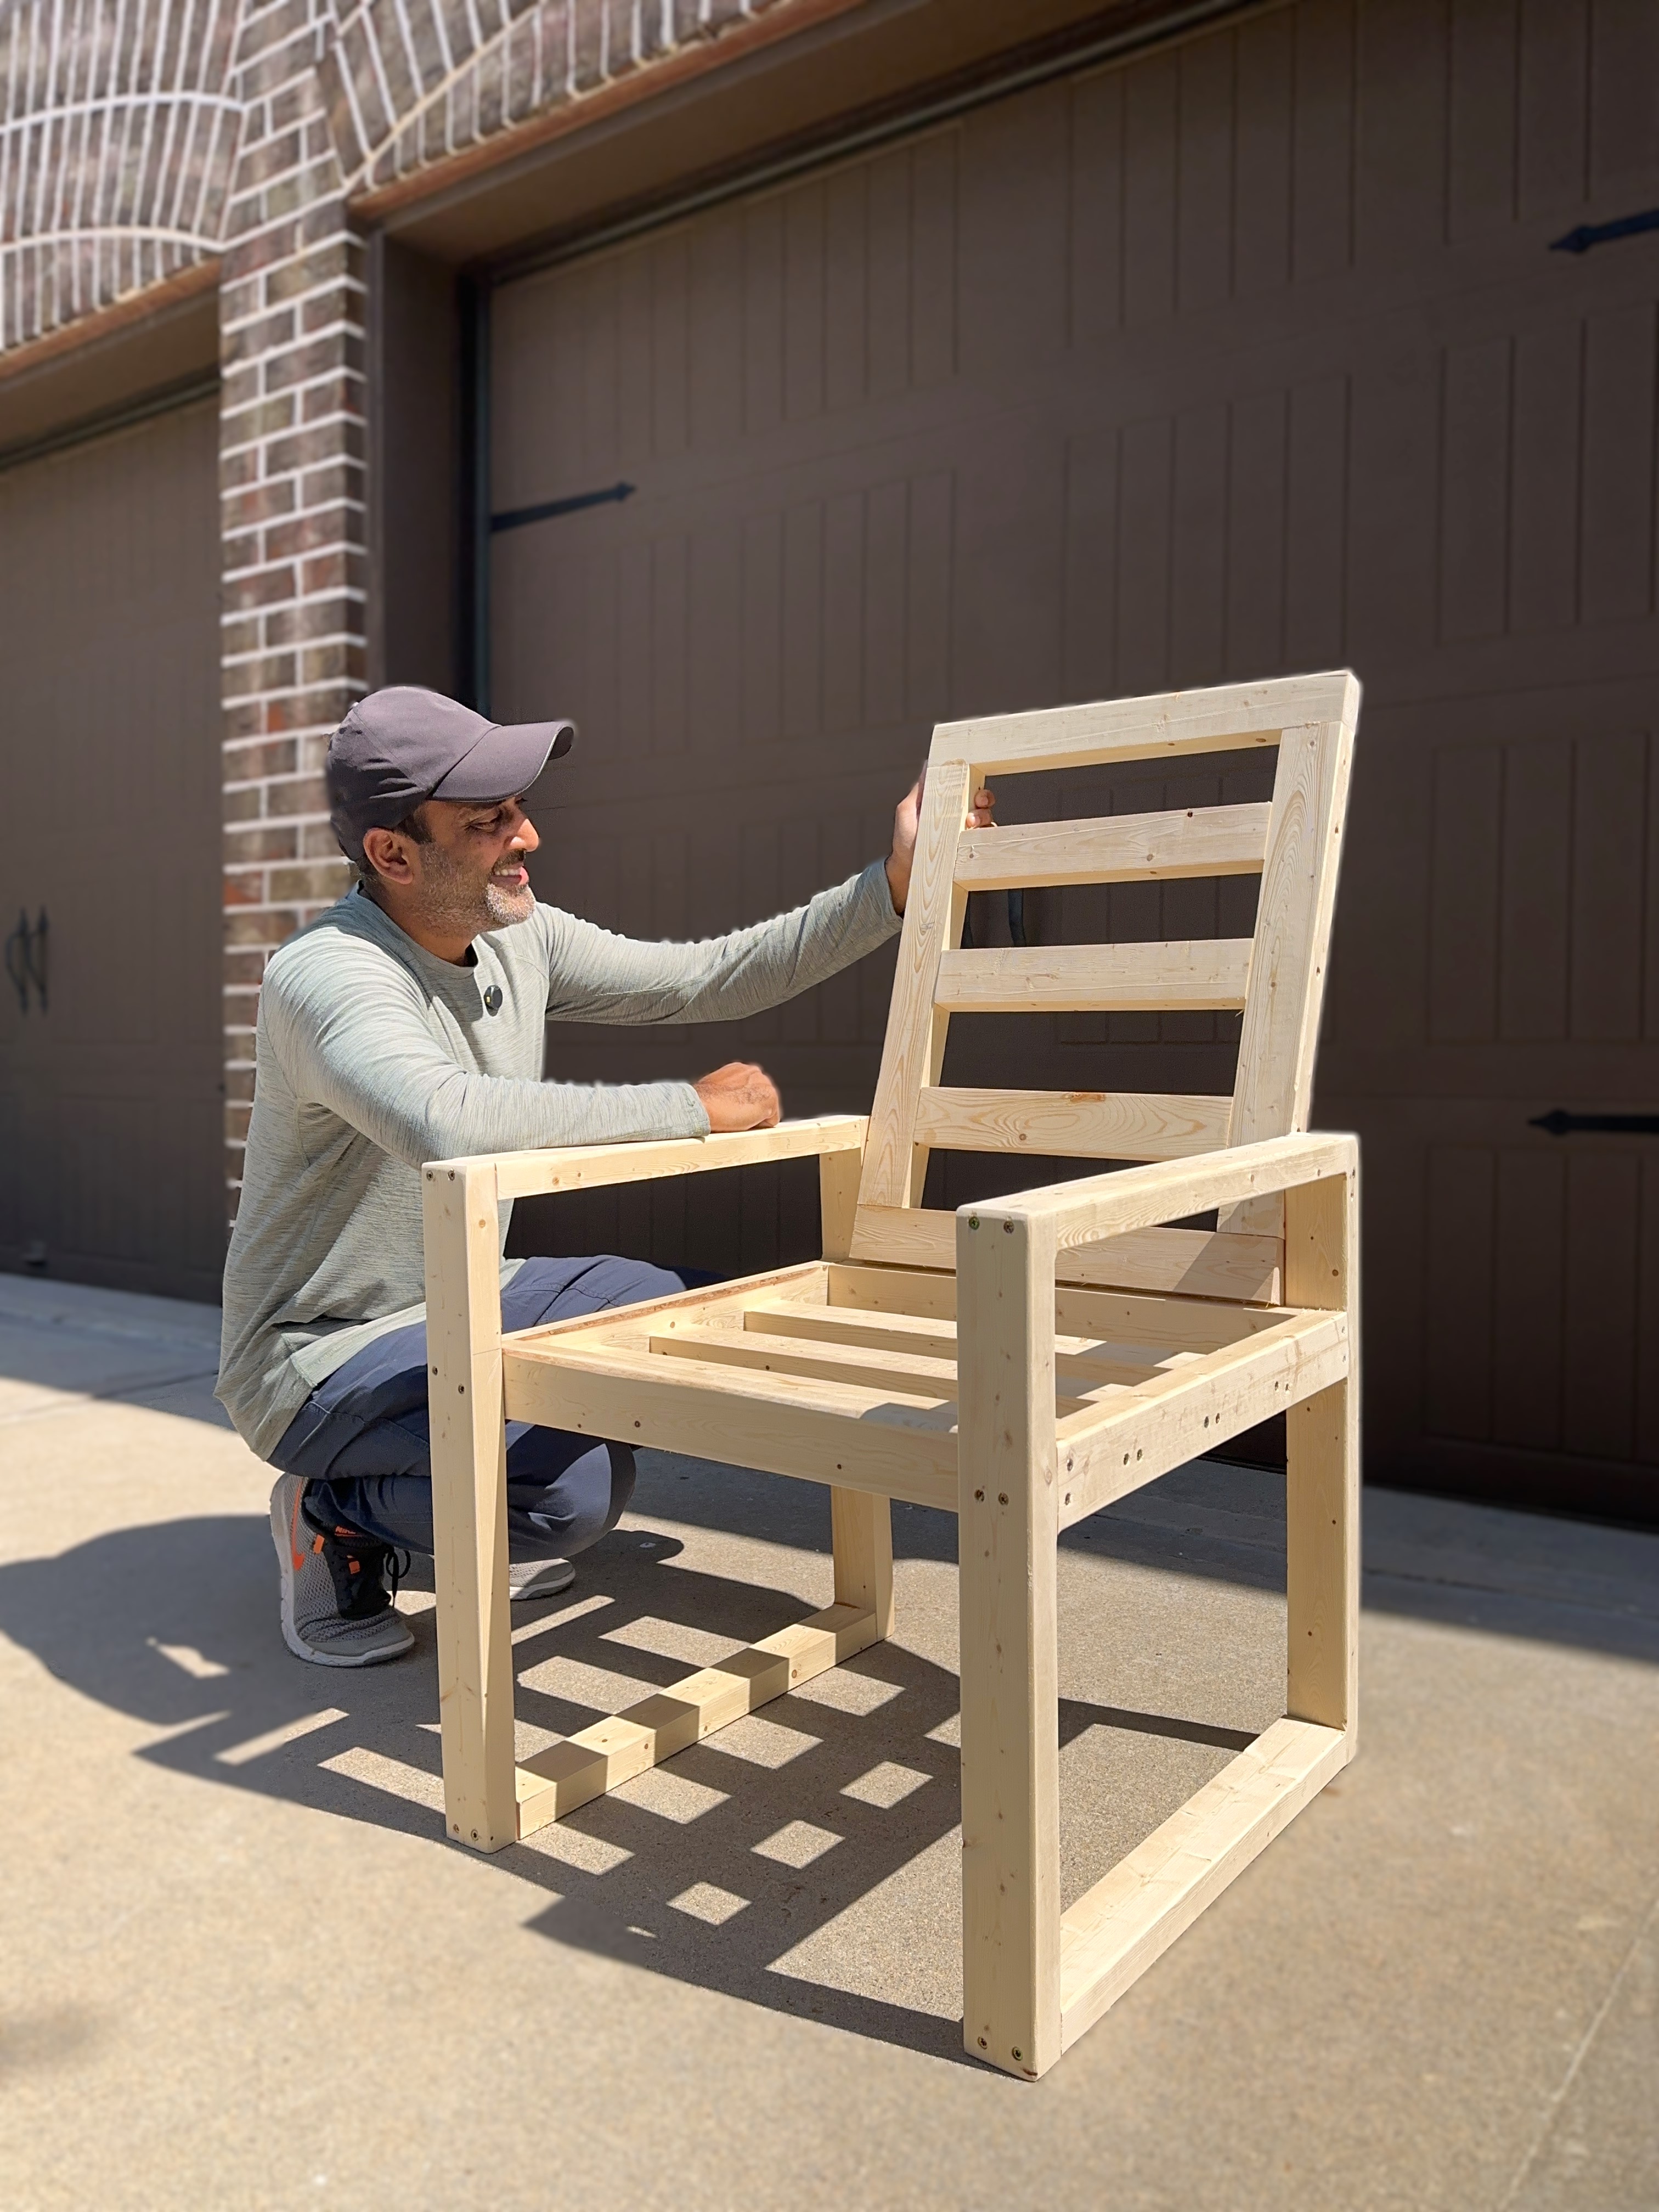
$15 Outdoor Lounge Chair
This simple outdoor lounge chair is built from five 2x3s and a box of exterior screws for around $15. The low-profile design is beginner-friendly, sturdy, and easy to customize with cushions or outdoor stain.
Materials
– 5 standard 2×3 boards
– 3″ exterior wood screws
– Exterior wood glue
– Outdoor cushions (optional)
– Exterior stain or sealer (optional)
Tools
– Miter saw or circular saw
– Drill/driver
– Drill bits for predrilling
– Tape measure
– Speed square
– Clamps (optional)
– Sander or sanding block
Cut List
Chair Leg Frames
- 22″ vertical supports x4
- 20″ horizontal supports x4
Seat Frame
- 20″ seat slats/supports x7
Backrest
- 18″ top and bottom rails x2
- 19″ side stiles x2
- 13 1/2″ middle rails x3
Steps
- Cut all chair parts to length before assembly. Label the pieces to keep the two chair sides identical.
- Build the two chair leg frames first using the 22″ vertical supports and 20″ horizontal supports. Assemble each side frame with 3″ exterior screws and predrill every connection to help prevent splitting.
- Build the seat frame using seven 20″ boards. Space the center rails evenly so the seat stays supportive and comfortable. The middle rails were placed flat.
- Test fit the seat frame between the chair side assemblies. Trim the width slightly if needed so the seat slides into place without forcing it.
- Attach the seat frame between the chair sides using exterior screws through the outer frames into the seat supports.
- Assemble the backrest using the two 18″ rails, two 19″ stiles, and three 13 1/2″ middle rails. Keep the spacing even for a clean look.
- Slide the backrest into place at a slight recline angle. Clamp it temporarily and test the seating position before fastening permanently.
- Screw the backrest securely into the chair side frames using exterior screws. Switch to lag bolts for a durable joint.
- Sand sharp corners and rough edges before applying an exterior finish if desired.
- Add outdoor cushions for extra comfort and to soften the low lounge-style seating position.
Notes
- Predrilling is important when working with 2×3 lumber since the narrower stock can split near the ends.
- Pressure-treated lumber works well outdoors but should dry before staining.
- The low seat height gives this chair more of a relaxed lounge feel than a standard patio chair.
- If your seat frame fits too tightly between the legs, trim small amounts evenly from both sides instead of forcing the fit.
- Exterior wood glue adds strength but is optional for this build.
- You can customize the sizing to your liking.
Difficulty: Easy
Estimated Time: 2-3 hours